Wednesday, November 30, 2011

Prepping the fabric.....and a discovery


I like to use the London shrink method for preparing wool fabric.  It's simple and much less expensive than taking a length of fabric to the dry cleaners.  God knows what they actually do there, if anything, other than waving some steam around.  I used this method way back on the toggle coat so there is more information in the archive.  


It's really quite simple.  You will need an old sheet torn into 30" wide strips.  Soak the strips in a sink of water and then wring as much water as possible out of them.  Lay the damp strips on one half of your wool fabric and then fold the wool over to make a "sandwich".   Fold the fabric up to make a manageable package. 


 I then wrap the whole mess in some plastic sheeting to keep the moisture in.  I let it sit over night.  The moisture in the sheeting will gradually be absorbed by the wool, and in the morning it will all be of a uniform dampness.  Unwrap and allow to air dry.  


Before cutting your pattern the cut edge of the fabric must be squared.  This will insure that you have "grain perfection" and the garment will hang well.   Pull a thread across the width of the fabric.  Wow, look how easily I did this!  That single thread is as strong as steel.  I think my bargain "wool" is mostly NOT wool.  Otherwise the thread would have been breaking constantly.  


I did a burn test, and although it didn't roar into flame, there's a hard plastic melted edge.  Oh well, I'm not going to agonize over it.  I have $30 invested.  It's a great color and has a great hand.  I'll just avoid gas stoves, bonfires and candles.  


I cut my pattern pieces and mark the darts and placement lines with tailor tacks.  I don't bother to tailor tack the buttonhole / button positions because they always fall out way before I get to that point.  I think that's enough work for today.  I'm actually to the point of actually putting this coat together.  Yay!  

Tuesday, November 29, 2011

Completing the welt pocket


Moving right along.  


Now we're working on the inside of the coat.  Take the larger pocket piece and align it with the other piece of pocketing.  While doing this,  smooth the pocketing and the coat fabric flat.  Pin the pocket bags together, but BASTE the the upper pocketing to the coat fabric above the welt opening.  This will hold the pocketing in place for the next step.  I'm a "baste-a-holic" so I would probably baste the entire pocket assembly to the coat front.  


Now from the outside of the coat, edge stitch along the fold where the fabric was slashed and pressed back.  The basting will help hold all this together and keep things flat.  This will secure the pocketing at the opening of the pocket.  


Now stitch around the pocket bags to complete the inside.  


The welts are then pressed back into position and stitched down.  I hope this has been helpful.  I know I'll be more confident when it comes to working on the real coat.  

Fire up the blog! The welt pocket mock-up


It's good to be back.  My mom is doing much better and I've left her in the care of her cairn terrier, Tessa.  I'm back in Maine and back on the pea coat project.  My "sew-alonger" in the UK has probably already finished the damn coat!  Anyway, today I did a mock-up of the welt pocket.  

This is the 3rd Japanese welt pocket that I've done, and I'm glad to report that it's also the easiest.  I just always like to do a "run through" of the pocket so I know where I'm headed.  There's a certain finality to welt pockets.  They either come out well, or they're a disaster that's in your face forever.  I think the practice, and finding where the potential pit falls are, is well worth the time and effort.  

I don't usually go into this much detail, but this is for the benefit of my sew-along pal.  


OK.  Here I've chalk marked the placement line on the coat and the stitching line on the welt, which has been turned and had its opening basted together.  Once the welt is flipped back into position it will hide the end of the dart that extends down from the armpit.  


Align the welt stitching line directly over the placement line and baste the welt to the body of the coat.  I always flip the welt over just to be sure I have it going in the right direction.  Put the wrong welt on the wrong side of the coat and you're doomed. 


The pocket pattern of this coat includes all the seam allowances.  Hooray!  Here I have marked the stitching line on the smaller of the 2 pocket pieces.  Align this mark directly over the stitching line on the welt and baste the pocket piece in place.  Now all of the 3 placement / stitching lines are one over the other.  Stitch along the stitching line on the pocket, being sure to start and stop your stitches right at the edge of the welt.  Take some extra care with this step. 


Now press the seam allowance of the welt and pocket back to get them out of the way.  The coat fabric must now be slashed.  This is the part that I truly hate.  The slash lines are clearly denoted on the pattern.  I approach this step with great caution.  Because the welt is angled the "points" at either end of the slash will NOT be identical.  I flip the welt back and forth to be sure the points will be covered by the welt.  Better to slash too little than too much.  After slashing the opening, press the "flaps" back and push the pocketing to the inside of the coat.  It should look like this from the outside.  


Friday, November 18, 2011

Temporarily on hold

Dear readers, the pea coat project has hit a little bump in the road.  My 87 year old Mom has been battling pneumonia for a week now, and I've been driving back and forth from Maine to NH to help her out as much as possible.  There really isn't any time for welt pockets right now.  I'm sure you'll understand.  

Thanks for all the feedback on the coat length.  Looks like the longer coat wins out.  Things should be back to normal after the Thanksgiving weekend.  

Wednesday, November 9, 2011

Pea coat muslin and a question


Just as a refresher, this is the book that I / we're working from.  It should be pretty easy to find on either Ebay or Etsy.  The photography is really stunning.  So even if you never make any of the coats, the book is a pleasure to own.  BTW I'm showing it placed on the pattern sheet so you'll know what you're getting into! 


OK,  I've finished my muslin for the pea coat.  I have to say that it went together easily after I figured out the crazy dart at the neckline.  As usual, the sleeves are too long, so I've turned them up about 1.5 inches.  My alterations, which were made during the pattern tracing process, added 2" of extra ease through the body.  There's plenty of room.  I've pinned in a pair of shoulder pads which were much needed.  Otherwise, I would have been faced with the dreaded sloped shoulder adjustment.  The pads are easier, plus they give the coat a more tailored appearance.  


I'm pleased with the fit in the back and across the shoulders.  The sleeves were remarkably easy to set on this coat.  For once, there wasn't an enormous amount of easing required.  My "sew-alonger" is concerned that the sleeves are too narrow.  She's sewing for a size 42 guy, I'm a 40.  I suppose it all comes down to the man and how the coat will be worn.  I wouldn't ever wear more than a shirt and sweater under this coat, so the sleeves suit me fine.  Wearing a suit jacket under it would be a totally different story.  In that case I'd want more room.  Then again, look at what Burberry is offering.  The emphasis is clearly on very slim sleeves (along with ridiculously young models).  

My co-sewer is also planning to lengthen the coat by 10".  I say "go for it!"  The beauty of making our own clothes is getting exactly what we want.   I'm actually leaning in the complete opposite direction.  Here I've turned up the bottom hem an additional 2".  I think it makes the coat a little "younger", "fresher", "hipper?"  I'd have to reposition the pockets, but that should be easy.  I don't have many followers, but I'd love to hear your opinions.  Shorter? Longer? Oui? Non? 


Short version front

Short version back.  

Monday, November 7, 2011

The devilish dart!


Warning!   This post will be of limited interest to anyone who isn't trying to make this coat. 


There are 2 darts on the front of this coat.  One runs from the armpit to behind the welt pocket.  Very straightforward.  The other is at the neckline, and has to be the most bizarre construction I've run into yet.  It took a couple of tries, but I finally figured it out.  Here goes.....


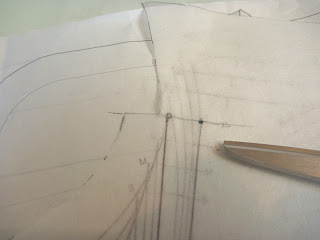
This is the corner of the shoulder seam and neck opening.  The seam allowances have to be added while tracing the pattern.  I'm using 5/8" seam allowances.  Add the allowance along the shoulder seam, turn the corner and add the allowance along the neck opening until you reach the TOP of the dart.  Draw a horizontal line across the top of the dart markings into the area of the neck opening.  Then continue with the 5/8" allowance to complete the neck opening.  

You'll end up with a jog in the neck opening.  


Mark the dart, I've used tailor's tacks, and stitch the dart.  


You will end up with a tuck.  


Now, very carefully clip the top of the dart as close as possible to the top of the stitching.  You will have to make one other very small clip to release the tuck.  Very hard to describe, but you will sense what has to happen.  Trust me.  


Press the dart and the neck edge will magically form one continuous line.  The top of the dart will be just barely inside the seam allowance.  At this stage of the game it would be a good idea to staystitch the neck opening.  Don't worry about the clip because you would be clipping this seam anyway.  

Back to EST.....an extra hour to get caught up with "The Brit"

Readers, yesterday we turned our clocks back to standard time so I took advantage of the extra hour and got started on the pea coat.  My English "sew-alonger" is well along on the muslin.  In fact, she may be on muslin #2.  Yikes!  Time to get moving.  


This is the coat.  A double breasted pea coat with welt pockets.  For those of you contemplating the book, there are 13 coats featured, but they're really just themes and variations on 4 basic patterns.  This one can be dolled up in a variety of ways.  One can add epaulets and buttoned tabs at the cuffs.   There are a variety of pocket options.  There is even one version with gold braid everywhere that strikes me as very Michael Jackson.  I'm going for the basic version.  (I have a MJ inspired coat already!)  


The patterns are traced using my trusty Swedish Tracing Paper.  A wise reader from Africa informed me that once you know what adjustments you need to make on these patterns, you can apply them to every pattern.  This has proven to be true.  I know that I need an extra 1/2" across the shoulder seam that extends down the length of the front and back, so I just make the adjustment during the tracing process.  The sleeves will probably be too long, but I'd rather wait for the muslin to make that adjustment.  


Here are all the pattern pieces.  I'm so glad this process is over.  


Here are my fabrics which I picked up in NYC's garment district a few months ago.  Thanks to my friend Martin for putting up with me during this expedition.  I dragged him from store to store on a hot summer day shopping for wool!  I ended up with a mid weight camel colored wool for $10/yd, and a printed acetate lining for $3/yd.  


The buttons are from Pacific Trimming.  They combine a rough matte texture with smooth and shiny.  Pacific Trimming has a huge selection of buttons at the back of the store, and the woman who always seems to be managing that part of the store is very helpful.  She goes from bin to bin pulling samples, and she always seems to come up with really striking combinations.  We all agreed that this one felt right for a man's coat.  

On to the muslin, which I hope will go together easily.  

Thursday, November 3, 2011

Frock coat finale!

The Victorian Frock Coat with Shawl Collar Brocade Vest


A single breasted frock coat in brown wool herringbone.  Worn over a polyester brocade vest of black, bronze and gold.  Both garments fastened with antique brass buttons.  Pattern by Laughing Moon Mercantile #109.  


A day in the country or a day at the grocery store.  It's all GOOD in a fabulous coat like this! 


Buttoned up with just a hint of the vest showing.  


And here is the back detail with shaped seams, buttons and full length tails. 
 I've been wearing this coat for a couple of days now and totally love it.  It was a challenging project (aren't they all) and I had to alter the pattern quite a bit, but I believe my efforts were all worth it.  I love Fall, and having a coat like this somehow lessens the painful reality that Winter will be here before too long.  

No rest for the weary, however.  I'm launching immediately into the Japanese pea coat, and get this.....  I'll be doing it as a sew-along with one of my blog followers from Gloucestershire, UK!  She's traced the pattern and made the muslin, so I have some catching up to do.  If anyone else has the book and wants to play along don't be shy.  

The frock coat. Down the home stretch


What the hell is going on here, you may ask?  This is the shoulder pad being pad stitched into the chest canvas.  While these stitches look huge, only a small amount of the canvas is caught with each stitch.  It's at this stage that the Cabrera book really starts to get confusing, so in a way I feel that I'm just winging it here.  I believe the goal is to have the shoulder pad anchored only to the chest canvas so that the outer fabric is able to move freely over the pad.  Makes sense to me.  I'm just never sure what to do with the part of the shoulder pad that extends to the back.  There's no canvas, so I just leave it unattached past the shoulder seam.  So far I've never had a shoulder pad fall out.  


Here a sleeve head is sewn into the seam of the armscye at the uppermost cap of the sleeve.  These were purchased at Steinlauf & Stoller.  However, they can be easily made with a couple of wool strips cut on the bias.  The function is to "fill out" the top of the sleeve so that there is a smooth drape.  


This is a felt undercollar that will be handstitched  to the collar.  You can see where I've basted the roll line and I've pressed it into shape over my tailor's ham.  BTW if you don't have a ham I highly recommend getting one.  You'll be surprised how often you reach for it.  

I attached the facings and the upper collar in one continuous seam just as I did on the trench coat.  I call it the "Big Seam" and it's a technique that works for me.  

From here on out it's just a LOT of handstitching.   Fortunately, I really enjoy this part of the process.  


Here are a few sneak peeks.  Antique brass "monkey fist" buttons at the sleeve vents.  


Antique brass buttons at the front and on the tails that match the buttons on the brocade vest.  I've really got to get this project finished.  We had snow over the weekend; a reminder that the season for wearing this coat is limited.  I want a few weeks to enjoy it before it has to be zipped up with some moth balls!