Showing posts with label Bill Blass suit pattern. Show all posts

Thursday, February 15, 2018

Next up -- Wedding #2

Here we go, another wedding! This time, my beautiful and uber talented daughter is marrying. The place -- Oakland, CA. The date -- April Fool's Day (which also turns out to be Easter this year).


My travel arrangements are all made, but my Father of the Bride wardrobe is sorely lacking. My daughter floated the idea of my wearing my whole Scottish kilt garb, but I think it's way too flashy. I think the bride should be the star of the show, not her crazy old man. Call me old fashioned, but I think a dark (dark-ish) suit is called for.
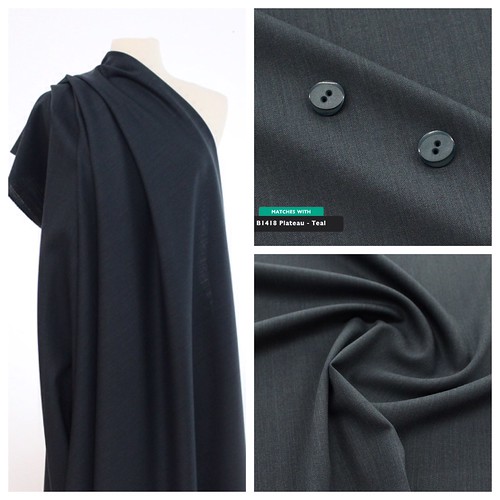


Enter "La Mer" from Sawyer Brook Fabrics, a heathered / striated 100% wool suiting from Italy. Wow! The quality of this fabric completely exceeds my expectations. I ordered it from a swatch and can't be happier. The yardage I received is flawless, and I absolutely love the color -- a dark teal blue. (Unfortunately my cheap point and shoot camera does a horrible job capturing the color). Sawyer Brook offers a swatch service, which I will most likely subscribe to. Their retail store is in central Massachusetts, about a 3 hour drive for me, and I can easily foresee a field trip in my future.


I prepped the fabric using the London Shrink method. I've done this many times, and it's a safe and reliable way to preshrink wool fabrics. Cotton sheeting is soaked in water and then well wrung out. It's sandwiched into the fold of the material.


Once everything is sandwiched, the fabric can be folded up and wrapped in plastic to set overnight. The moisture from the sheeting is absorbed into the wool to create a uniform dampness. The yardage is then air dried and ironed. This suiting required almost no ironing once it dried. There are benefits to working with high quality fabrics!
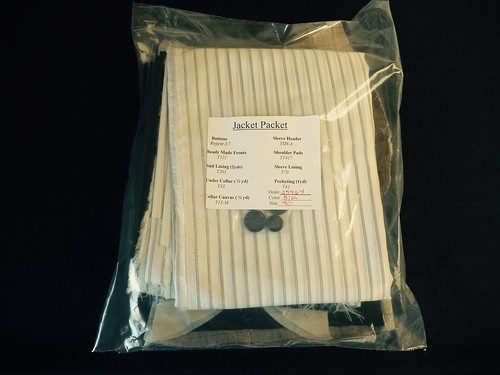


I have no access to menswear tailoring supplies here in Maine. Maybe you have the same issue? Fear not, B. Black and Sons to the rescue. They offer a "Jacket Packet" which contains everything you'll need. A pair of premade haircanvas jacket fronts, more than enough lining material (I think you could actually screw up a piece and have enough to recut another!). Sleeve lining, a huge piece of pocketing, collar felt, a strip of French canvas for the collar, shoulder pads and sleeve heads. (The buttons aren't so hot). This packet is my "go to" when a trip to NYC is out of the question.
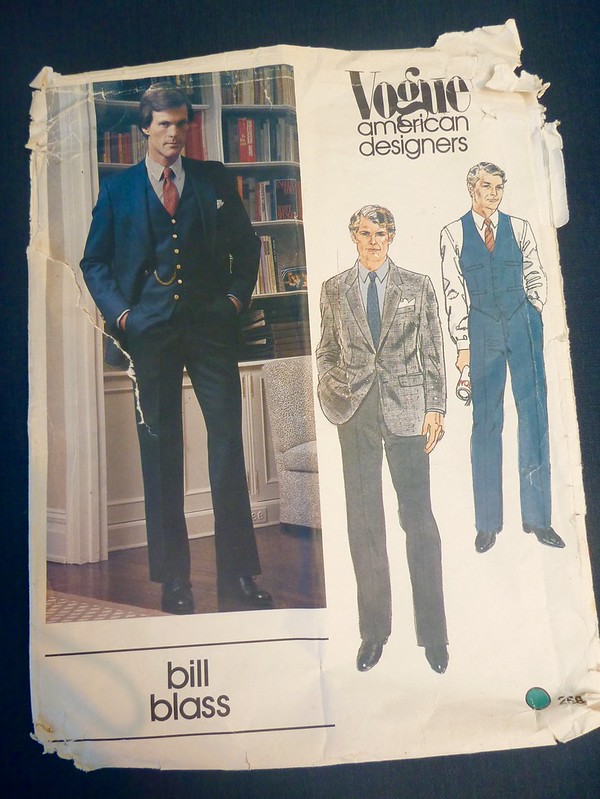


I'll be using my old standby, this very beat up Bill Blass suit pattern from the early 80's. This is just a nice all around jacket pattern. No crazy lapels, typical menswear pockets, vented sleeves and double back vents. I've only made the trousers once, but they're also straight forward, classic.
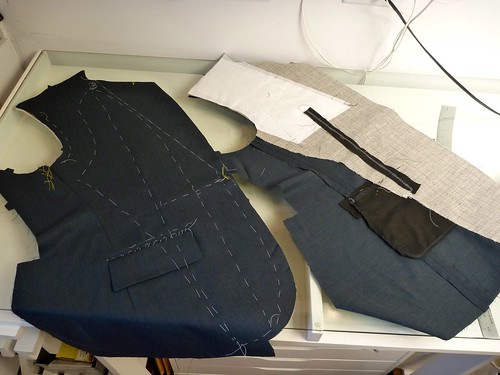


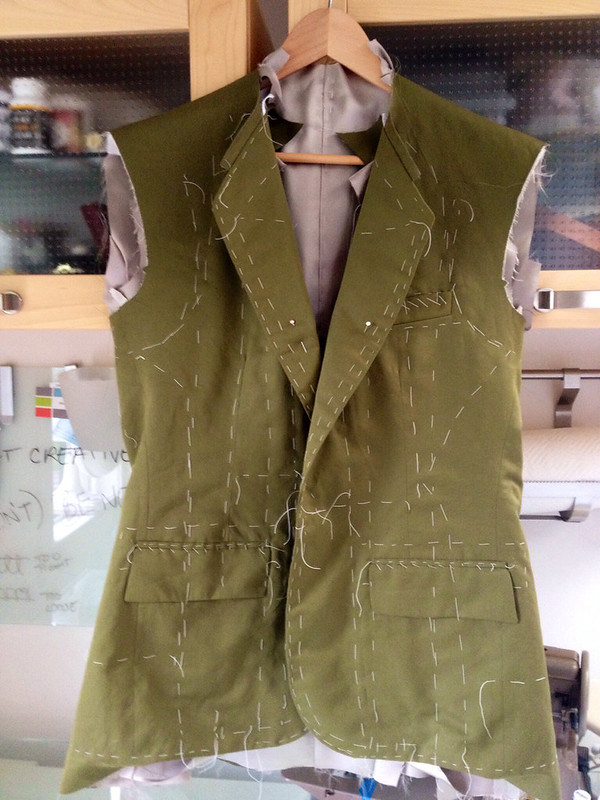
I won't go into great detail. The jacket fronts are by far the most work. I use Roberto Cabrera's book on menswear tailoring as my guide. None of it is particularly hard, it just pays to be as accurate as possible, both in measuring as well as sewing. If I'm tired or "just not feeling it" I put everything aside. Things go so much better when I'm fresh, which is usually the next morning.


Another huge benefit is having the right thread to work with. Real cotton basting thread and a spool of silk thread that matches the fabric makes the work go so much faster, and with less aggravation. So much of tailoring is about control. All the basting is about taking control of the fabric and making it conform to the body.
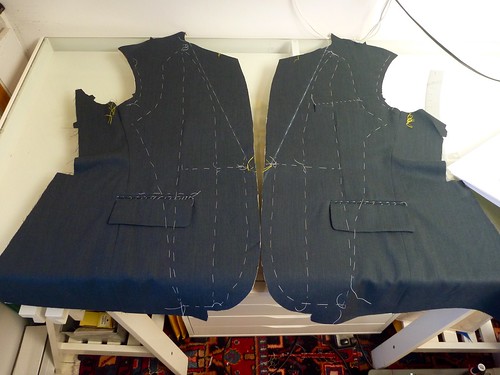


Here are the completed fronts. From here I like to move to the sleeves. They're made fully lined, and there's a fair amount of fussy work around the vents. I HATE working with polyester lining material, so the sooner this part is over the better!


So far, so good. Be well, and enjoy your current sewing projects!


Sunday, September 7, 2014

The Completed Wedding Suit

The wedding took place on Martha's Vineyard last weekend. To say it was a fabulous time would be a huge understatement. Not only was it the most extravagant wedding I've ever attended, it was a chance to spend time with my far-flung children. They were truly the "icing on the cake" of the whole affair, and a reminder that being their dad is the best thing in the whole wide world.


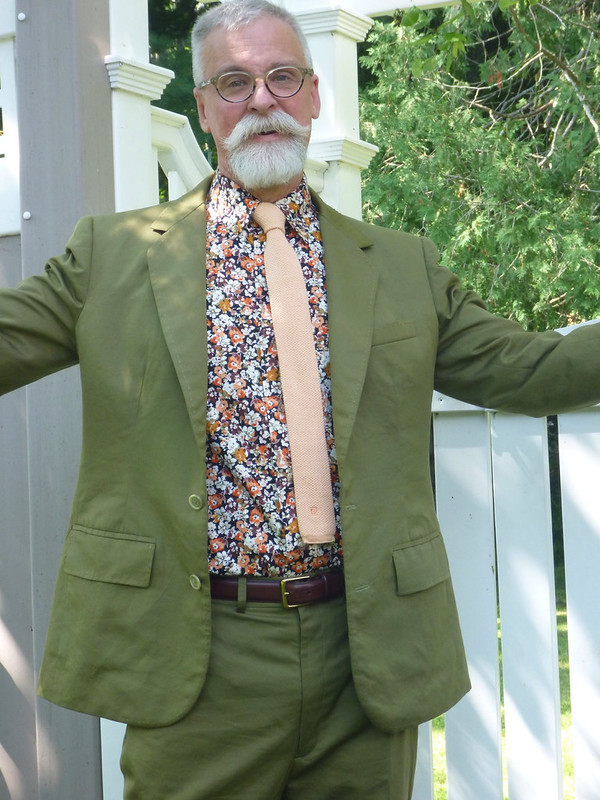
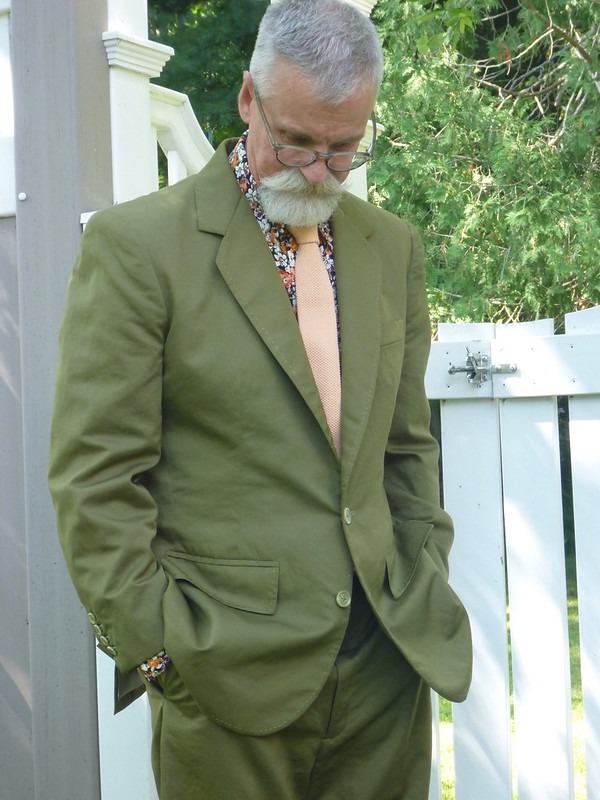
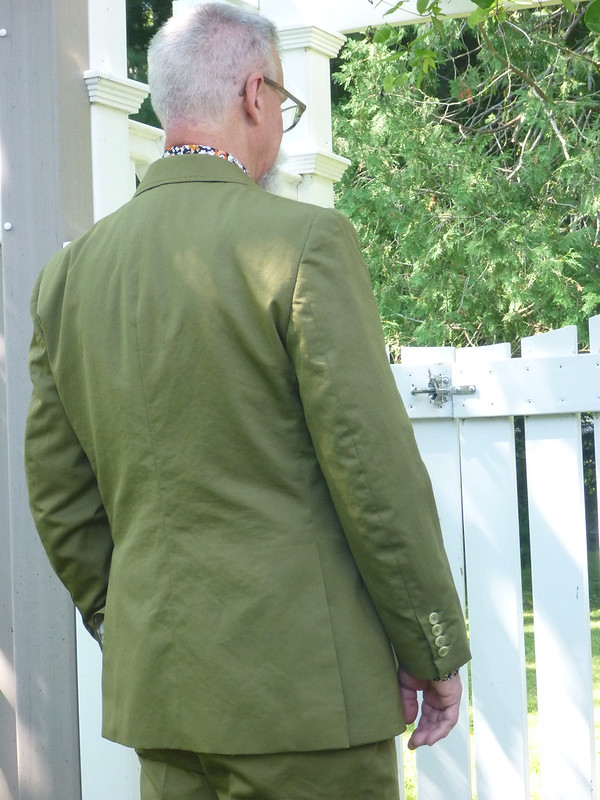
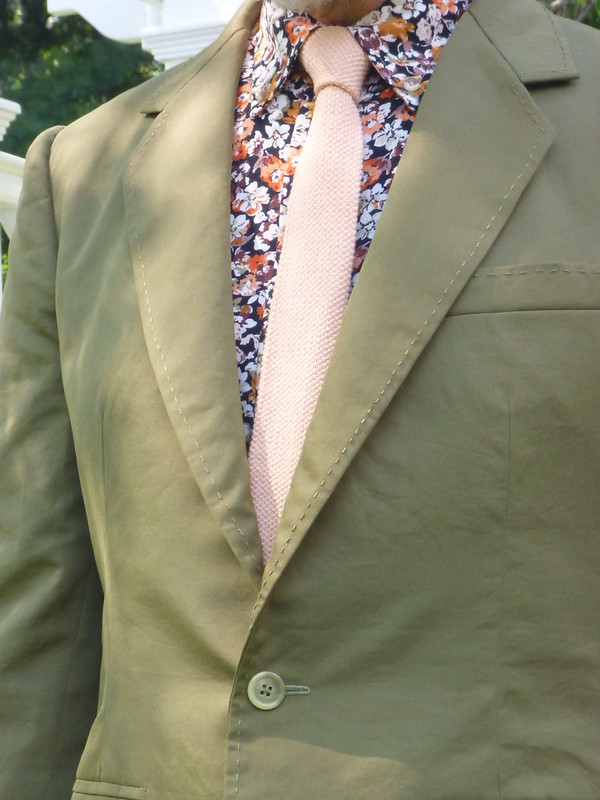
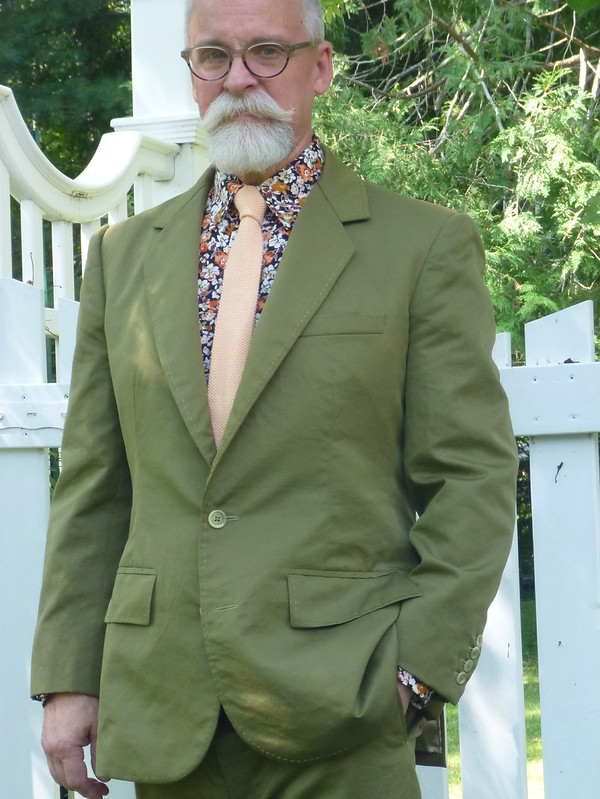
So here's how it all turned out ... Suit and shirt fabrics from Elliot Berman Textiles. Neck tie - vintage cotton knit Pierre Cardin, found on Etsy.


I added a pick stitch detail to the lapels, chest pocket and pocket flaps. I love this kind of customized detail. It really makes it MY suit. End result ... A slightly rumpled, yet classic, summer suit. I felt like a million bucks wearing it!


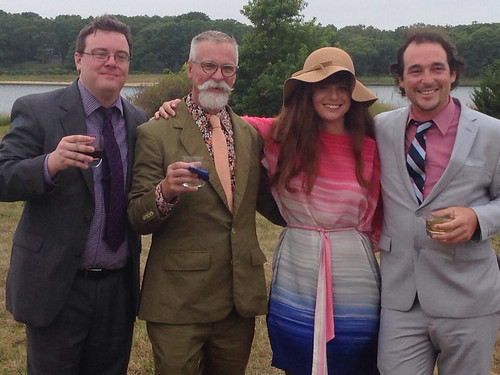
At the reception with my son and daughter. (She made her silk kimono dress BTW)


And we can't leave out Evan, the stylish Westcoast boyfriend!


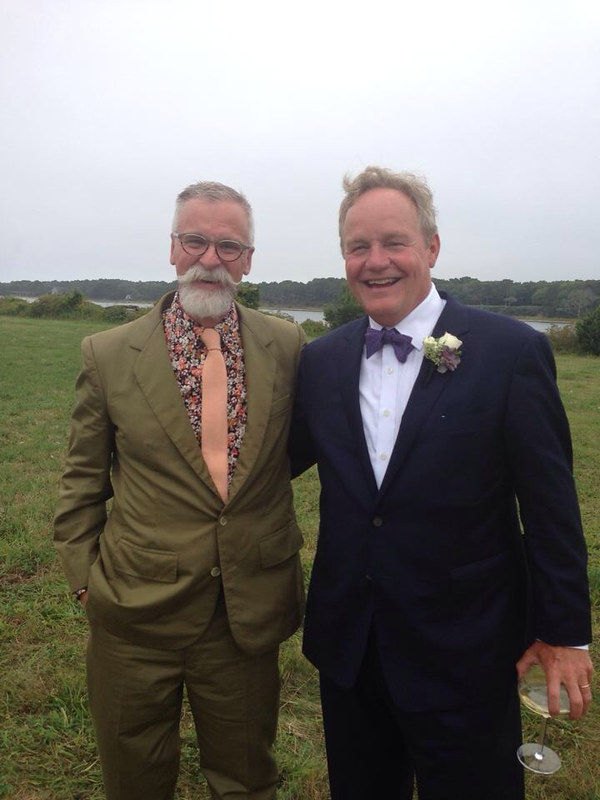
And lastly, here I am with my Brother in law, father of the groom. (AKA nicest guy in the whole world).


So ends another project. Thanks to all of you who offered words of encouragement as I navigated the world of tailoring. It's been a journey! The suit is headed off to the cleaners, and I need to plot my next sewing project. Something for fall, my favorite season. Cheers!


Monday, August 4, 2014

Pants progress -- Pockets

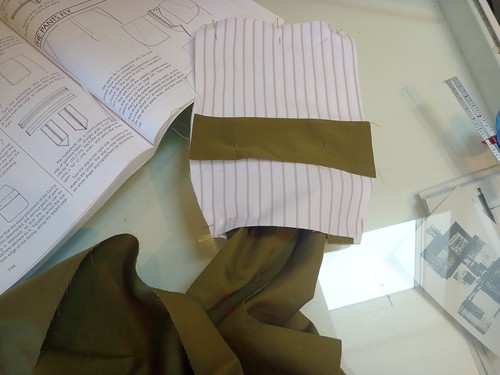
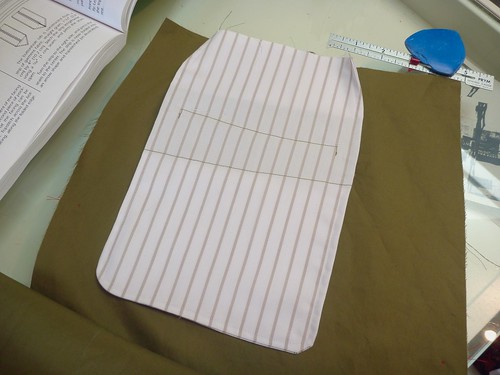
I've launched into the pants. My plan is follow the pattern directions for the front slant pockets, but I'll defer to Cabrera for the back welt pockets. Why you might ask? Firstly, his directions are crystal clear and there's a line drawing for each and every step. Secondly, I can totally ignore all the fiddly little pattern pieces. The pockets are just constructed of simple rectangles which are easy to chalk out and cut. I love it when things are made simpler.

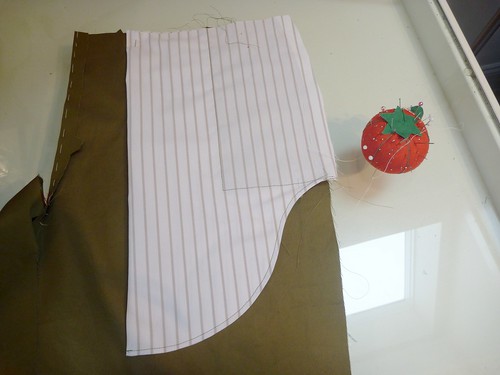
Having made a pair of Thread Theory's Jedediah pants prepared me to make the front slant pockets. The construction here was exactly the same. The pocket facings are attached to either end of the pocketing. Then it all gets folded in half and stitched to create a French seam. The result is a pocket that's beautifully finished on the inside. No raveling seams, no serging required. The pockets on this pattern have a lovely curve to them.

Here is the pocket from the right side. A nice feature of this pattern is that the pocketing extends out beyond the side seam allowance. This extra fabric eventually gets folded and stitched over the side seam, which makes the finish on the inside very neat and tidy. I will try adding this feature to my next pair of Jeds.

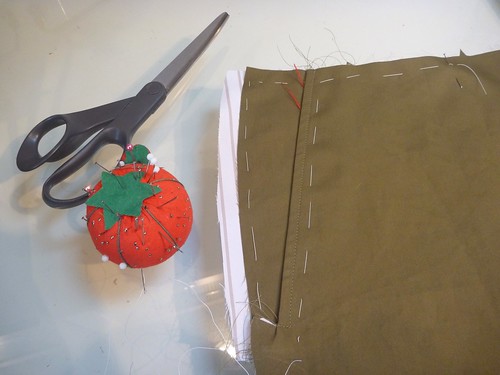
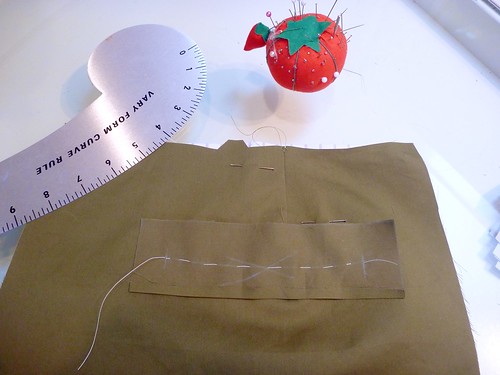
The back double welt pockets are new territory for me, so I let my buddy Roberto Cabrera take me by the hand and guide me step by step. This strip of fabric will become the welts. It's basted in a slight curve over the pocket placement line. The curve is intended to keep the pocket from gaping open. I won't bother to show all the steps here, just know that it's all extremely straight forward and not difficult at all.


There are a few unusual sewing shenanigans; like where the entire pair of pants has to be pulled through the pocket in order to sew it up. Crazy.


But again, the result is a nicely finished French seamed pocket.


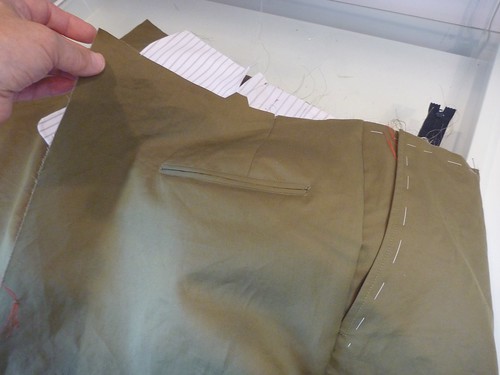
So here are my pockets from the outside. Unfortunately, I don't have any extra buttons that match the jacket. Otherwise, I would have added a button loop closure to the back pockets. Next time, right?

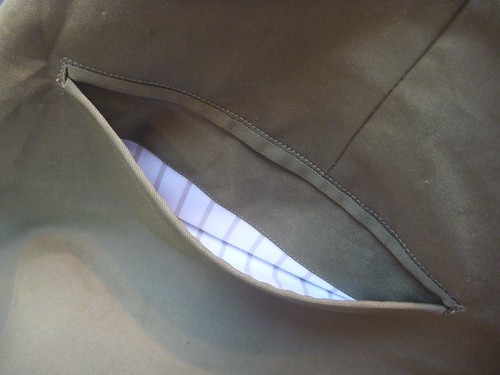
A peek into the back pocket, which ends up perfectly finished inside almost by magic.


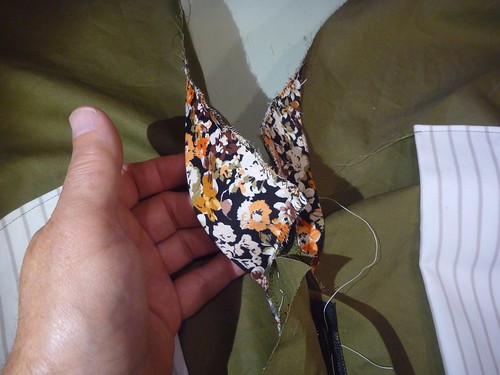
Here I've added a crotch shield of my floral shirting fabric. It's a square of fabric, folded on the diagonal and then pressed into a curve. It's zig zagged onto the pant's front crotch before sewing up the inseam. I'm also planning on using my left over shirting to construct the waistband "curtain". I love adding little unexpected touches to my clothes when I can.
Now it's on to the waistband and belt loops, which I'll make according to Cabrera. I figure it will take the better part of a day. More later.

Oh, and the boat is half planked up.

Thursday, July 31, 2014

Wedding Suit -- The pant muslin

All that remains on the jacket are the finishing details, things like sewing on buttons and adding some pick stitched details. These are all little projects that can be done in little snippets of time. If I have a few minutes I can sew on a button or two. But my deadline is looming, so it's time to move ahead on the pants.


I've only made one other pair of pants, so my knowledge of them is pretty shaky. I know that they can be difficult to fit (I struggled a bit with my Jeds), but I've decided going into this project that I'm not going to agonize over them. I don't have either the time or the desire to work through muslin after muslin, looking for that elusive "perfect fit". I'll be more than happy if they fit around my waist and aren't too saggy in the butt.

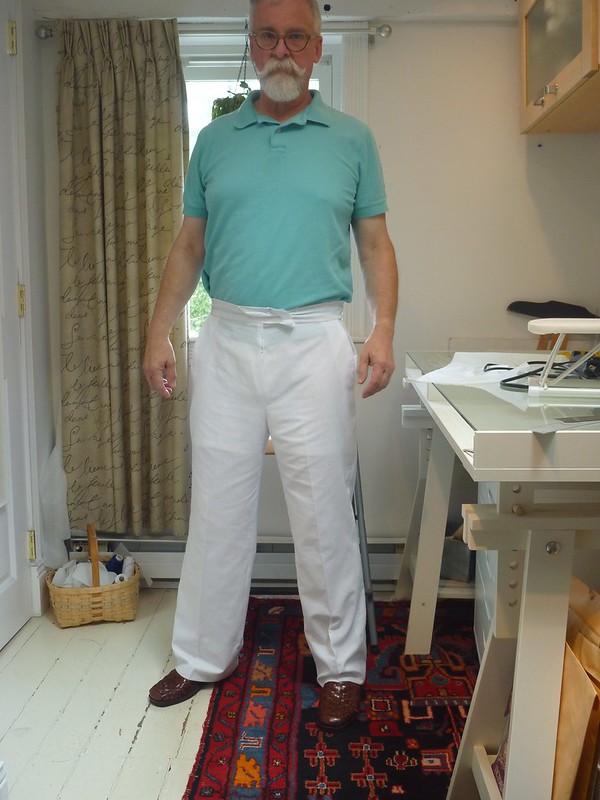
So, I made a very quick and dirty muslin out of a flimsy Goodwill sheet. It's about as minimal as I could make it. No zipper, no pockets. Just the basic shape sewn onto a waistband of sorts. So here's what I learned about these Bill Blass pants right off the bat. They are very straight legged.


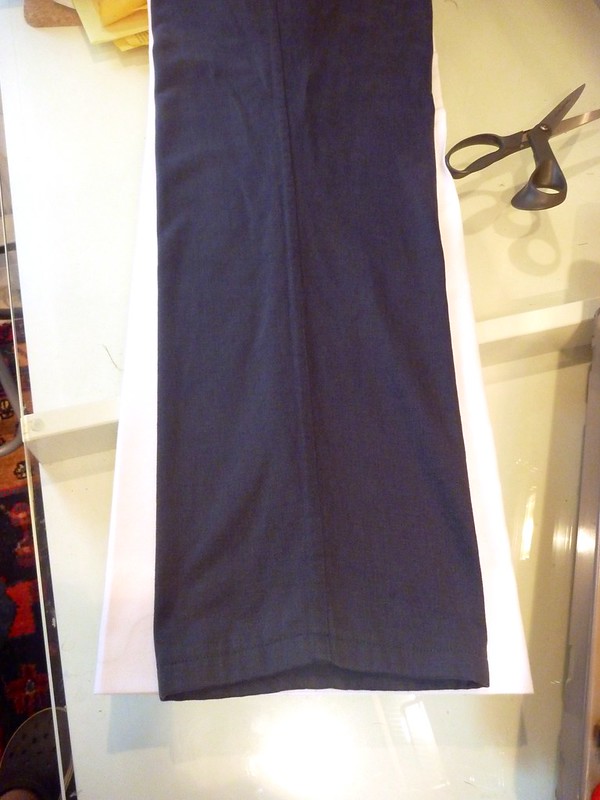
Here I've laid a Jeds leg on top of the white Blass muslin. The Bill Blass pant leg is at least 4" bigger. Palazzo pants? The Jed pant leg is a little too slim for a suit IMO, especially for a guy my age. So I've decided to split the difference and remove 2" of width from the leg.

I also need another inch in the waist to accommodate my little gut. This was actually an easy fix.


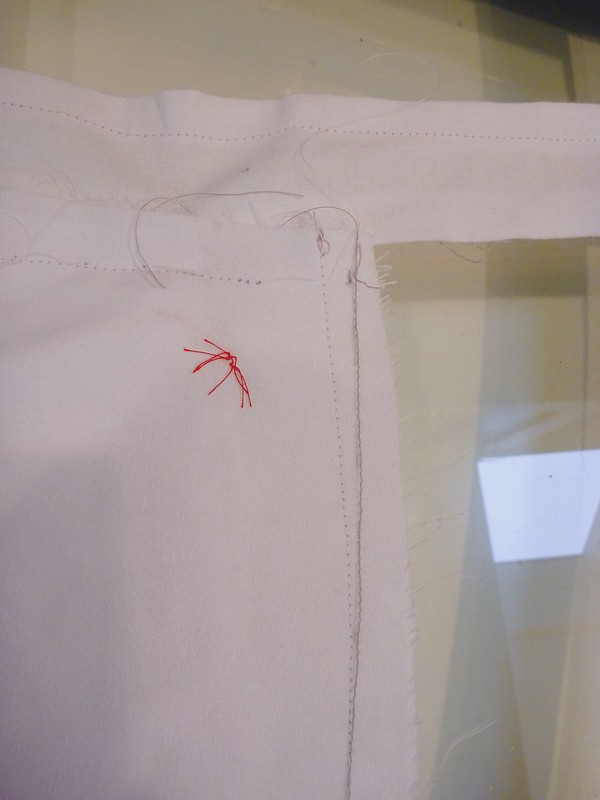
Here's where the side seam is hitting the waistband. I added a 1/4" to the seam (sewn in the darker thread), which will give me an extra inch of waist circumference. This adjustment also straightens the hip area, which I'm learning is usually too full on most patterns. I'm just not that curvy in the hip.


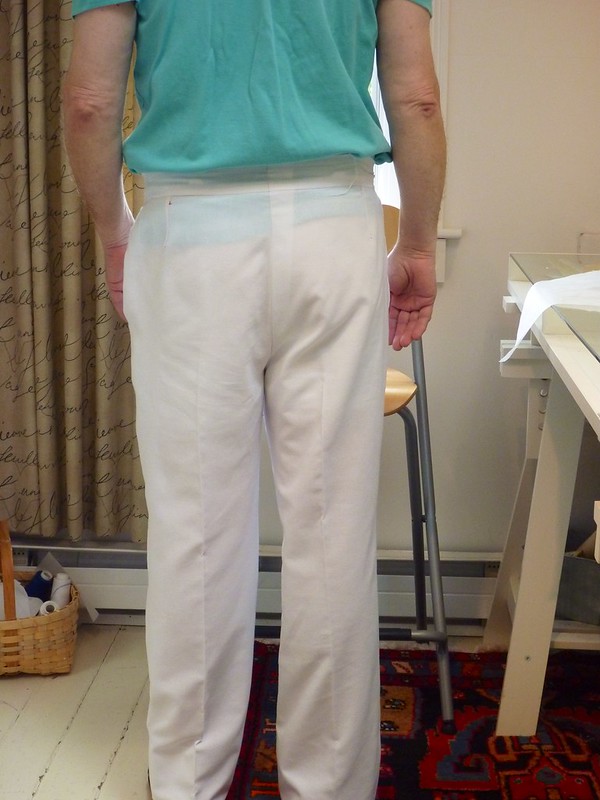
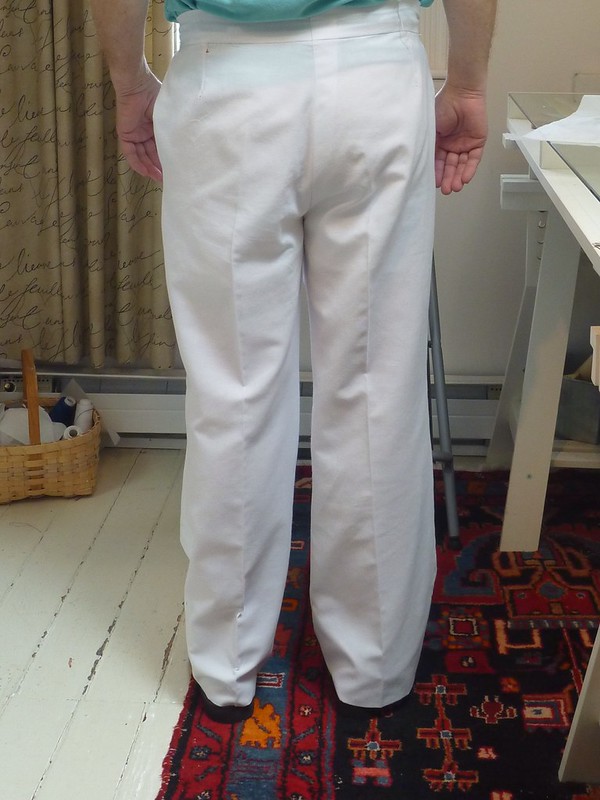
The left leg has been tapered, removing 2" of width at the hem. Look how that change has improved the fit at the bottom of the buttocks! I never anticipated this. Fitting Score!


Here the extra fabric in the right pant leg is more evident. It makes the pant visually bottom heavy. Of course,the pattern appears to have been drafted for a 6' 4" man. I've shortened the inseam by 6" and they're still too long!


Are they the perfect fitting pair of pants? Hell no! Will they work? Yes! Time to cut out these bad boys and delve into the mysteries of sewing trousers. Zippers, flys, crotch shields, Oh My! So much new sewing territory.

Thursday, July 3, 2014

Tailoring Progress

I'm making steady progress on the wedding suit.

It's been awhile since I've done any tailoring, so the amount of basting and handsewing has been a little overwhelming at times. I'm using the Roberto Cabrera book on tailoring which is usually helpful, but tonight he has me totally baffled about constructing the collar. It's almost more confusing than putting in a zipper fly! So I'm just going to walk away for the night and pick it up in the morning when I'm fresh. I do that a lot, hence I'm one of the slowest sewers out there.

The sleeves are essentially done, they just need buttonholes on the vents. I do like Cabrera's method of making and lining the sleeves. You do have to make a muslin first because the length will be set when all is said and done.


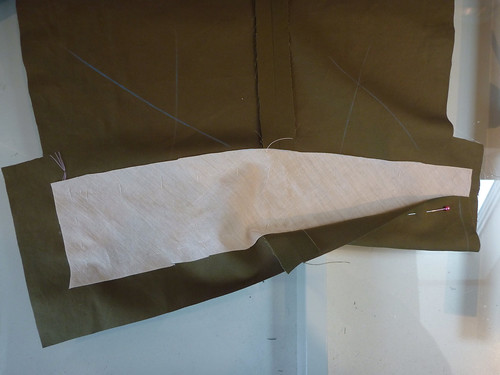
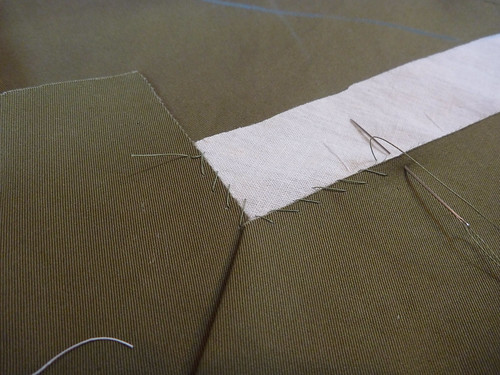
A wide piece of bias muslin is basted into the cuff along the hemline and fold lines of the vent.


The hem is pressed up and attached to the muslin. This way there will be no stitches visible on the outside of the cuff. The sleeve and lining are then sewn up as usual.


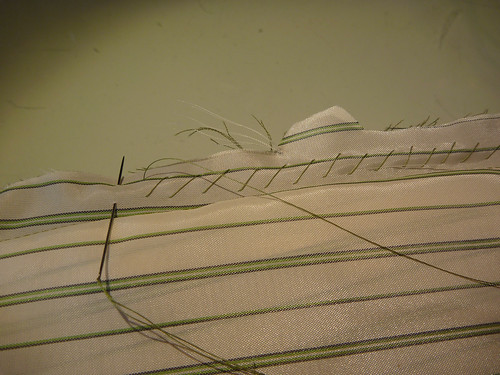
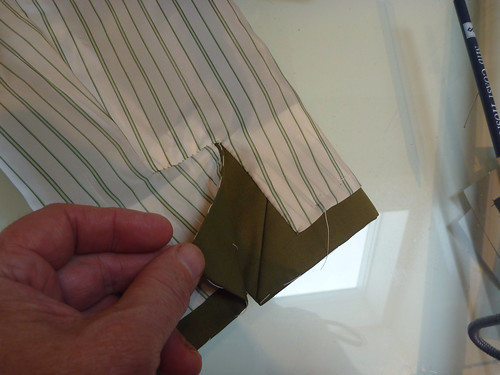
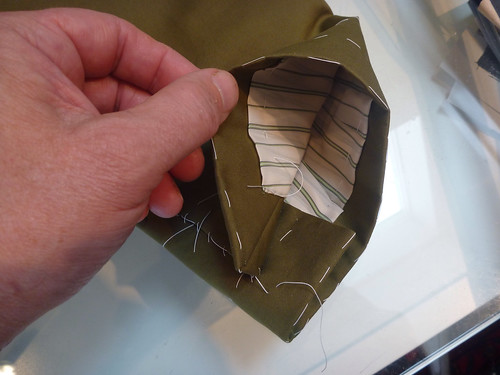
Both the sleeve and the lining will be wrong side out. They're stacked up and the corresponding seam allowances are quickly stitched together with a diagonal stitch. Nothing fancy here. Then the fun happens. Reach down through the lining and pull the sleeve up through it. Voila! A perfectly lined sleeve (inside out) ready to have the lining finished at the vent.


Here's the finished vent. You just have to fiddle with it until it works. Once it makes sense and comes together, I press it into position, baste to hold things together and then slipstitch with silk thread.


The sleeves are done for now and set aside.

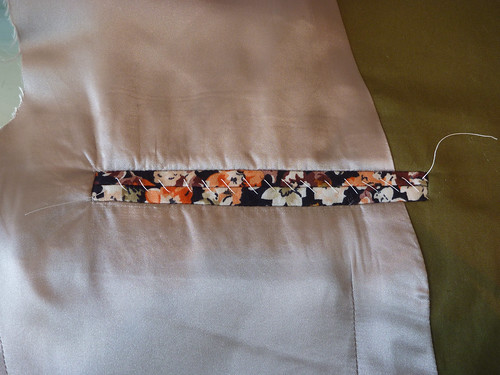
Next I've worked on the lining and added an inside left chest pocket.


I used some of my left over shirting fabric for the welts. A fanciful touch. This is the same pocket construction as the outside pockets, just a bit smaller. I'm not bothering to make a right inside pocket because I would never use it, not to mention the time required to make it.


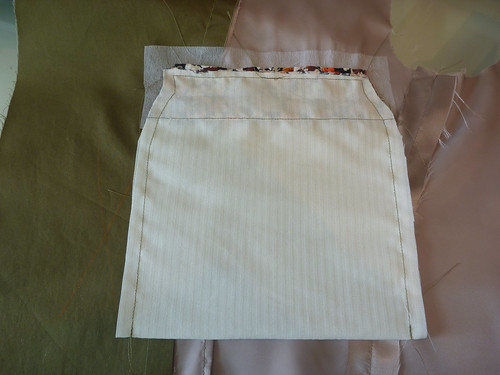
It looks like this from the inside.


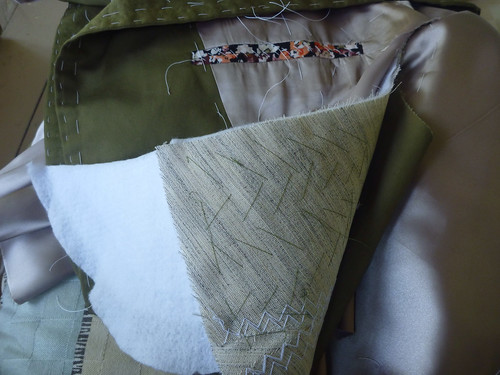
I've put in the shoulder pads. The front of the pad is padstitched into the canvas. It's kind of a wrestling match, and I'm always glad when this step is over.

 
It's not pretty, but it works.
 

And here's where I leave off. Is there enough basting???? :)


Thursday, March 6, 2014

Velvet jacket update, and moving forward

Thanks SO much for all the positive feedback on the velvet jacket. I just want to let you all know that it was a HUGE hit at the engagement party. I'm so glad that I both made it AND wore it. I have to admit that I almost chickened out at the last minute, knowing full well that I would be the only man not wearing a suit and tie... which I was. But no other guy got touched as much! The grandmother of the bride-to-be, a very stylish woman, was particularly taken with it, and threatened to rip it off me on several occasions. I lost track of how many martinis she'd had! It was an amazing party and great fun.

 
I know I wasn't feeling all that positive about the jacket, which was foolish in hindsight. I think we all have a tendency to judge our work quite severely. I know I do. As home sewists it's easy to get all caught up in every little detail, and fail to see the bigger picture. I don't think anyone was scrutinizing my seams or buttonholes. What they saw was ME, wearing a fabulous jacket, and that's quite enough. Now I'm actually looking forward to an event where I can wear it again! And isn't that one of the best things about making our own clothes? The joy of wearing things that we truly love.


Engagement party over, now it's on to the wedding which will take place on tony Martha's Vinyard in late August. Hmmm what does the eccentric uncle wear to this shindig? On my mental "Pinterest board" I'm pinning random ideas... wedding, New England enclave of the rich and famous, nothing too formal, fun vs stuffy, casual but classy, lighter vs darker, strong "prep" vibe, colorful, outside reception in tents overlooking the ocean, potentially very hot (or raining). The image forming in my head.... A suit (yes, the real deal, jacket and trousers), cotton, poplin, maybe seersucker or pincord, with a floral shirt and a vintage Rooster skinny knit tie. Are you still with me? Now to make it happen!

I had the chance to be in NYC for just a day, and I took full advantage of it. I was a man on a mission, so I made a beeline to Elliott Berman on W 35th. I just can't say enough about this place. A treasure trove. Just be warned that they're not open on weekends. As I'd hoped, I was able to "knock it out of the park" in just one store. As always, thanks to Eugenia of EBT for encouraging me to "go bold, or go home"!

So here's the result.
A French floral cotton shirting in tones of peach, orange, gold and mulberry on a black background. An Italian olive poplin (actually a micro twill) which is 80% cotton, 20% silk with NO stretch.

This shirting was love at first sight! It was the boldest of three prints I considered, all gorgeous in their own right. It's a full 54" wide, so I can easily get a shirt out of 2 yards. End result....a very Liberty looking shirt for $24. Score! I'm wanting to make this up right away and start wearing it. It's no secret, I'm completely enamored with floral shirts these days.

The olive poplin has a wonderful weight and crispness to it, and best of all....NO stretch. I've really come to dislike stretch fabrics for tailored garments. They just don't "act right". Olive is a great color for me and I always feel confident wearing it. So this fabric has all the makings of great classic summer suit.

Not wasting any time, I scurried around the garment district getting the other supplies I'll need. The linings are from A&K fabrics. I picked up both polyester and a spool of olive silk thread at SIL for all that hand sewing I'll be doing. The buttons I'm not 100% sold on. They looked great in the store, but not so hot now that I have them home. That's easy to fix, and there's plenty of time to swap them out. I'll be using a set of premade lightweight hair canvas jacket fronts from B Black and Sons. I'd rather put my efforts into other more technically challenging parts of the project.


I'm going to be using this vintage Bill Blass pattern which is all over eBay and Etsy. It's a two button jacket with moderate lapels and double back vents. The trousers are basic flat front. This is a classic pattern that looks as relevant today as it did when it was originally issued IMO. Some of you may recall that I riffed off this pattern last year to make my lapel-less silk patchwork jacket. I've gotten into the habit of saving my muslins, so a big chunk of the fitting has already been done. I'll just need to redo the fronts, add the collar and possibly adjust the back. It will be nice not "reinventing the wheel" this time.

As much as I'd like to dive into that floral shirting, I have another project in the pipeline.... My first pair of pants! Wish me luck.