Showing posts with label tailoring menswear. Show all posts

Thursday, February 15, 2018

Next up -- Wedding #2

Here we go, another wedding! This time, my beautiful and uber talented daughter is marrying. The place -- Oakland, CA. The date -- April Fool's Day (which also turns out to be Easter this year).


My travel arrangements are all made, but my Father of the Bride wardrobe is sorely lacking. My daughter floated the idea of my wearing my whole Scottish kilt garb, but I think it's way too flashy. I think the bride should be the star of the show, not her crazy old man. Call me old fashioned, but I think a dark (dark-ish) suit is called for.
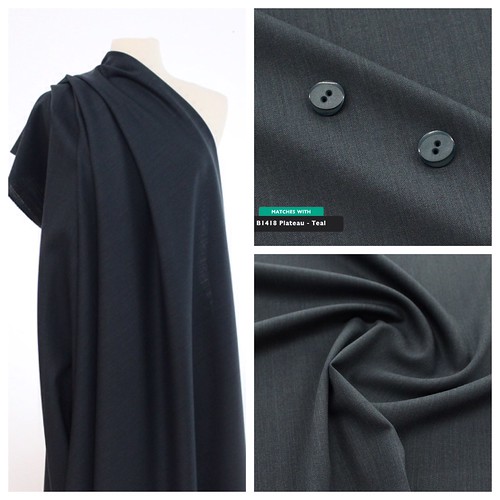


Enter "La Mer" from Sawyer Brook Fabrics, a heathered / striated 100% wool suiting from Italy. Wow! The quality of this fabric completely exceeds my expectations. I ordered it from a swatch and can't be happier. The yardage I received is flawless, and I absolutely love the color -- a dark teal blue. (Unfortunately my cheap point and shoot camera does a horrible job capturing the color). Sawyer Brook offers a swatch service, which I will most likely subscribe to. Their retail store is in central Massachusetts, about a 3 hour drive for me, and I can easily foresee a field trip in my future.


I prepped the fabric using the London Shrink method. I've done this many times, and it's a safe and reliable way to preshrink wool fabrics. Cotton sheeting is soaked in water and then well wrung out. It's sandwiched into the fold of the material.


Once everything is sandwiched, the fabric can be folded up and wrapped in plastic to set overnight. The moisture from the sheeting is absorbed into the wool to create a uniform dampness. The yardage is then air dried and ironed. This suiting required almost no ironing once it dried. There are benefits to working with high quality fabrics!
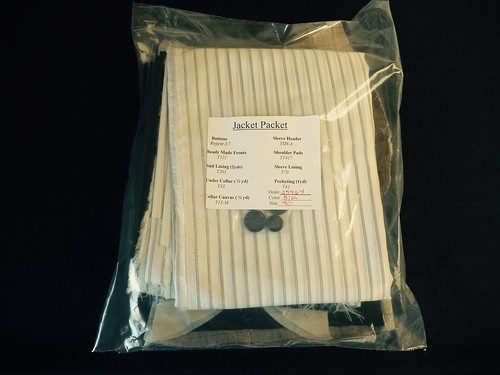


I have no access to menswear tailoring supplies here in Maine. Maybe you have the same issue? Fear not, B. Black and Sons to the rescue. They offer a "Jacket Packet" which contains everything you'll need. A pair of premade haircanvas jacket fronts, more than enough lining material (I think you could actually screw up a piece and have enough to recut another!). Sleeve lining, a huge piece of pocketing, collar felt, a strip of French canvas for the collar, shoulder pads and sleeve heads. (The buttons aren't so hot). This packet is my "go to" when a trip to NYC is out of the question.
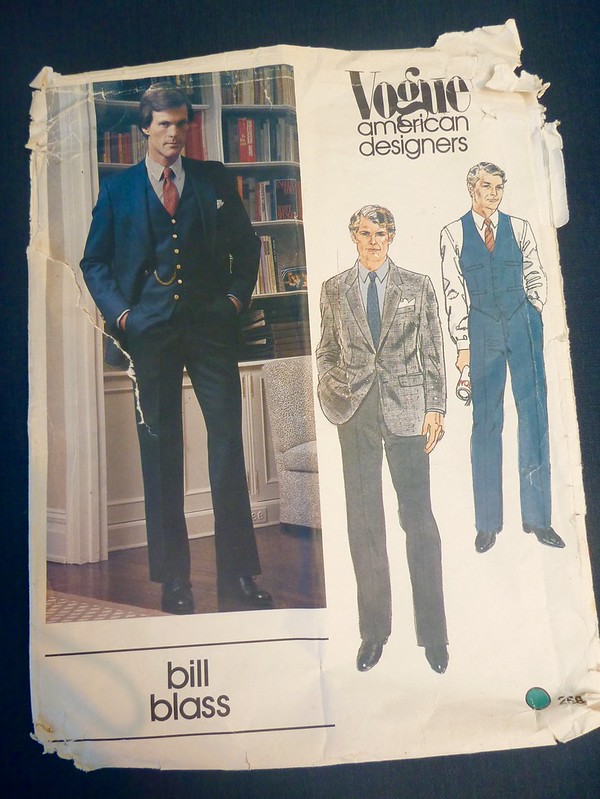


I'll be using my old standby, this very beat up Bill Blass suit pattern from the early 80's. This is just a nice all around jacket pattern. No crazy lapels, typical menswear pockets, vented sleeves and double back vents. I've only made the trousers once, but they're also straight forward, classic.
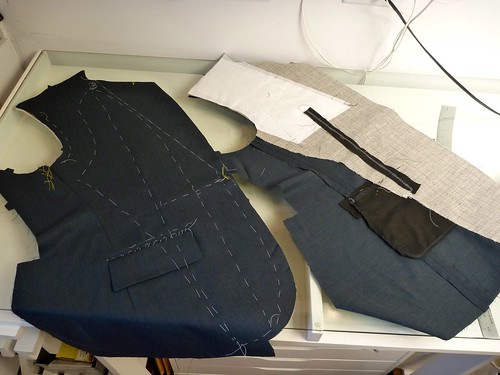


I won't go into great detail. The jacket fronts are by far the most work. I use Roberto Cabrera's book on menswear tailoring as my guide. None of it is particularly hard, it just pays to be as accurate as possible, both in measuring as well as sewing. If I'm tired or "just not feeling it" I put everything aside. Things go so much better when I'm fresh, which is usually the next morning.


Another huge benefit is having the right thread to work with. Real cotton basting thread and a spool of silk thread that matches the fabric makes the work go so much faster, and with less aggravation. So much of tailoring is about control. All the basting is about taking control of the fabric and making it conform to the body.
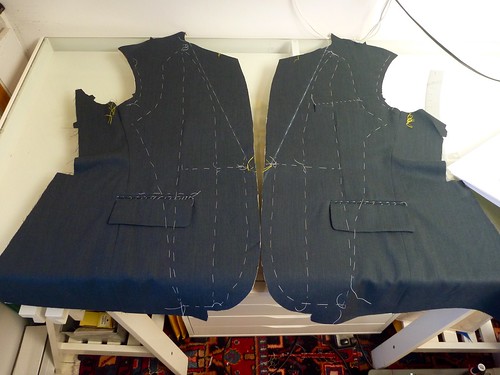


Here are the completed fronts. From here I like to move to the sleeves. They're made fully lined, and there's a fair amount of fussy work around the vents. I HATE working with polyester lining material, so the sooner this part is over the better!


So far, so good. Be well, and enjoy your current sewing projects!


Monday, April 25, 2016

Blazer of 2016 -- Muslin #1

After weeks of procrastinating I jumped into the muslin phase, and it didn't take long to figure out that I've got my hands full with this pattern. There were some pretty glaring problems right out of the envelope. So I decided to do some "preemptive" adjustments.


First off, the center back seam is ramrod straight and I know that I have what Roberto Cabrera calls "stooped posture". Doesn't sound very attractive, but it beats Dowager's Hump any day! (Actually, I think they're one in the same). I need more curve to the upper back, otherwise the collar will pull away from the back of my neck. Not a good look.


The fix for this is to create a 1/2 to 3/4 inch dart from below the arm hole to the center back. This has the effect of tilting the upper jacket forward. So here you see my adjusted pattern over the original.


To prevent the front of the jacket from drooping down, a corresponding dart is made on the jacket front.


And it looks like this.


Sleeves on jackets are always too long for me, so I shortened the sleeves by 1 inch.


I removed 1/2" both above and below the elbow on the "shorten here" lines from my pattern. Using Swedish tracing paper makes this a breeze. I just fold it and stitch a 1/4" seam on my machine. I also reduced the ease on the sleeve cap by 1". My goal is to create a more natural shoulder. Time will tell if I can pull that off.


Lastly, I noticed the the front and back shoulder seams are the same length. According to Cabrera the back shoulder should be at least 1/2" longer than the front. Easing the back into the front creates room for the shoulder blade. I don't have a picture, but I simply added 1/2" at the arm hole side of the pattern.


So here's what those changes turned into.....


The center back adjustment has worked, but I think I still need a touch more curve. As you can see the collar still doesn't want to sit against the back of my shirt collar. The shoulder seam is also running to the back of my shoulder. This isn't a fitting issue addressed in Cabrera, but I feel that the shoulder line needs to be swung forward about a 1/2" so that it sits closer to the apex of my shoulder. It would be a simple fix. Please chime in if you know the answer to this problem! Am I on the right track? My gut just tells me it needs fixing.


Eeeeek. The big problems are up front. The neckline is just too wide. Plus, I feel the jacket pulling across the shoulder / upper chest like there just isn't enough fabric there. I think the solution to this mess may be two pronged. I'm going to try redrawing the neckline to add a bit of fabric towards my neck, in addition to slashing and separating the upper chest portion a small amount. Maybe 3/8" to start. I'm open to all suggestions on this one. Something's gotta give!


All these wrinkles are telling me I need a substantial belly adjustment! Also, the button placement (marked with chalk) on the original pattern is unusual to say the least. I'll need to lower the stance by bringing the top button down at least to the level of the pin, maybe even lower.


Before sending this muslin to the dust bin, I let the side seams out about 3/4" on each side.


This was the only glimmer of hope in what was, over all, a pretty dismal start.


On a brighter note......I picked up some lovely thistle design blazer buttons on eBay.


These are from Waterbury Button in Waterbury, CT. "The brass Capitol of the United States". I love them. Now I just need to build a damn jacket around them!


Wednesday, August 6, 2014

The Home Stretch, or....The All Day Waistband

I had a feeling that the waistband would be time consuming, and man was I right. I used the construction techniques from Roberto Cabrera; and while I love the results, there are probably much easier, and faster, ways to finish off a pair of pants.


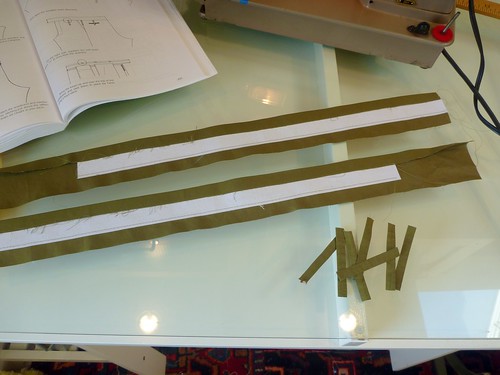
The waistband is constructed before sewing up the crotch seam, so it's done in two halves. They're just basic rectangles sized according to the width of waistband that one desires. I'm making a 1 1/2" inch band, which is pretty standard. I've interfaced the bands with Prowoven Medium sew-in interfacing from Fashion Sewing Supply Co. It's stiff stuff! The belt loops are sewn and turned instead of folded and topstitched. It's a more polished look, but a real PITA. The interfaced band is sewn onto the pants, catching the belt loops which have been basted into position.


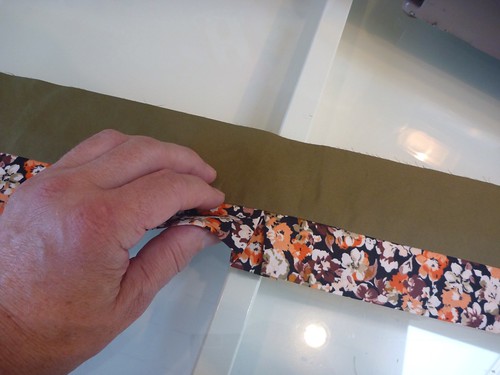
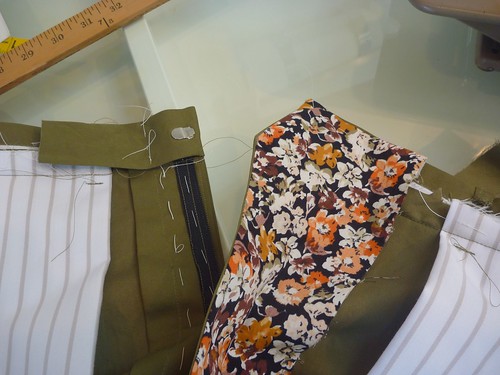
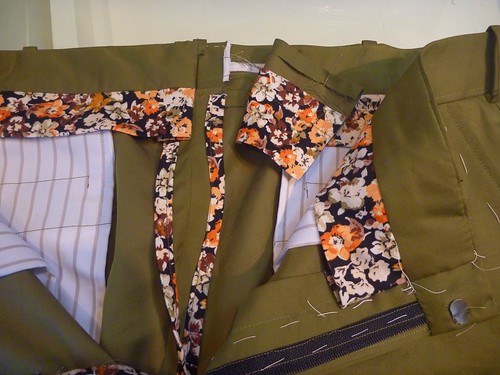
Next I constructed the inner lining with its attached curtain. The curtain is a bias strip of shirting, folded in half and stitched onto the lining. There's a box pleat at the center which adds some wearing ease. It's a classy detail, and I love getting to use my leftover floral fabric this way.


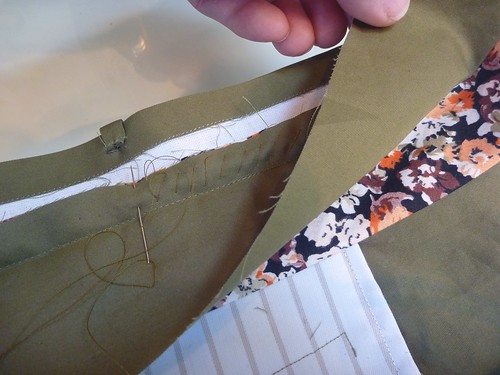
The seam allowance of the lining / curtain is diagonally stitched to the seam allowance of the waistband. The tops of the pockets are caught in this seam. You can also see that the belt loops have been brought up and tacked onto the waistband.


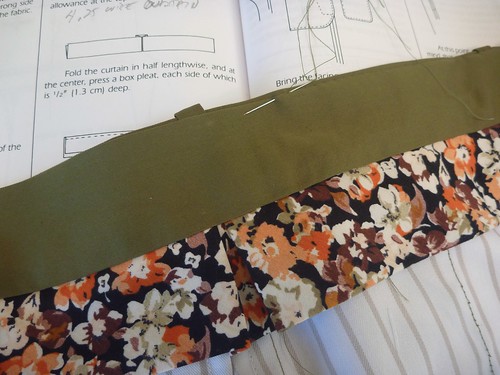
The seam allowance is folded down, the lining is pressed into position and slipstitched to the top of the waistband.


This pattern has a right fly extension, otherwise known as a French fly. I've lined it with my shirting. At this point, having abandoned the pattern instructions, I'm just making things up as I go along. It's all hand sewing, so I just press things into position until "it works". I've also added a hook and eye closure, which came with the worst instructions ever. That it works is a miracle.


Eventually, the back seam has to be sewn. I made some bias binding to finish off the seam. At this point, what's a little more work, right? My little Clover bias gizmo makes this a breeze, and it does make for a nice clean finish. The waistband lining is then worked across to the center back, where it's folded back and stitched into place. Here you see one side completed.


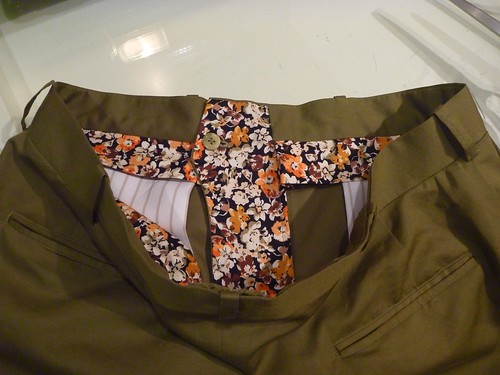
The finished front. A buttonhole is made in the French fly, and the button is attached at the seam level of the waistband.


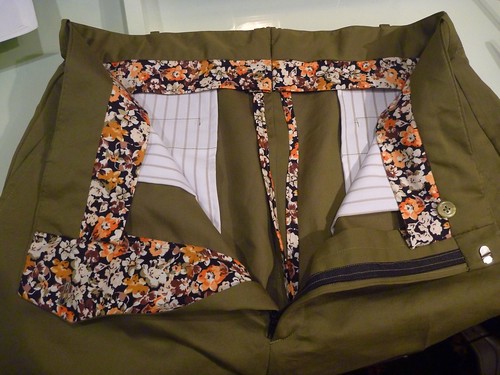
The completed waistband. A ton of work, but beautiful. Whew! What a day.


Sunday, February 24, 2013

Sit by a window, listen to some music....stitch

The next step in the process is to tape the edges of the jacket and reinforce the vents. It's all about handsewing, which I happen to enjoy, probably more than I'm supposed to. I find it very enjoyable. Not only is it satisfying, I also love the fact that I'm participating in an activity, a tradition, with a long history. While I stitch away I fantasize about working in a great atelier, perhaps making a coat for royalty! Fantasy aside, I like to sit by a window, watch the snow fall and listen to some music. My current soundtrack is The Weepies. Love them!


The canvas is oversized so any excess canvas is trimmed away after the fronts have been basted. The seam allowance is then marked on the canvas and very carefully trimmed away. This step always makes me nervous because one risks inadvertantly clipping the jacket fabric. As Cabrera says frequently in his book, "give this step your full attention". The alternative is complete ruin.


The twill tape should be soaked in cool water, dried and pressed before using. Starting at the neck, the tape is basted along the seamline through all layers.


At the break, the tape is cut almost to the edge and a small wedge is clipped out. This insures that the tape will lay flat when the "corner" is turned. The tape runs down the jacket front and then along the hemline.


Now that it's all basted into position, the edges of the tape are slipstitched to the canvas on one side, and into the fashion fabric on the other. None of these stitches should be visible from the right side of the jacket. Put on some music that you love and enjoy the process!


So here is the tape all sewn into position.


Lastly, a crossgrain strip of pocketing is slipstitched at the edge of the vent. Again, these stitches should not be visible from the right side of the jacket. This completes the work on the jacket fronts, and they are ready for the front facing.


At this point the body of the jacket can be assembled, and there's a sudden feeling of huge amounts of progress being made.


Go to your stash (I know you have one!) and cut a strip of "semi-bias" lining. This strip is basted to the front shoulder as a reinforcement. Note how the canvas has been peeled back.


The back shoulder seam is wider and will need to be eased. In this picture you can see how it ripples.


Steam press the wrinkles out, extending the tip of the iron only an inch beyond the seam line. Now stitch the shoulder seams. Pressing out the wrinkles makes this seam so much easier to sew.


Press the shoulder seam over a tailor's ham which will help preserve the shape. Now simply attach the back to the fronts. I like to stitch down to the waistline, remove the piece, and then stitch up from the hem to meet my stitching at the waistline. Thank you Edna Bishop for this tip, which helps prevent distortion of the garment.


So here's where I am so far. The jacket body from the front.


Jacket from the back.

Now it's on to the sleeves and even more tailoring geekery! As always, I hope you are finding this informative.