Showing posts with label Lining a jacket. Show all posts

Sunday, February 25, 2018

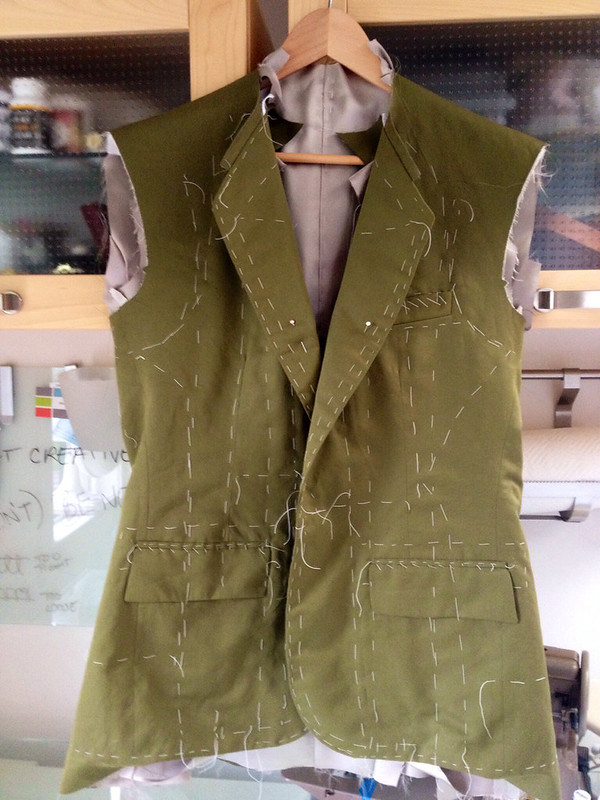
Suit progress and... learning some new skills

With the jacket fronts complete I moved on to the sleeves. It was a nice break from all the detail work (pockets, taping and pad stitching). The sleeve construction is really quite simple, it just gets fussy where the lining meets the vents.
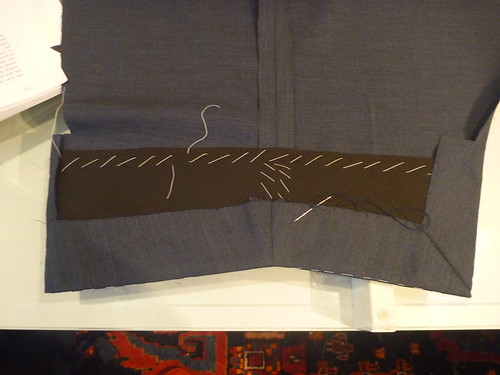


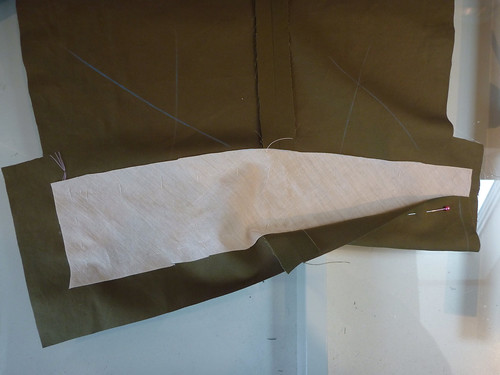
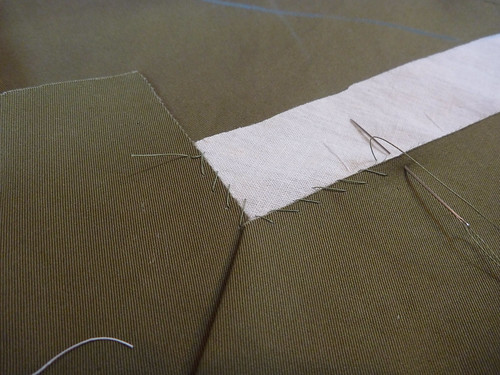
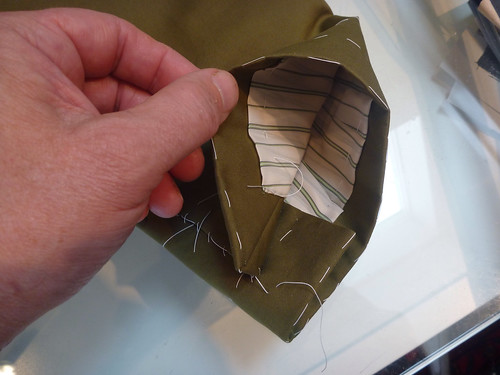
A wide strip of pocketing cut on the bias is basted into sleeve cuff. The vents and hem are folded into position and slip stitched into the pocketing.
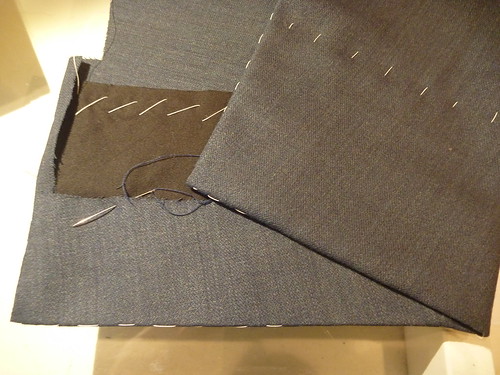


No stitches are visible from the outside. It's like the hem is held in place by magic!
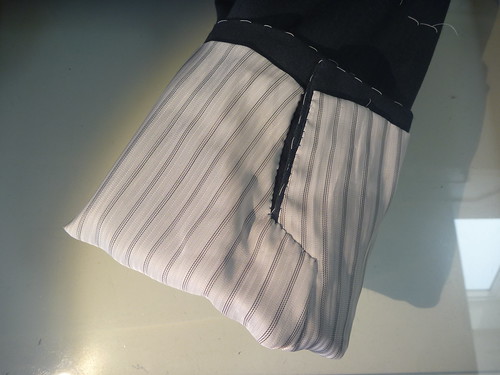


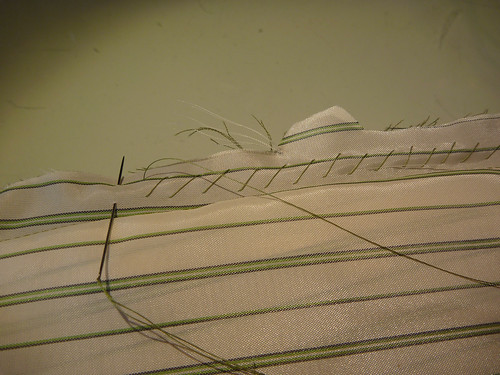
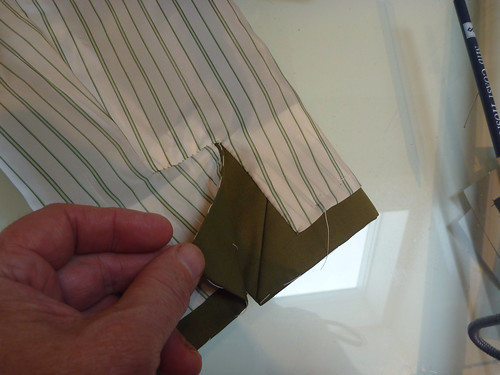
Getting the lining in around the vents is NOT magic! It took me awhile to figure out what part overlaps what, and how to get from one side to the other. Working with lining material is its own special hell. It's a lot of frustrating work for something that will never be seen!


Moving on.....


Are there any perfect patterns? Hmmmmm. This pattern, as much as I like it, has its issues. The first issue to rear its head turned out to be the jacket front facing (which becomes the lapel when it's folded back). The lapel edge is curved. Why is this a problem? If you're working with a stripe, the stripe will fall off the lapel rather than be parallel to it. My fabric has a subtle striation to it, so the front facing needs to redrafted.


The original pattern piece is on the bottom. Notice the curved edge. The new pattern piece on top is drawn with a straight edge. Using an iron and LOTS of steam, the new facing is curved to match the original pattern piece. Steam is used to shrink the other side of the facing which will ripple up during the process. This is where working with wool is a wonder!


Once this step is accomplished a new front lining will have to be drafted. Usually I make an inside breast pocket that slightly overlaps onto the facing. This is pretty standard stuff on all RTW jackets. But now all my usual pattern pieces are out the window. Arghhhh, what to do?


I turn to Cabrera's "Barcelona" pocket.


Confession..... I can get totally freaked out by sewing illustrations.
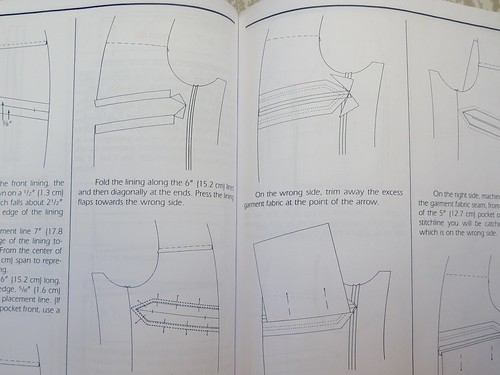
 

Just looking at this scares the sh** out of me! In my head I just assume that this is WAY beyond my ability. I've always skipped over these pages of Cabrera's book, and retreated to familiar territory. But this time I'm pretty much forced to confront it. And guess what?


It's way easier than I ever imagined!
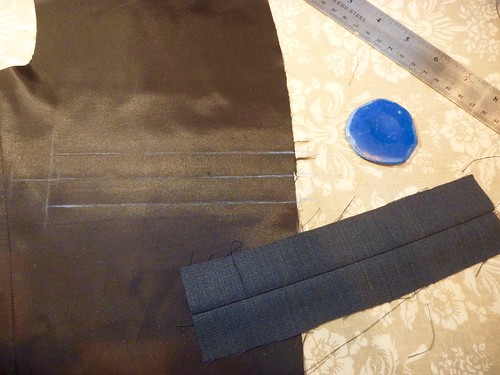


Like so many things in tailoring, it really comes down to careful measuring and taking things one little step at a time. Making the Barcelona was actually less work than the usual double piping pocket that I've used in the past. I'm sold! If you can measure and cut a rectangle, you can make this pocket.
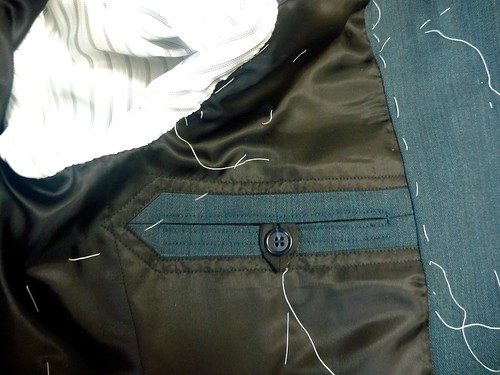


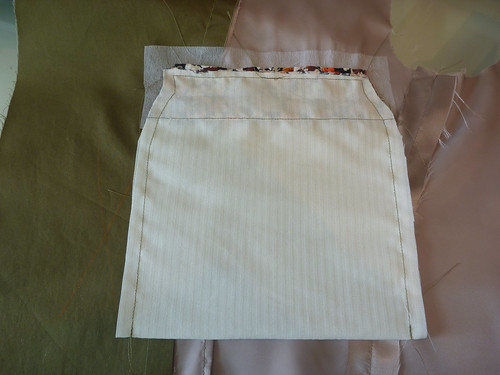
And here is the completed pocket. I did add one extra step....I fused a very lightweight interfacing to the back of the lining. This made it much easier to work with, and I'm all for that.
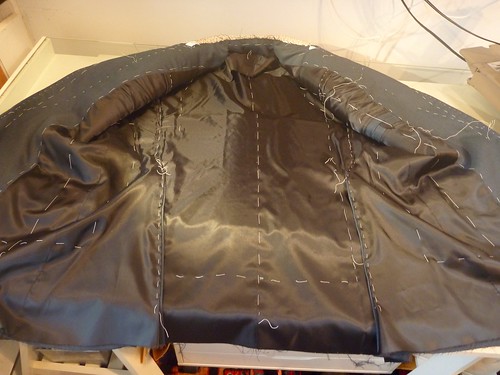


Working along, the jacket pieces get sewn together and the lining pieces are basted into position. I know this isn't everyone's cup of tea. The combination of basting and having extra wide seam allowances on the lining pieces makes this process much easier. This is the essence of "slow fashion", and it can actually be very satisfying. Using silk thread for the slipstiching makes it go so much easier because it's much less inclined to tangle.


My next issue turned out to be the collar. I've made this jacket a few other times and have fiddled with the pattern piece multiple times. Somehow I've lost the revised pattern, because what I have doesn't come close to fitting the neck opening. GRrrrr. I should take better care of my patterns when I file them away.


Enter more intimidating illustrations!
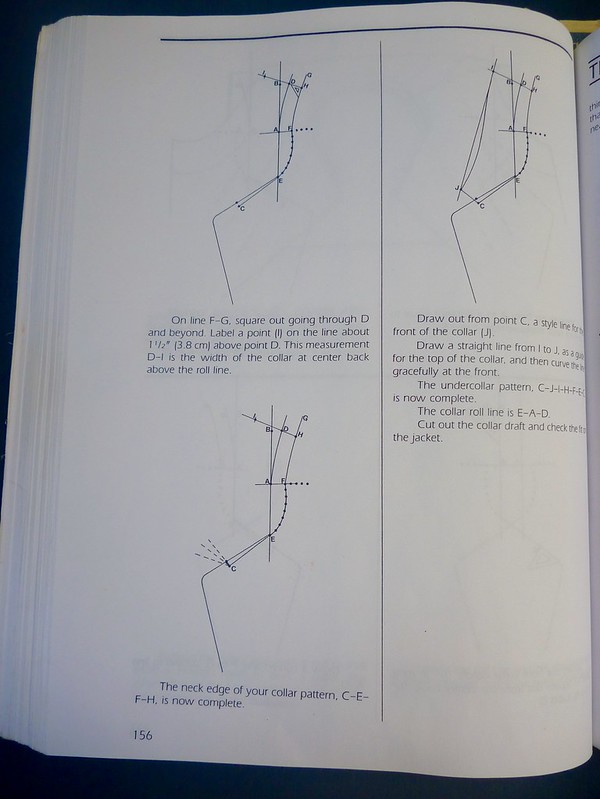


This takes me back to the nightmare of Algebra II in highschool. I never dreamed that I'd be using this page from Cabrera, but here I am needing to draft a new collar. And guess what..... this was F'ing easier than the Barcelona pocket!!!
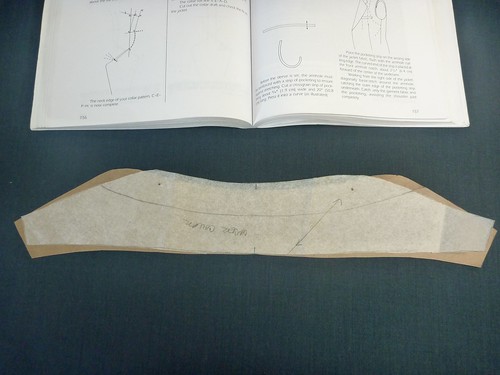


I just followed along step by step, and voila! Here is the original pattern piece (white) sitting on top of the new pattern (brown). Any wonder I couldn't get it to fit? Another new skill obtained.
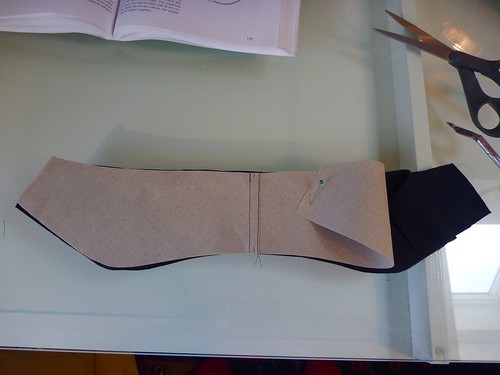


The collar is constructed on a base of French canvas and undercollar felt. It doesn't show in this picture, but a piece of pocketing is sandwiched between the layers at the collar ends to add even additional body.
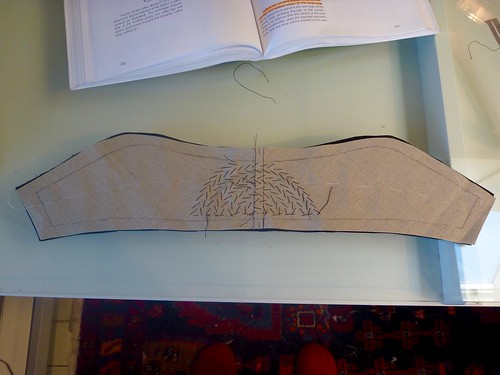


The whole assembly is pad stitched together in a circular pattern. Because the components are very stiff, it's sort of like pad stitching a cardboard box. Silk thread makes the process easier. After pad stitching the collar it's shaped on a tailor's ham with lots of steam. The result is well worth every bit of effort; and having done it a few times, I wouldn't consider making the collar any other way.
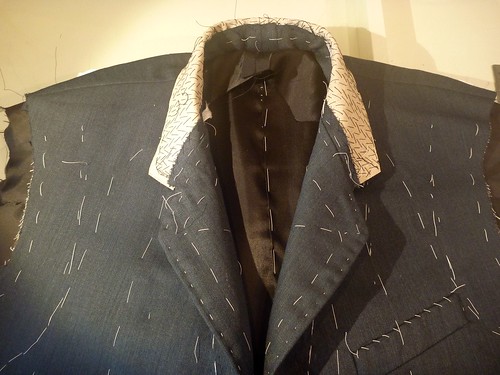


Here is the collar attached to the neckline of the jacket. The newly drafted pattern fit perfectly. This is a good place to stop for now.

Thursday, July 3, 2014

Tailoring Progress

I'm making steady progress on the wedding suit.

It's been awhile since I've done any tailoring, so the amount of basting and handsewing has been a little overwhelming at times. I'm using the Roberto Cabrera book on tailoring which is usually helpful, but tonight he has me totally baffled about constructing the collar. It's almost more confusing than putting in a zipper fly! So I'm just going to walk away for the night and pick it up in the morning when I'm fresh. I do that a lot, hence I'm one of the slowest sewers out there.

The sleeves are essentially done, they just need buttonholes on the vents. I do like Cabrera's method of making and lining the sleeves. You do have to make a muslin first because the length will be set when all is said and done.


A wide piece of bias muslin is basted into the cuff along the hemline and fold lines of the vent.


The hem is pressed up and attached to the muslin. This way there will be no stitches visible on the outside of the cuff. The sleeve and lining are then sewn up as usual.


Both the sleeve and the lining will be wrong side out. They're stacked up and the corresponding seam allowances are quickly stitched together with a diagonal stitch. Nothing fancy here. Then the fun happens. Reach down through the lining and pull the sleeve up through it. Voila! A perfectly lined sleeve (inside out) ready to have the lining finished at the vent.


Here's the finished vent. You just have to fiddle with it until it works. Once it makes sense and comes together, I press it into position, baste to hold things together and then slipstitch with silk thread.


The sleeves are done for now and set aside.

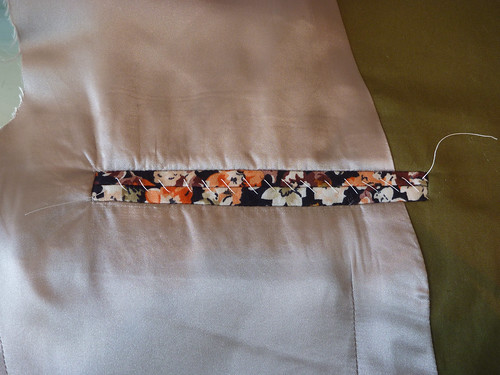
Next I've worked on the lining and added an inside left chest pocket.


I used some of my left over shirting fabric for the welts. A fanciful touch. This is the same pocket construction as the outside pockets, just a bit smaller. I'm not bothering to make a right inside pocket because I would never use it, not to mention the time required to make it.


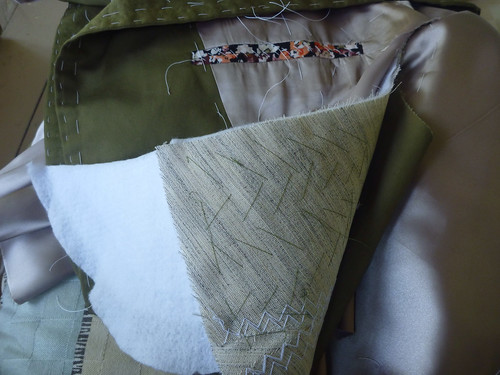
It looks like this from the inside.


I've put in the shoulder pads. The front of the pad is padstitched into the canvas. It's kind of a wrestling match, and I'm always glad when this step is over.

 
It's not pretty, but it works.
 

And here's where I leave off. Is there enough basting???? :)


Thursday, February 28, 2013

A Lazy Man's Lining

With the sleeves set it's time to turn my attention to the lining. This is where I start to part ways with the Cabrera book. I think we should all feel free to pick and choose the techniques that work for us and meet our needs. Personally, I find linings difficult. Mostly because the (insert expletive here) polyester acetate is slipping all over the place. It drives me nuts. Couture be damned, I sew as much of it as possible by machine. Sorry, I'm just not into setting the lining by hand.

Basically I use the jacket pattern pieces with a few adjustments here and there.


This is a technique I learned from the Japanese coat book. If you've ever ripped out the armpit of a jacket, this one's for you.

I add some extra fabric at the underarm seam of the sleeves, maybe about 1 1/2". I mark it out with chalk and cut. There's no need to be precise here. The extra fabric all gets eased in when the sleeve is set. This extra fabric provides some wearing ease at the underarm, a point that sees a lot of stress. I didn't do this on my frock coat and ripped out the lining the first time I wore it. Lesson learned -- the hard way!


And here's what it looks like on the undersleeve. The rest of the pattern stays the same. Lop off the extensions for the vents and sew it up.


Wearing ease is also added at the center back seam. Here's the back pattern piece. I've lopped off a portion at the neckline which accounts for the facing. The center back seam is chalk marked out 1". This extra inch continues all the way to the waist, where it tapers back to the original pattern size. Stitch with the usual 5/8" seam allowance. It will become a pleat at the center back. This allows for movement across the back and shoulders, another high stress point.


More ease is added at the lining fronts. The front shoulder seam is extended 1". A half inch pleat is basted across the lining approximately at the midpoint of the arm opening.


It will look like this after the lining is assembled.


I've worked a pocket into the left chest portion of the lining. Theoretically there should be a pocket on the right as well, but I'm right handed and never use the pocket on the right. Call me lazy, but I see no reason to add features that are never going to be used. This will be perfect for my phone. One of the great benefits of making our own clothes is to have the features we want.


This was a last minute addition to the lining. It occurred to me, while busily working along, that there was nothing to help preserve the shape of the upper back and the neckline. This is a piece of pocketing, cut using the back pattern piece, layered over the back lining. It's sewn into the shoulder seams and basted like hell around the neck opening (which has stretched, in spite of staystitching, and has frayed away to almost nothing!)

This is actually a technique from Edna Bishop's book on clothing construction, and oddly never mentioned by Cabrera. I should have anticipated using it, especially since there's no collar on this jacket.


So here's the completed lining. Not much to look at. What a mess!! Thank God none of this will be visible.


It's much prettier on the inside. I'm just glad to have this portion of the project behind me. I'll save attaching the lining to the jacket when I'm fresh.