Showing posts with label shirtmaking. Show all posts

Wednesday, November 30, 2016

Repairs Completed or..... Rip, Sew, Scream, Rip, Repeat.

OK. This exercise is completed, and it's been a journey for sure. At one point I was screaming louder than the collective scream heard from coast to coast a few weeks ago. My strategy was to take a break, go to yoga class, breath and then calmly return to the whole mess.


Yes, it got messy! The shirt in particular. But first up...the safari jacket.


This was the easier of the two repairs. I opened up a slit in the lining's side seam just big enough to put my hand through (I didn't want to mess with the armhole). Then it was easy to reach up inside and pull the sleeve head down and out. And what to my wondering eyes did appear?


Why, a sleeve head and seam allowance clips everywhere! All part of my failed attempts to improve the set of the sleeves way back when.


This time around I reduced the height of the sleeve cap by 5/8" at the apex, and then graded the curve down to the front and back notches. This greatly reduced the amount of easing required.


After sewing the new seam, I stitched in a new wool sleeve head over the top of the sleeve. This technique is from The Bishop Method of Sewing Construction, by Edna Bishop. A bias cut strip of wool 1 1/2" wide is lined up with the edge of the seam allowances, and then hand sewn in close to the seam. It sounds more difficult than it is. When the sleeve is turned rightside out the strip will fold over on itself and fill out the top of the sleeve. That's the theory anyway.


And here's how it turned out. It's not perfect by any stretch of the imagination, but still a big improvement. If it weren't for the Lycra in the fabric, any little dimples could have been steamed out. Alas, they just spring right back. Still, this repair is a win in my book. The safari jacket is back in rotation! (And I will continue my resolve to NEVER buy stretch fabrics again!).


On to the shirt.....


Picking apart a shirt is an exercise in patience and perseverance, especially when it's sewn with about 20 stitches per inch.


After what seemed like hours, I had a pile of abandoned parts. Cuffs, collar, stand, interfacing and the entire left front placket. From there, things actually progressed quickly. I had more than enough fabric to remake the replacement parts which I interfaced with Shirt Crisp interfacing from Fashion Sewing Supply. Everything was assembled and wouldn't you know, my old Singer 301 refused to make a buttonhole. Ugh!


I pulled out the Janome Magnolia, my backup machine, and figured out how its buttonhole attachment works. I had never used it before. My practice buttonholes were coming out perfectly. I bet I made at least 10. Everything was working flawlessly. The buttonholes on the placket and cuffs came out perfectly. I was cruising towards the finish line. And then....I had to make the small buttonholes on the collar.


Wouldn't you know. The F'ing contraption just took off on its own and decided to make a huge butttonhole. To make matters worse I had set the machine for its most dense stitch. Needless to say there were some choice words said. By the time I picked it out, the fabric was pretty well shredded. In fact there was actually a hole on the undercollar.


In another act of brilliance, I though a dab of Fray Check might help. Wrong! It bled through to the upper collar and left a stain. At this point a cooling off period was in order, so I put the whole mess aside for at least a week.


I had just enough fabric to make another collar, so I ripped the whole thing out again and started over. This time around the buttonhole gizmo worked perfectly, but I still held my breath through the whole operation. So what did I end up with other than frazzled nerves....?


A shirt that will actually get worn. I made a few stylistic changes this time around. The placket and collar are cut on the cross grain, I added a buttoned pocket, and swapped out the light colored buttons for something darker. The shirt will always have its flaws (I've learned a lot about shirtmaking since I made this), but overall it fits in better with my wardrobe, and I no longer feel guilty about the clothes that I never wear.


What's next? Some "secret sewing", and then a fresh project. Wishing you all happy sewing!


Wednesday, October 26, 2016

The Troubling Ethics of Clothes That I Never Wear

Maybe you caught this little post from Sewing on The Edge which linked to an article about a minimalist / capsule wardrobe? While my wardrobe is hardly minimalist, I do try to make clothes that I want to wear. Still, there are clothes that I've sewn that, for one reason or another, I NEVER wear.


There's something vaguely unsettling about this. I don't regret the time and effort involved in making these clothes; but to never wear them seems a waste of resources. To remedy this situation I'm going to undertake "rescuing" two items that never see the light of day.


First up....


My safari jacket.


I should be wearing the hell out of this jacket right now, but I cringe every time I see the horrible set of the sleeves. This mess is the collision of two problems....one, too much sleeve ease...and two, a stretch fabric that doesn't allow the extra ease to be steamed out. Note: this project made me swear off stretch fabrics forever. I've replaced this jacket with my wool Halston shacket, but I truly miss wearing it, especially this time of year.


This jacket was both a ton of work, and a joy to make. To have it languishing in the closet because I'm too embarrassed to wear it is a shame. My plan is to open the side linings and pull the sleeve through, shorten the sleeve cap and put things back together. I may even put in a little wool sleeve head to give the shoulders more structure. Here's hoping!


Next problem child...


The first shirt I ever made!


I made this shirt when Peter had his Shirt Sewalong (I think he was making the Negroni?). I think I've worn it once, which is a shame because it's a fine Italian cotton in a great color for me. Sadly, it has some issues. Some I can fix, others I'll just have to live with.


The biggest problem is lack of decent interfacing. It's just interfaced with white cotton fabric with little to no body. Since making this shirt I've learned just how important good interfacing is to a shirt. Hence, my addiction to Fashion Sewing Supply's "shirt crisp" interfacing. For me it's the difference between a shirt that gets worn, and one that's relegated to the back of the closet.


Next problem, the full French cuffs. Fun and novel as they are, they're just not me. They've gotta go.


Ummm...this was the best I could do at the time. Reality check, I still can't sew a curve worth a damn, so I'll replace the whole collar and stand (God willing). This time around it will be a button down, which is much more my style (and NO curves involved!). With a little love, I'm hoping to get this sad shirt back into the game.


Thankfully, I saved a good sized hunk of this fabric. Vindication for all us sewists who save all our scraps, and sometimes scratch our heads wondering why we do it!

Time to break out the seam ripper.


Tuesday, July 5, 2016

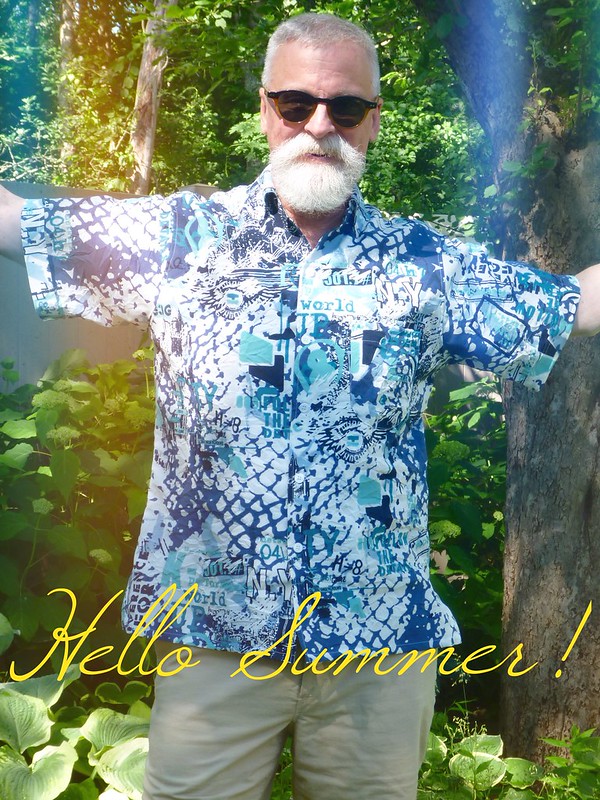
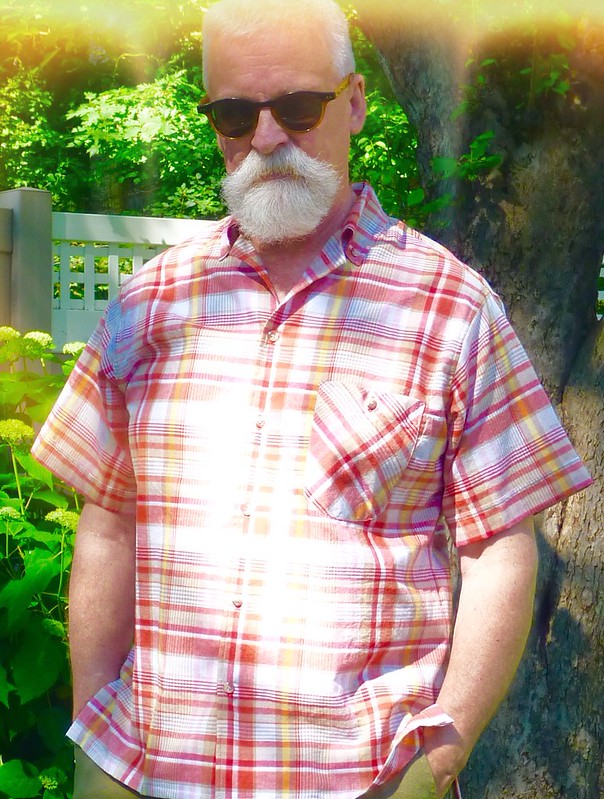
New Summer Shirts


What's better than a new shirt for summer??? Two new shirts!


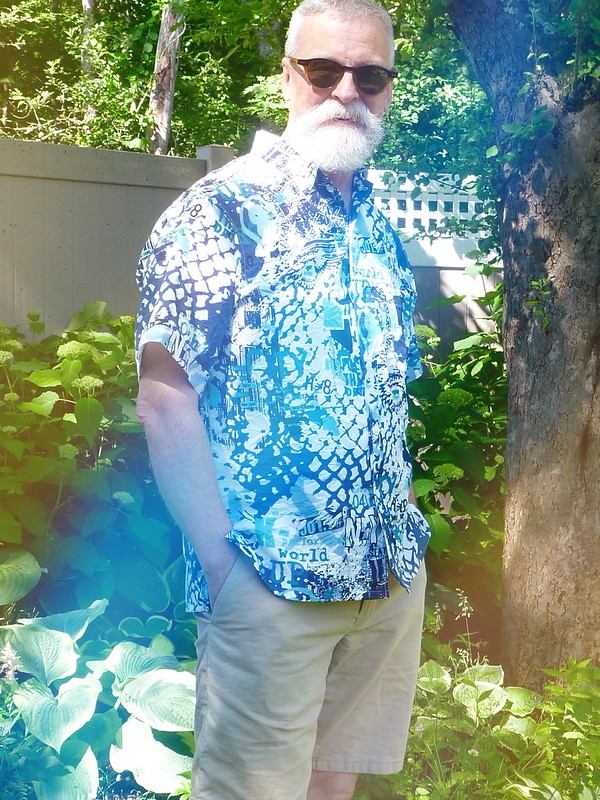
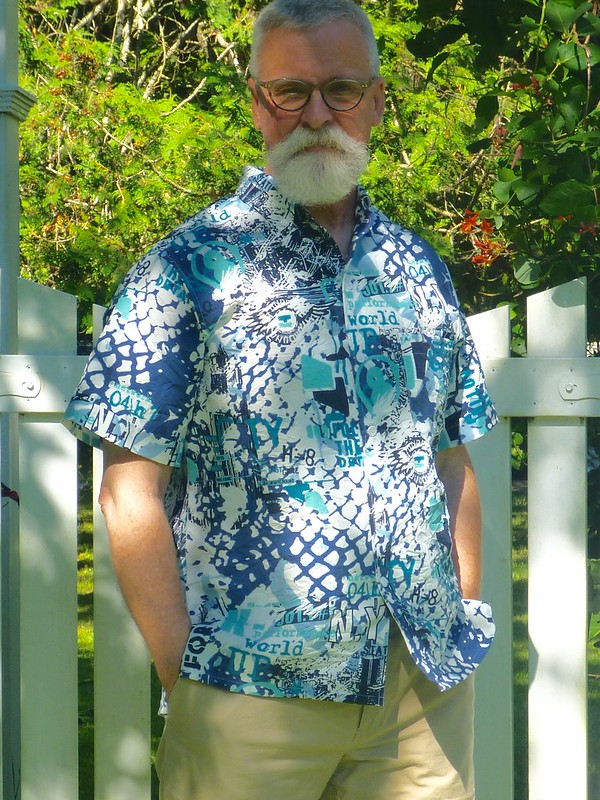
I made just a couple little adjustments to my vintage pattern. I always need a sloped shoulder adjustment (top pic), and I also added a slight curve to the upper back (lower pic). I also cut the undercollar and the collar interfacing on the bias. I think that helps a camp collar fit a little better. Oh, and I added some extra fabric at the lower sides to allow for some small side slits.

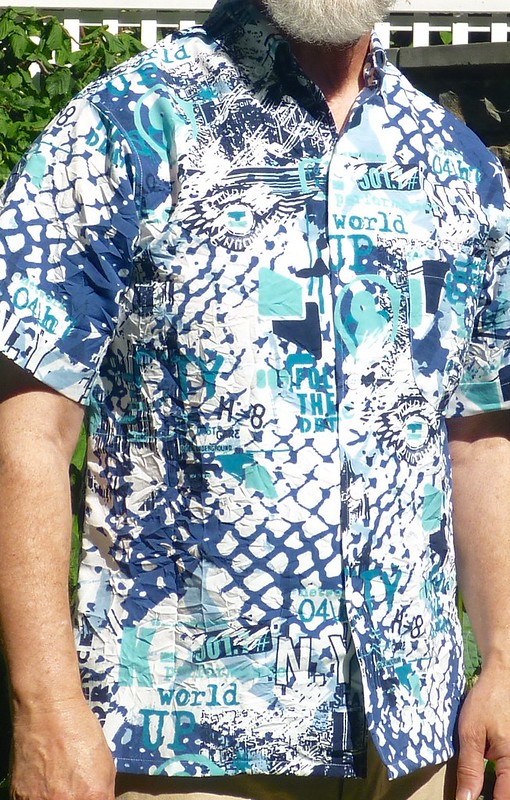
Both shirts have sew-in interfacing. A fusible would have flattened out all the crinkle on the graffiti print, so I used some very lightweight cotton gauze from my stash. I think it was intended to be used for sheer curtains. It's that light, and it worked perfectly. The plaid shirt is interfaced with Fashion Sewing Supply's "light crisp" sew-in. A dream to work with, and it didn't weigh down my fabric. No guy wants a heavy summer shirt.

All the construction was extremely straightforward. Basic shirt stuff.


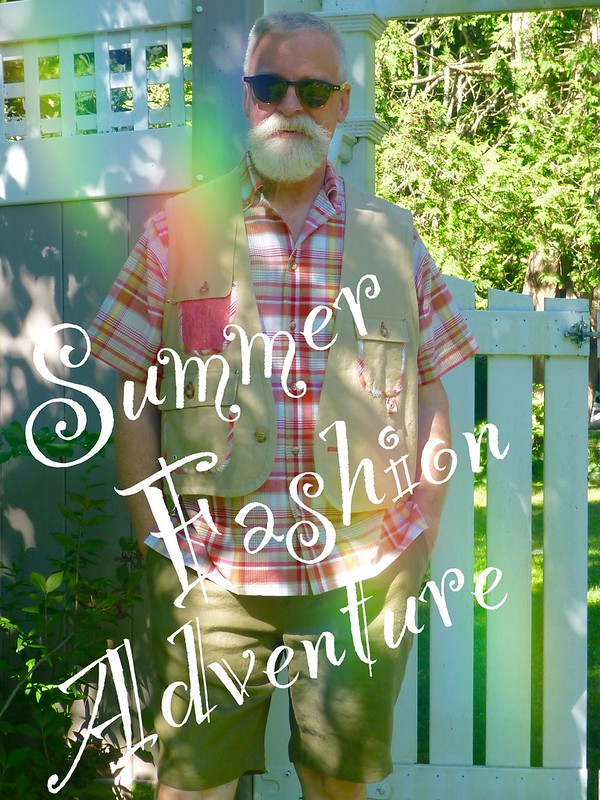
The plaid shirt is a whisper weight cotton madras plaid from Peron Fabrics. It's been patiently waiting in my stash for the right pattern to come along.


I'
 

The truly observant will notice that I've used this fabric before... namely as bias binding, elbow patches and other assorted do-dads on last year's Watanabe inspired jacket and fishing vest. It's a lotta look! I'll save it for a day when I'm feeling especially "fashion adventurous". A morning at the laundromat maybe!


I fell in love with this crazy crinkled graffiti print at Elliot Berman. I don't tend to wear much blue, other than jeans, so this is a big departure for me.... Both color and style wise. It's hard enough getting older, even worse to be old and turn into a stodgy fuddy duddy. No chance of that with this shirt!


Plus, summer is made for wearing crazy shirts!


So get out there and have your very own......


Thursday, December 17, 2015

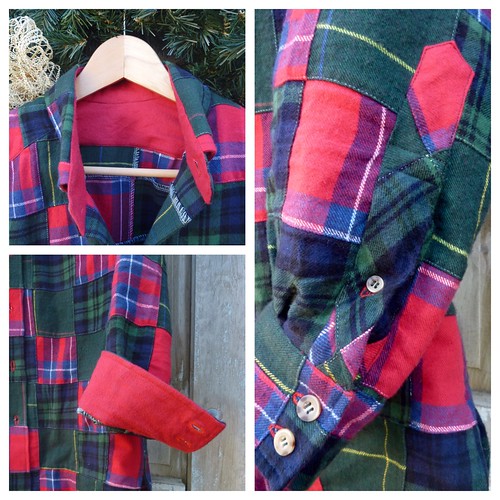
A flannel shirt to close out the year.

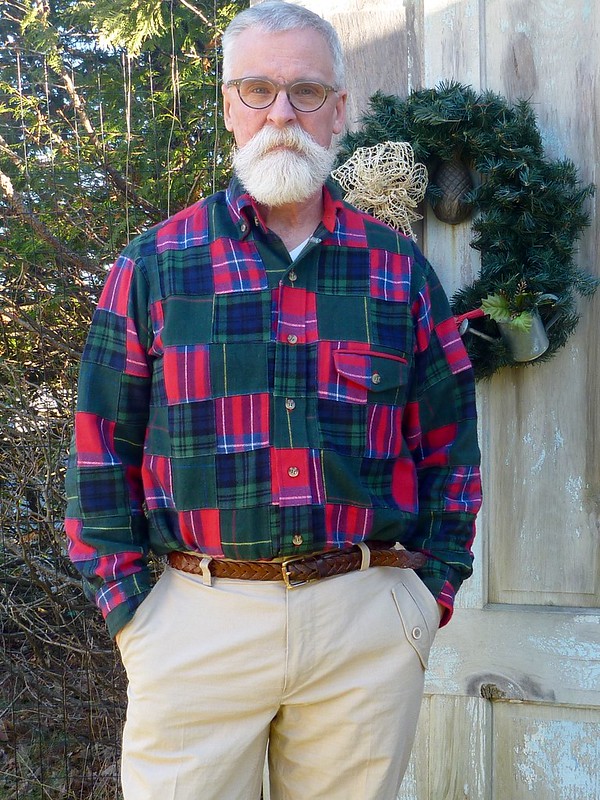
I'm pretty much set for the staff Christmas party / potluck next week. Skip the velvet blazer, bring on the flannel!


I bought the fabric this summer at Peter's MPB day. It's from Metro Textiles and was so inexpensive it's almost embarrassing. It's much beefier than any of the flannel offered at the "LL" store a few miles from here. The pants are a hack of Thread Theory's Jedediah Pants.


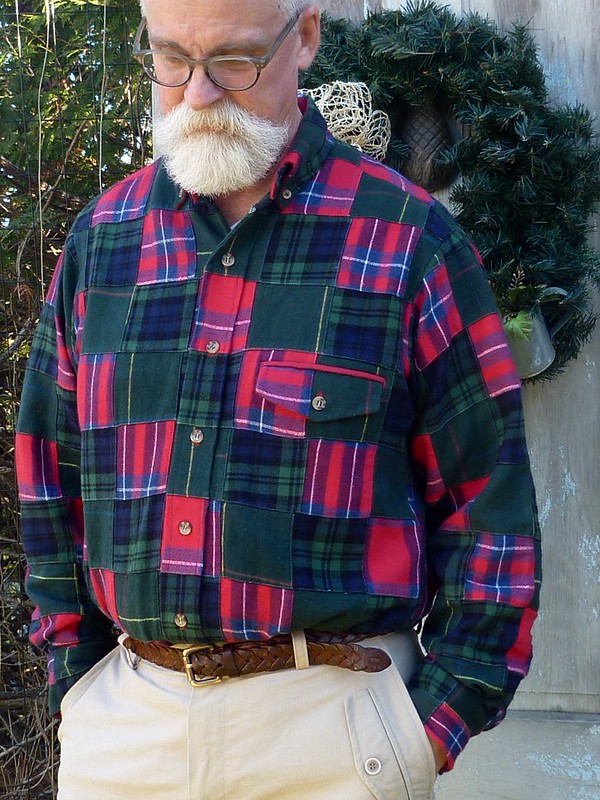
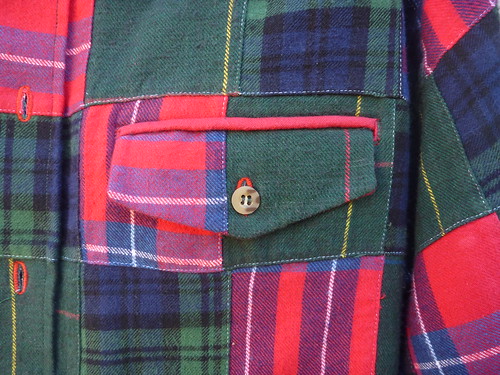
I always like a left chest pocket on my shirts but I'm not crazy about plaid patch pockets cut on the bias. Throw in the patchwork and I envisioned an even bigger mess. My solution was to make a welt pocket with a flap.


The welt is made with some solid red flannel I picked up at my local JoAnn's. I also used it for the inside collar stand, inside yoke and inside of the cuffs to help reduce bulk. All those patchwork seams can make for a very lumpy shirt.


The pocket bags are black flannel from my stash. I use the instructions from Roberto Cabrera's mens tailoring book. It's actually a double piping pocket for the back of a pair of trousers with just a slight twist. It's surprisingly easy to make, and results in a neat French seamed pocket. I've never posted a tutorial, but if there's any interest in how to sew this type of pocket, I could be talked into it.


As always, I'm greatful for all the friendship and support I've received through the sewing community. See you in 2016!


Peace.


Tuesday, March 31, 2015

Thinking Ahead -- Summer Beach Shirt

We're all craving some warmer weather here in northern New England. 40 degrees would be heavenly! How twisted is that??? So to keep myself from going completely crazy I've been working on some summer clothes.


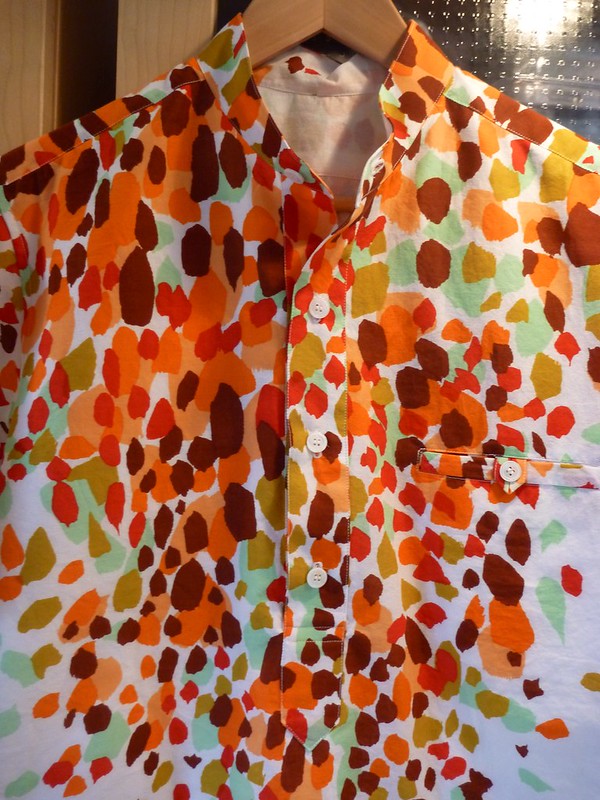
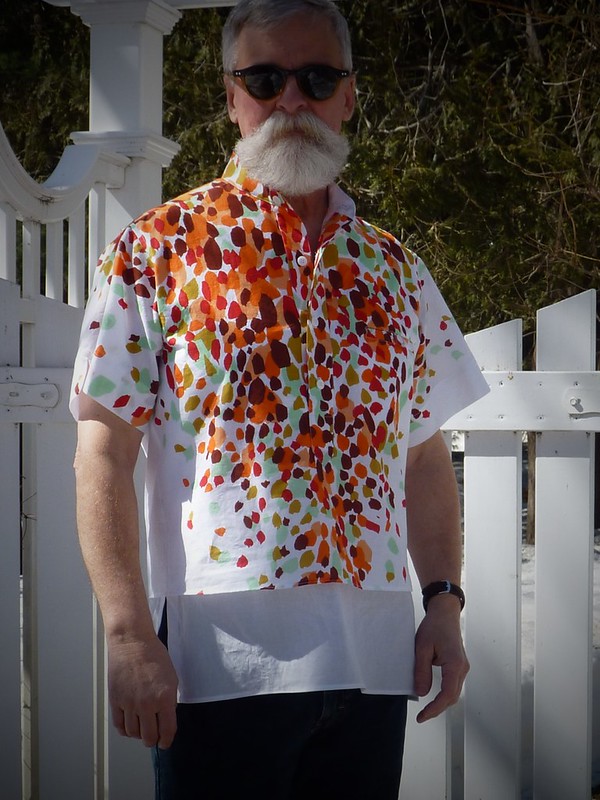
My latest is this cotton shirt.


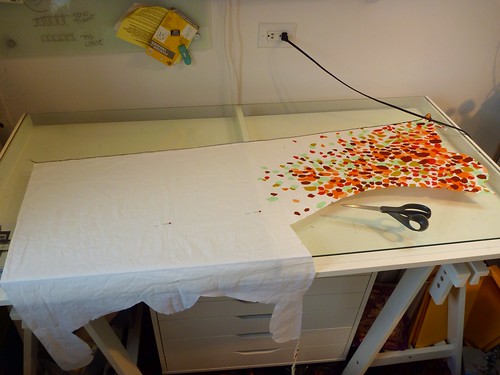
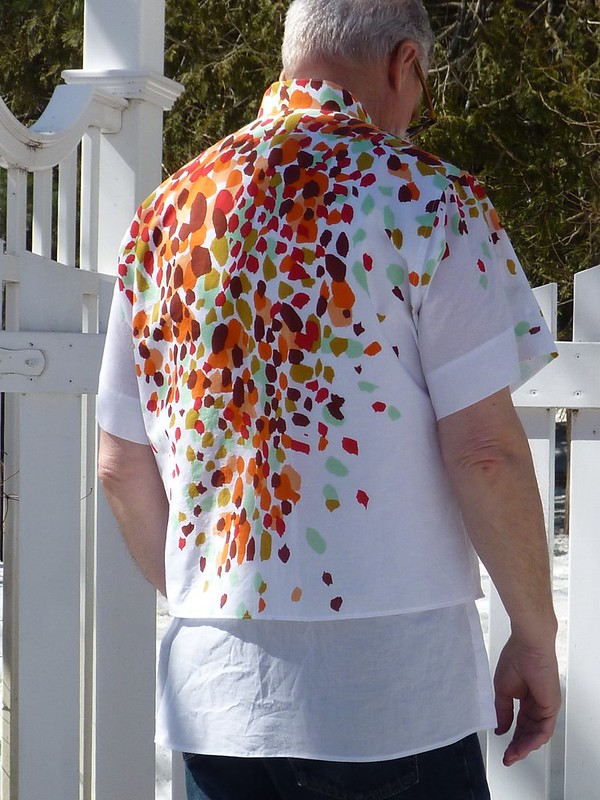
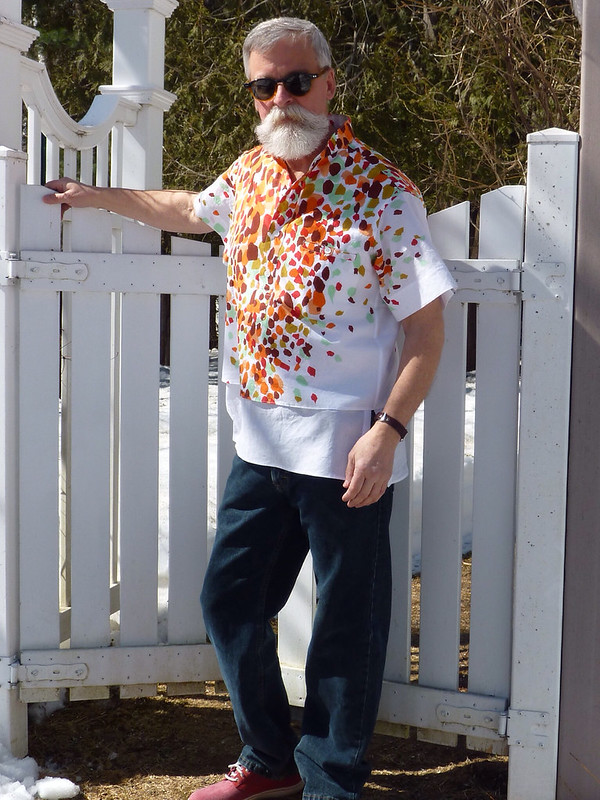
The "short over long" look, done up in a very lightweight cotton border print. Cotton lawn? Voile? I really don't know the difference. What I do know is that, as much as I love the colors and design, this fabric is a little too sheer for me to feel comfortable wearing. Therefore, I've made a double layer shirt.


I'll leave wearing see-through shirts to these guys!


I wish I'd taken a picture of this fabric before I started cutting it up. It must have been about 60" wide with the pattern clustered in repeating triangle shapes along one edge. In my usual cheapskate ways I only bought 2 yards, which gave me a little less than three repeats of the pattern. Of course, at the time, I wasn't thinking about making a double layer shirt; so I thought that 2 yards would be more than enough for a short sleeved shirt. I had to get very creative with the cutting, which is another way of saying that it took forever to cut this shirt out!


No way to match this bad boy, so I opted for a pullover style with a placket front. This is just the sleeve placket from David Page Coffin's Shirtmaking book on steroids. It's a great example of one skill leading to the next. If you can make a sleeve placket, you can make a placket front shirt of your own design. I went with a simple band collar out of necessity. There just wasn't enough fabric for a collar; and even if there was I think I'd still go for the band.


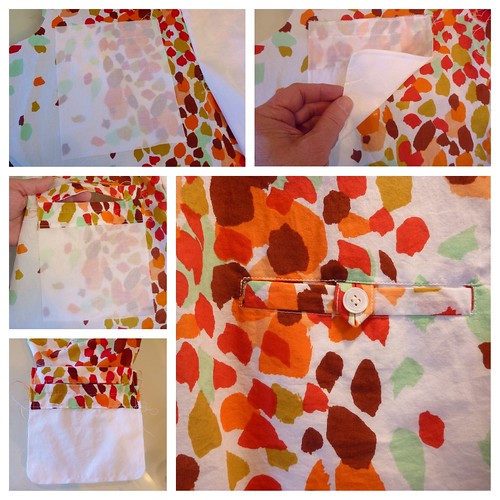
I do like a left chest pocket on my shirts. This is actually a hack of Roberto Cabrera's back welt pocket for trousers. It makes for a neat french seamed pocket, sandwiched between the two layers of the shirt. Well worth the time spent making it, plus it's just fun to do.


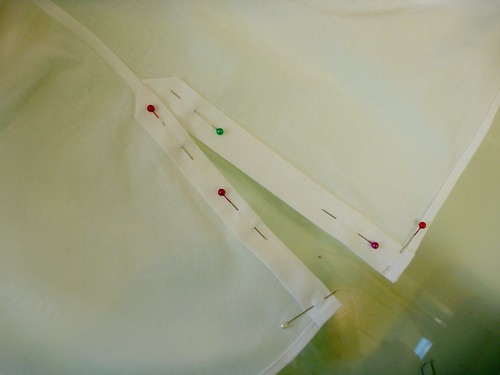
A slit at the side seams of the inner shirt is made by extending the seam allowances an additional 5/8". The extensions are pressed back and edgestitched in place.


A construction shot showing the extensions on the inner shirt. The sleeve and side seams (both layers) are french seamed.


Fabric -- cotton border print $7/ yd. From one of those incredibly cramped fabric stores in NYC

Interfacing -- Light Crisp sew-in from Fashion Sewing Supply

Buttons - Genuine shell from Fashion Sewing Supply. (Ooops, sold out!)


Ridiculously inexpensive and FUN summer beach shirt. I can't wait to wear it!


Wednesday, March 4, 2015

Time to Spring Forward!

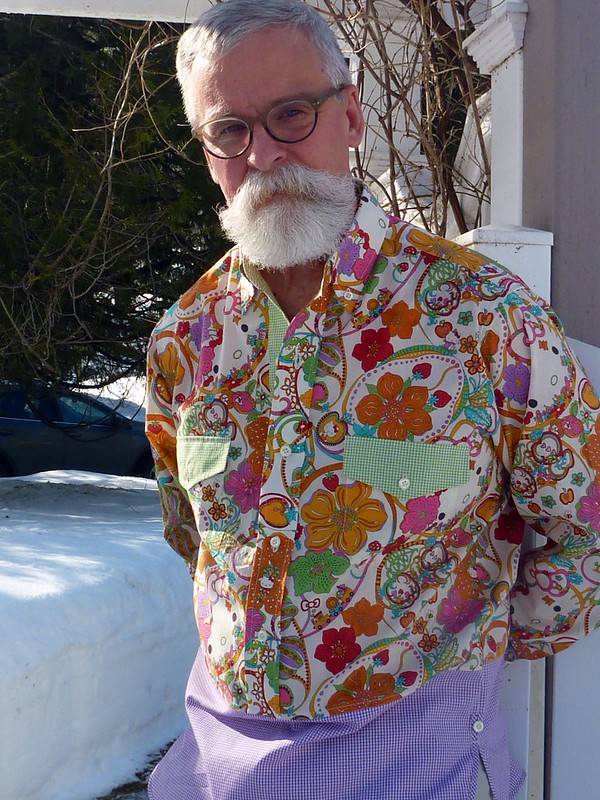
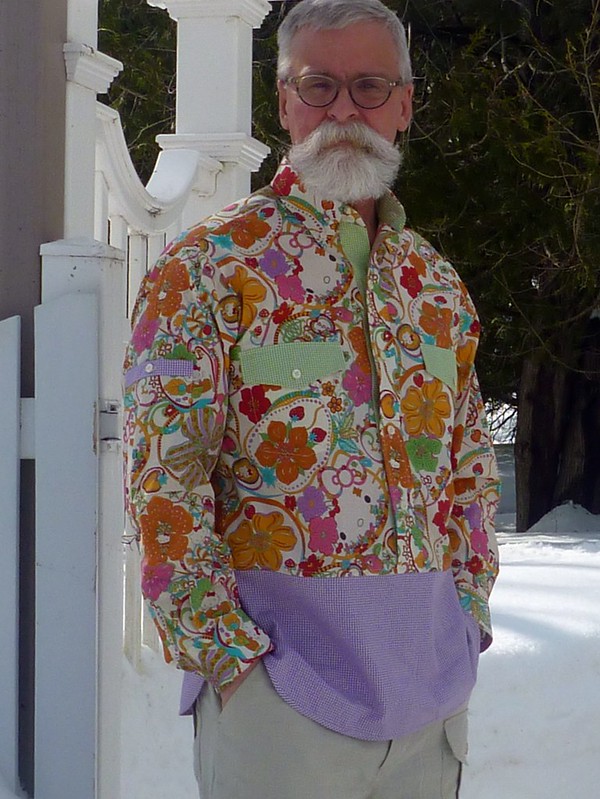
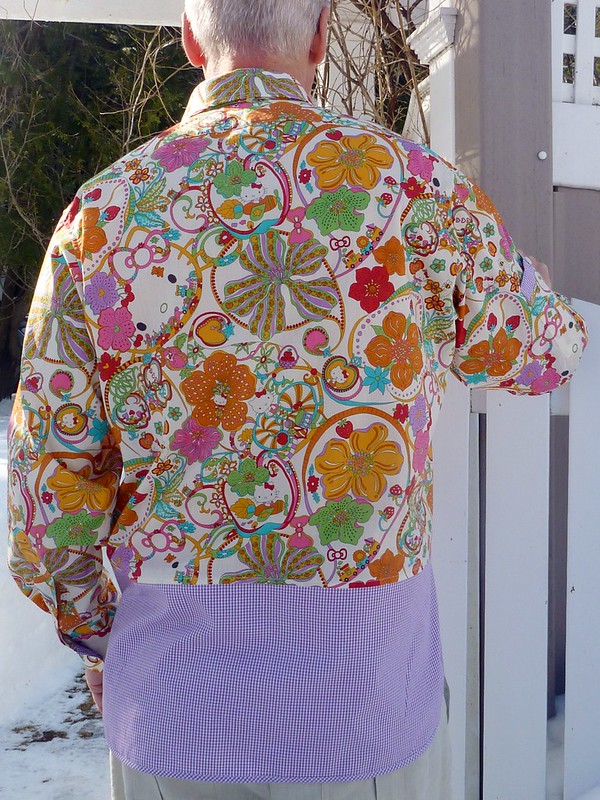
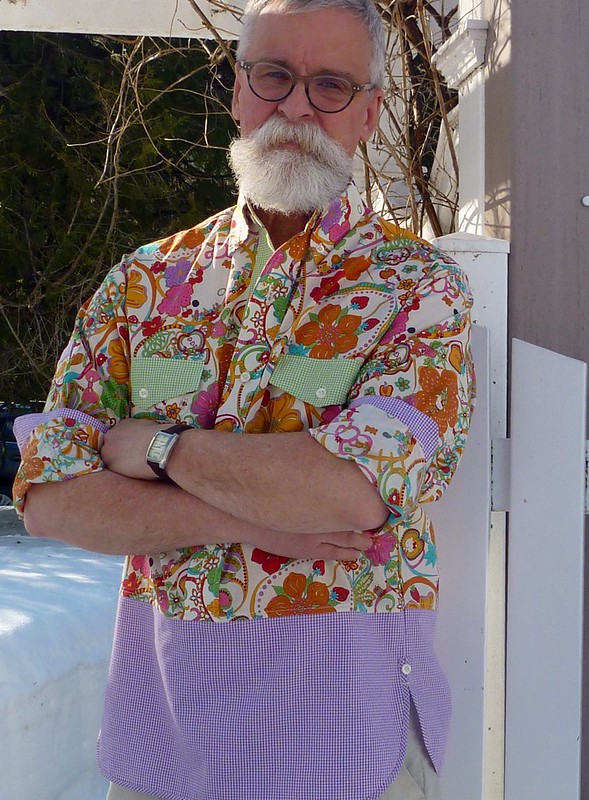
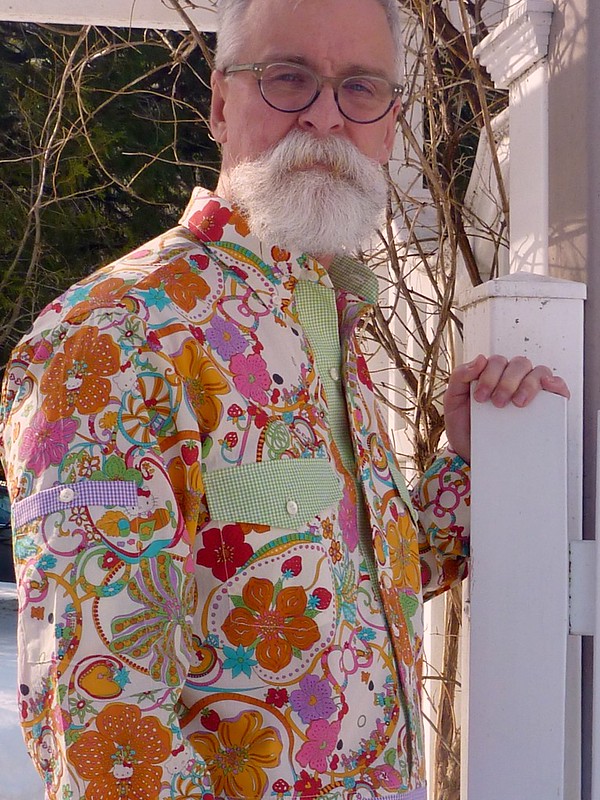
I'm ready to turn the clock ahead wearing my new Hello Kitty shirt.


Ignore all that snow in the background! Spring is right around the corner, and it really felt like it today.


Recap: Liberty of London tana lawn and coordinating gingham, in a hack of my TNT buttondown shirt pattern. The Liberty fabric was a gift from a reader. I truly hope that I did it justice for her. Personally, I feel like I'm putting on a party when I slip it over my head! What fun!


Sleeves rolled up to reveal the contrasting inner cuffs. A little button detail at the bias trimmed shirt tails.


Hello Kitty! Hello Spring! Actually, this shirt is so light I'll probably wear it right through summer. Unfortunately, it's still a little too cool, so back into the closet it goes. :(


I don't know about you, but I'm on a spring sewing roll. My next project is going to be a Junya Watanabe inspired spring jacket. I love all the details of these jackets from past seasons, and I've collected a variety of fabrics to make my own mash up of this look.


This promises to be a lot of fun; and as I promised myself, it involves RED and RIVETS (do you hear me Enrique???).


As always, I thank you for all the encouragement I receive here, and I wish you all happy sewing adventures!