Showing posts with label kiltmaking. Show all posts

Tuesday, February 6, 2018

Wedding #1, the recap

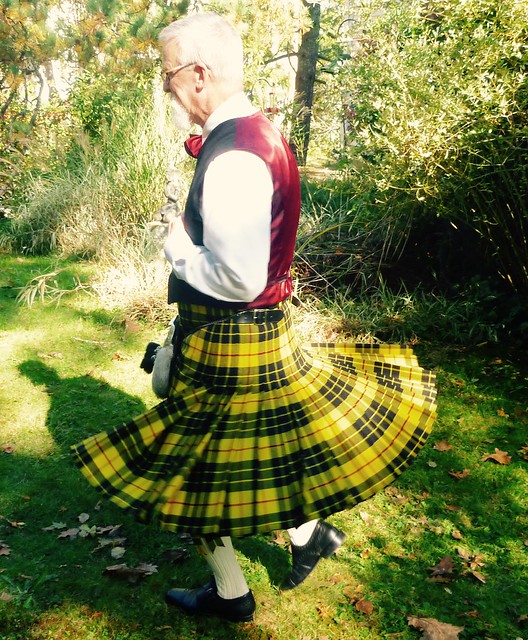
I realize that I never really wrapped up the kilt project(s). It all got a little overwhelming. Rather than blab on and on about the whole endeavor, I think I'll just let the wedding photographer's blog post illustrate what an extraordinary event two amazing young people, and their loving families, created on a farm in Maine.


http://iamsarahv.com/blog/weddings/william-allen-farm-maine-wedding-photographers-fall/


Having my son ask me to make a kilt (and the whole nine yards) was a huge honor. We're talking real once in a lifetime stuff. If there's anything my sewing journey has taught me, it's that there's value in the "realness" of the clothes that we create. Yes, there may be little mistakes here and there, something that could have turned out better, but in the end what we make is honest. And all those threads....not only the physical ones that are holding things together, but the emotional, spiritual, loving threads we spin, simply can't be had "off the rack".


Credits

Tartan fabric, Strathmore 11.5 oz, "Dress MacLeod". -- Irish Traditions, Annapolis, MD

Wool suiting and linings. -- AK Fabrics, NYC

Tuxedo satin and tailoring supplies. -- B Black and Sons

Pewter Prince Charlie buttons. -- Three Feathers Pewter , Millersburg, OH

Custom dress sporran. -- Artisans of Scotland

Kilt hose, Clan kilt pin and brooch. -- USA Kilts


One final twirl!

Wednesday, March 29, 2017

Kilt Update (long overdue)

I'm afraid this blog has really fallen by the wayside. The boat project has really taken over just about everything for the past few months. Because I don't have a barn or garage, I've been splitting the rent on an industrial space with an ex-coworker for over 4 years now. So there's a real economic incentive to be wrapping things up. Plus, my co-tenant is sending some subtle hints that he may want to emigrate and live an ex-pat life in Mexico! I'm trying not to panic, but it's feeling like crunch time. To speed things up I've turned a tiny bedroom in "this old house" into a painting and varnishing workshop. So, evenings when I would usually be working on a sewing project, I'm working on the boat instead. Trust me, this does not make me a happy camper.


So where did I leave off?


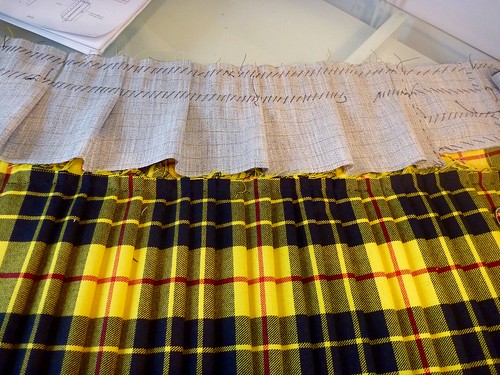
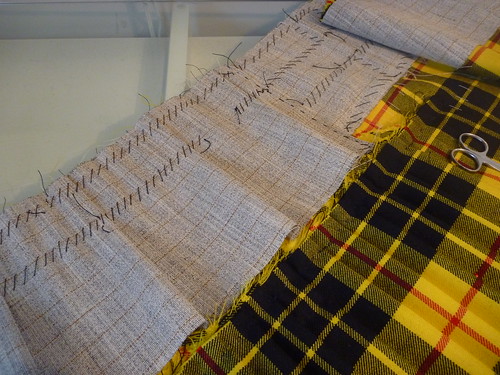
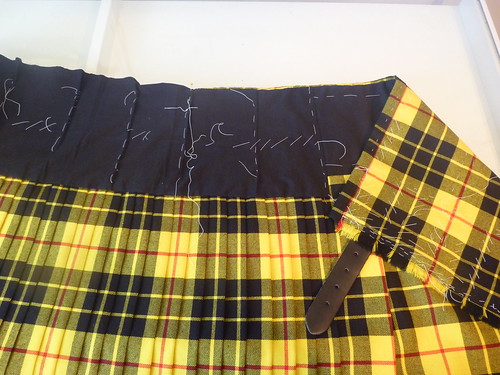
Oh, yeah.....A heavy weight hair canvas arrived from B. Black and Sons. Strips were sewn to the top portion of the kilt using a heavy carpet / buttonhole thread. A tailor's or diagonal stitch is used, the trick being to catch only a single layer of the tartan underneath so that none of the stitches show through on the right side of the kilt. It's surprising how one can develop a "feel" for it, especially this far into the whole process. I found using a very short needle worked the best for me.


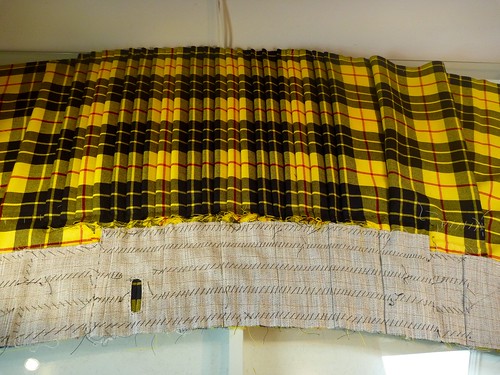
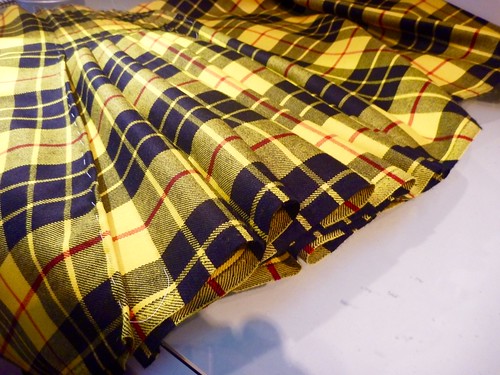
Pleats are formed in the canvas covering the pleated section of the kilt. This preserves the slight flair at the back. Nothing is really measured, it just intuitively happens as one is stitching along.


So here is the completed canvas all sewn into place. What looks very tedious was actually very soothing and relaxing to do. It went remarkably fast. It also helps that I enjoy handsewing.


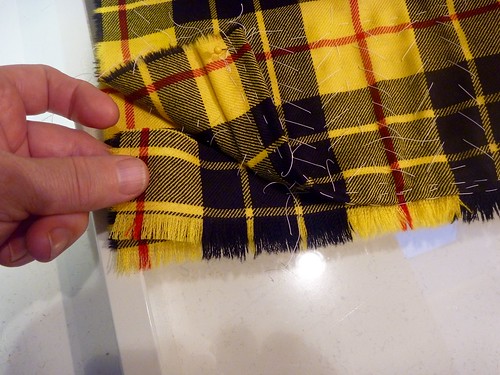
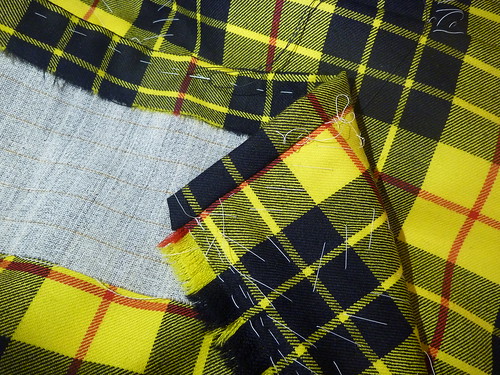
The fringe at the edge of the upper apron is actually double thickness. I undid just a bit for this picture to show how a narrow fringed strip (maybe 1.5 inches wide) is sandwiched into the side seam. Offsetting the layers slightly gives a more full appearance.


The only machine stitching on the kilt is the attachment of the narrow waistband (and even this can be handsewn if one wishes). The waistband will only match on the front apron of the kilt, and a walking foot would be a big help. I'm definitely going to look into getting one for my Magnolia. Even with basting, my matching isn't as perfect as it should be. Have I mentioned how obsessive this kiltmaking biz is???


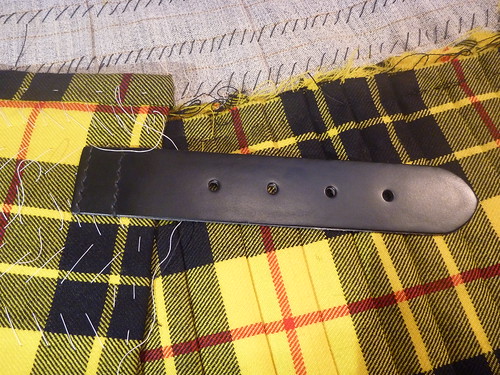
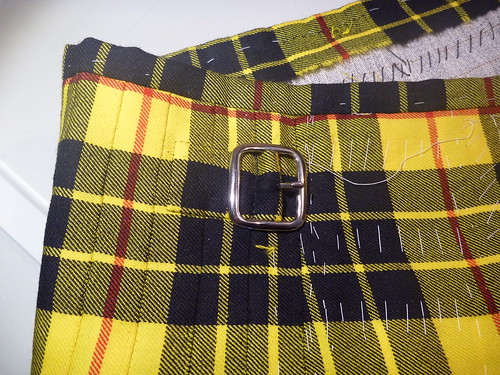
The buckles and leather straps are easily found online. These leather straps came all pre-punched, so sewing them on was a breeze. Making the tartan tabs for the buckles is a bit trickier, the goal being to make them as inconspicuous as possible. In the end the buckle tab gets covered by the leather strap, so go figure! Just more obsessive kiltmaking behavior.


The home stretch! A cotton broadcloth lining is basted and then handsewn over the canvas. Once again small pleats are worked into the back to preserve the shaping of the kilt.


Time to give it a good pressing and remove what seems like miles of white cotton basting thread. I'll try to model the completed kilt soon. Be well....and be sewing more than me!


Tuesday, January 24, 2017

Kilt update -- I'm steeking!

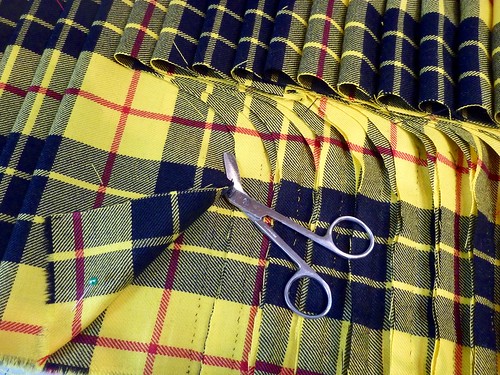
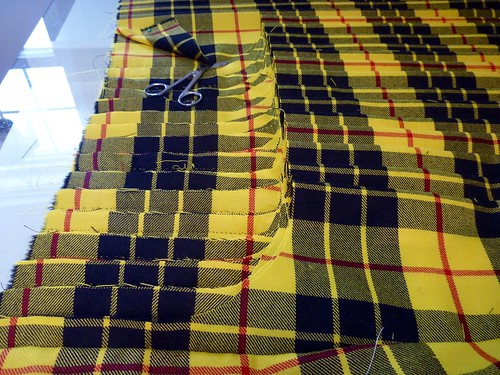
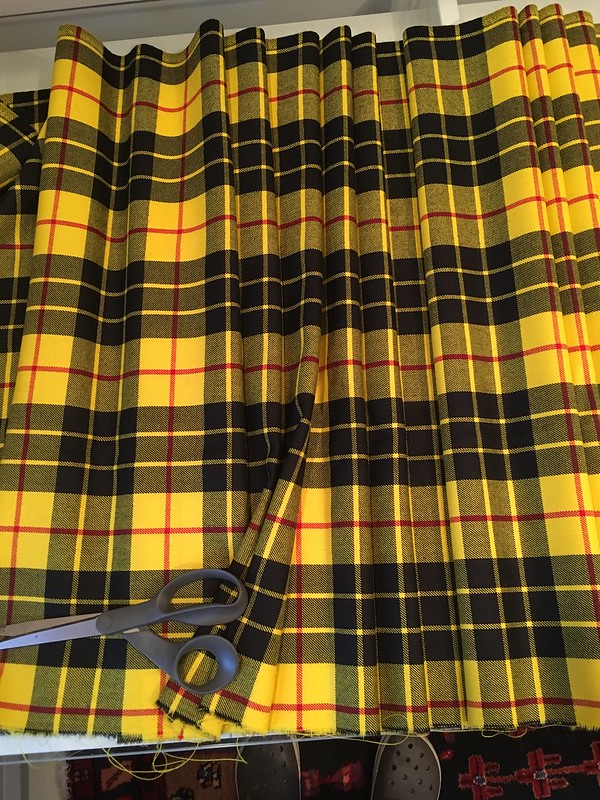
The next step is cutting out the excess fabric from behind the pleats. The book I'm using emphasizes that this is no place to screw up. One slip of the scissors is all it takes to make an unfixable mess. For me that means the most expensive wadder ever!


Based on the way the pleats are formed, just a single layer of fabric is removed at a time. I used my trusty bandage scissors.


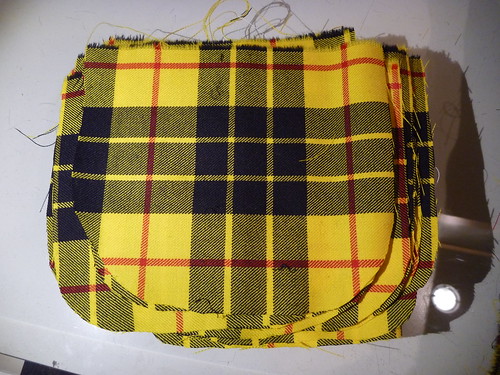
I ended up with a nice little stack of scraps. Some of these will be used as beltloops and buckle straps. The rest might end up as elbow patches some day. :).


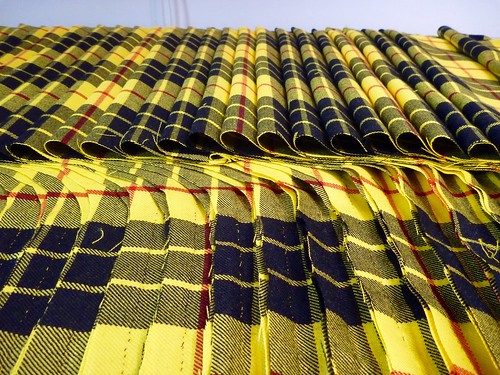
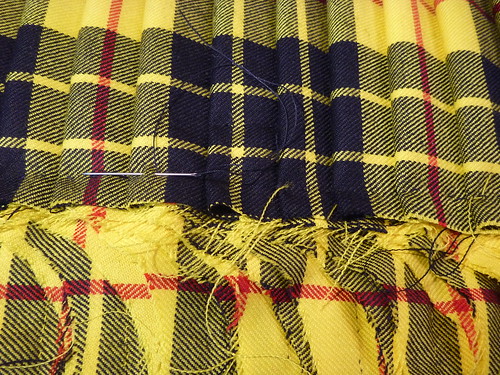
The tops of the pleats are secured in a process called steeking. Using a heavy carpet thread, a line of stitching is worked across the top of the pleats from the back of the kilt. This stabilizes the pleats and helps prevent the stitching from ripping out.


It's hard to see the steeking because my thread is black. The trick here is to sew through as many layers as possible without going through the front of the kilt. Even if a single thread is caught on the outer layer of fabric a dimple will form. I ended up with 2 dimples, had to go back, rip out a few stitches and restitch.


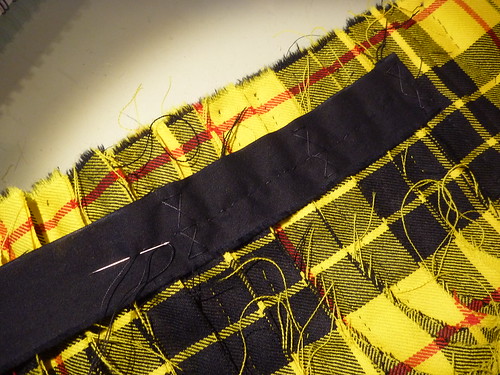
Next, a waist stay is sewn in over the pleats. This is a selvedge strip of cotton broadcloth. Like the steeking, all the stitches are worked from the wrong side of the kilt. "X's" are worked in at every third pleat. Because it's at the edge of the kilt, it's much easier to keep flipping the work over to check for dimples or stitches that show.


That's as far as I can go right now. The next step requires a heavy hair canvas which I can't find locally. B Black and Sons to the rescue! Once my order arrives I'll be back in business. In the meantime there's always a boat to build.


Wednesday, January 18, 2017

Pleat On!


I think the scariest part about making a kilt is that it's just based on 3 measurements that someone else has taken. You have to give up every shred of control and place your faith in someone that you hope is taking the job seriously. That's hard for a control freak like me. I had my son, who has NO sewing experience whatsoever, measure me. Then, unbeknownst to him, I had my very OCD friend David do it. If you've got that kind of friend in your life I highly recommend it, purely for the peace of mind! In the end their measurements were almost identical. David gave me an extra 1/2" of length, and I'm taking it. I'd rather have a little extra length than end up with a plaid miniskirt.


So that's it....no pattern, no muslin, no dry run. Three measurements.


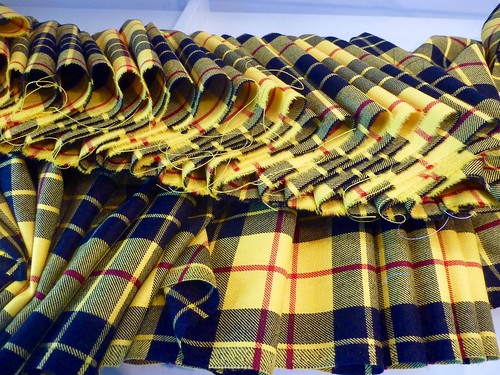
The book I'm using is unapologetically traditional in its methods. Everything is marked with chalk. That might be fine for an experienced kilt maker, but I found myself handling my fabric so much that my marks were quickly wiped away. As a result I misplaced my first pleat! Not a great start. So I resorted to more reliable techniques. I remarked all the pleat spacing with Wonder Clips and triple checked myself. (Any mistake is almost unfixable). Then I popped in a tailor tack at each clip. No more lost chalk marks. I also thread traced the edges of the overlapping fronts (the "aprons" in kilt speak).


You can see a few of the clips in the above picture. This is 5 yards of fabric that's perpetually sliding back and forth on the table.


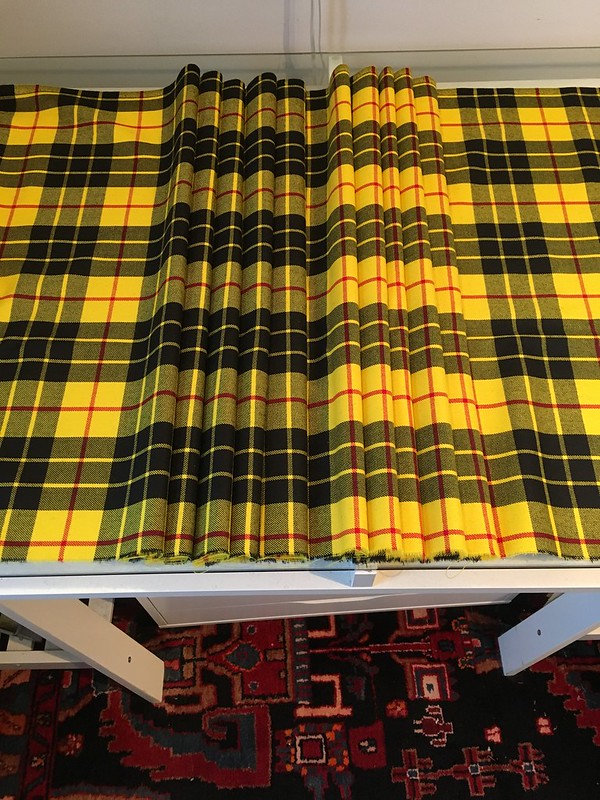
My kilt will have 22 pleats across the back. The set of three black blocks is centered on the front of the kilt, so it should also be centered on the back. That took a bit of trial and error but I eventually got there. Each pleat is 1" at the hip (the "fell" in kilt speak) and tapers to 7/8" at the waist. The amount of taper is determined by the difference between the hip and waist measurement. Mine is minimal since I have a flat buttock and the waist is measured 2" above a person's natural waist.


I'm sorry I don't have more detailed photos of the pleating process. There's a certain rhythm to the sequence. In short, the next pleat has to be formed and held in place before stitching the pleat one's currently working on. This is all to be accomplished by pinching the pleats with the left hand and stretching the fabric over one's thigh. With the fabric stretched the pleat is hand sewn with small invisible edge stitches. Somehow everything is supposed to end up perfectly straight and aligned. IN MY DREAMS!


I quickly realized that I would have to make a hundred kilts before I could master this technique. Anyone who's followed this blog knows that I'm a baste-o-holic, so I posed a question about basting on "X Marks the Scot". Stand back! This set off a small firestorm between the traditionalists and the more modern kiltmakers. After the dust settled I pretty much ignored all their advice and proceeded to baste all my pleats. In the end it's all about what works, right?


Even with all my basting, sewing the pleats accurately was no small feat. The horizontal red stripe was particularly difficult to keep aligned. There's definitely a knack to it. Maybe on my hundredth pleat I might have it down. Sometimes you just have to say it's "good enough for a first kilt".


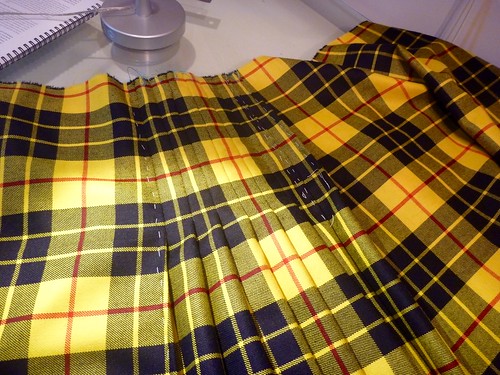
So here is the completed back, pleated to the sett, with all the pleats basted into place. A good place to take a break and read up on the next step.


Wednesday, January 11, 2017

Kilt -- Baby Steps

So I've officially taken the plunge.


This will be my guide. I think it's safe to say that this book is considered the bible of kiltmaking. It's a little on the daunting side. The book opens with a series of color plates showing "good kilt" next to "bad kilt". Good kilt length / bad kilt, too short . Good stitching, invisible / bad kilt, stitches too large. Good kilt, stripes straight / bad kilt, stripes wandering. It's hard not to feel defeated before even starting! This lady sets the bar high.

In addition to this book I've also joined an online forum called "X Marks the Scot". Barbara Tewksbury, author of the book, actively participates in the forum. I've already posted several questions and she has chimed in on all of them, sometimes at great length. I've appreciated both her expertise and willingness to explain things in a supportive way. That doesn't always happen in online forums, where some members love nothing more than to pontificate on and on, and never answer the question.


But, I'm getting ahead of myself.


I spent days playing around with possible pleating styles. Yes, days! Without going too deep into the weeds, there are two types of pleating. Pleating "to the stripe" (also called military pleating), and pleating "to the sett" (in which the tartan is reproduced in the pleats). In military pleating the same stripe is centered in the pleats worked across the back of the kilt. My tartan is one of the more simple weaves, made up of only 3 colors. There are really only two possibilities for pleating to the stripe IMO. The yellow stripe centered between the black squares, and the red stripe through the yellow. I sort of approximated them in the photo above.


In the end I rejected both of them. Pleating to the yellow stripe created a very somber, to my eye "muddy", look. It took on almost a greenish cast.


However, it would have produced bright flashes of color when the pleats moved. Lots of drama, but a little too risky for a first (and most likely the only) kilt I will ever make for myself.


Pleating to the red stripe created a very golden yellow kilt. Pretty, but would I love it forever? These are the kinds of quandaries that can keep a man up at night, especially considering the cost of the materials and the amount of labor involved.


In the end I decided that pleating to the sett was the way to go. The pleats in the back will reproduce the tartan, giving the kilt the same appearance all the way around. In other words, I'm taking the safe route.


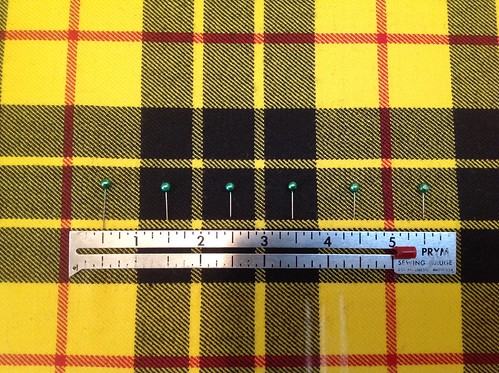
Here I've broken the weave down into the sections that will become the pleats. Each pleat will be 1" wide with a stripe or color border centered in each pleat.


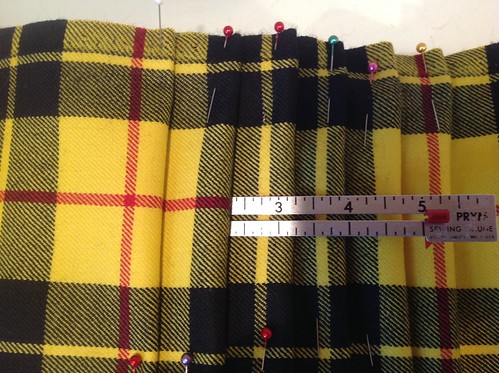
Here I've pinned the pleats into place. The sett of my tartan is actually quite small. Each total repeat of the plaid is only 5". Why does this matter? It makes the depth of each pleat quite shallow. That would be fine if I had a limited amount of fabric to work with, but I have "the whole nine yards!" I definitely don't want a skimpy kilt, so I've decided that each pleat will encorporate two whole repeats of the tartan. Yet another decision that kept me awake at night!


Days of deliberation and not one stitch made! Next time I hope to have made some real progress.

Tuesday, January 3, 2017

Sewing Bigly in 2017!

Sorry, I couldn't resist. Clearly, we're sailing into uncharted waters as a nation, but my goals for the coming year are crystal clear.


My son will be getting married in October, and get this.....he's asked the old man to make him a kilt! I am deeply touched and honored beyond belief, but at the same time scared to death. Maybe you remember that this has been on my sewing bucket list for about 3 years now.


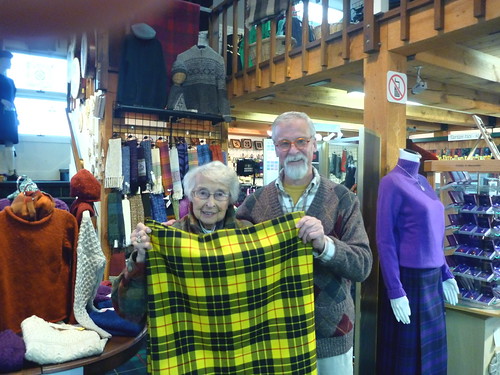
Here I was picking up my tartan, the "Loud MacLeod", with my mom at Scotland by the Yard in Quechee, Vermont. It's been on mothballs ever since! My plan is to make myself a kilt first, (read: make all the mistakes on mine), then tackle his.


I have this Folkwear pattern, but won't be using it for the kilt. There is, in fact, no "pattern" for a kilt. A kilt is totally made based on the wearer's measurements and the amount and sett (repeat) of the tartan. It's a little overwhelming. I will use the pattern for the Prince Charlie jacket and vest.


So here's to the New Year! My year of SWAP, sewing with a purpose.


My goal.....


Two 8 yard kilts

Two Prince Charlie (or maybe Argyle) jackets

Two vests

A Glengarry cap for me


Oh, and something snazzy to wear for the rehearsal dinner I'm hosting. Time to roll out the tartan!


I also promise to never utter the word "bigly" again!


Sunday, January 27, 2013

Trying to be productive

I live in New England, and I shouldn't complain, but damn it's been miserably cold lately. So it's been a good time to stay in and work on a project.

The kilt is temporarily on hold. As suggested by one of my readers, Craig Thomas, I purchased the book The Art of Kiltmaking by Barbara Tewksbury and Elsi Stuehmeyer. I have so much invested in fabric that it seemed foolish not to have the ultimate kiltmaking guide, which it most certainly is. I'll use the Folkwear pattern to make the jacket and vest sometime down the road.


Before I even consider starting the kilt project it's clear that I need a really GOOD set of measurements taken. A kilt sits higher than most men wear their pants and should come just to the top of the knee cap. Nothing's worse than a grown man in what looks like a naughty catholic schoolgirl in a plaid mini-skirt! Good measurements are crucial to the whole endeavor and hopefully they can be taken within the next week. While I'm at it, I'm also hoping my measuring buddy, who is recovering from the flu, will be willing to take a full set of measurements as outlined in Lori Knowles book The Practical Guide to Patternmaking for Fashion Designers -- Menswear. One of my sewing goals this year is to draft both upper and lower slopers. At some point I'd like to be drafting my own patterns. Hey, a guy has to have a dream, right?

So, while the kilt is somewhat dead in the water, I've decided to work on a muslin for a spring jacket.


This is my inspiration, which is from Brioni's spring 2013 collection. I thought lapel-less jackets were ridiculous until I saw this. Is is the color? the tailored shorts? the beard? The hat? Who knows, I'm totally loving the look. It's casual and age appropriate for me. It also looks pretty easy to make. The only details are patch pockets and some top stitching.


In order to replicate this look I'm going to be riffing off this vintage Bill Blass pattern, which shows up on eBay and Etsy frequently. Mine looks like it has never been taken out of the envelope. Maybe the initial purchaser took one look at the 12 pages of instructions and went running!

Menswear is relatively static, sort of a "theme and variations" world. Features get added or subtracted from season to season, but underneath it all there are just a few basic designs. This three piece suit strikes me as a great basic pattern.


The lapel width is reasonable and there are darts in the front to add shaping. It also features a double back vent and sleeve vents.


A pretty classic silhoutte that could easily be worn today. My plan is to chop off the lapels at the roll line and "voila!", Bill Blass 1980's? turns into Brioni 2013. So, on to the muslin.


I'm using a set of lightweight canvas tab top curtains that I picked up at Goodwill for $6. The construction is very straight forward. So far I'm finding that there's a lot to like about this pattern. The front darts add some nice shaping, which is further enhanced by the shaped side seams. This coat should nip in at the waist just like the Brioni.


There's just the right amount of easing at the shoulder seam. This helps shape the upper back and shoulder area of the jacket.


The amount of easing at the sleeve cap is reasonable. Sometimes there's just too much fabric. Not so here. With shoulder pads and sleeve heads the dimples should press out nicely.

I lopped off the lapels so that the roll line will become the finished edge of the jacket. The front facing was cut to match and I fashioned a back neck facing. As I work along I'm anticipating that the sleeves will be too long and that I'll want to shorten the body of the jacket. Next time I'll model the muslin and we'll see if I'm right.

It feels good to be working on a project again!
Monday, January 7, 2013

A winter's project -- The Kilt

Happy New Year, readers. I know it's been awhile since I've posted on here, but small things HAVE been taking place. Unfortunately, none of them involve any actual sewing.

Today I'm letting the cat out of the bag and announcing that my winter's project will be making an authentic Scottish kilt. So where to begin?


Several months ago I ordered Folkwear's #152, Scottish kilts. The pattern includes a history of kilts, and the tissue to make a man's Prince Charlie jacket, or coatee for those perfectionists among us. There are also instructions for knitting argyle socks (No Way!) and a sheet outlining the process for making a kilt. There is no physical pattern for a kilt. It's essentially a rectangle of fabric pleated to fit the wearer's measurements.

Emboldened and armed with this pattern I went in search of my tartan.


My search ultimately brought me here.... to the incredible Scotland by the Yard in beautiful Quechee, Vermont!


This store is a shopper's paradise for all things Scottish and Irish.


Need a wool scarf in your tartan? I'll take one of each!


Or maybe you need a new sporran to hold your wallet and cell phone? Check out the skunk fur one at the top center. LOVE!!!

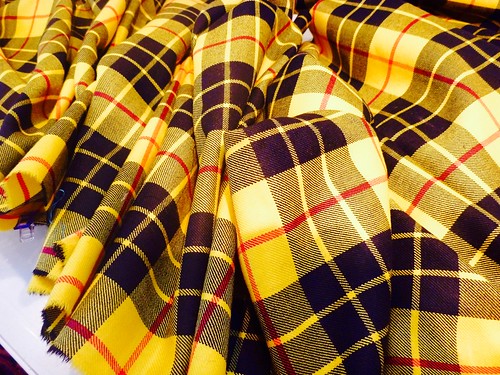
Once I stopped drooling over everything in the store I got down to ordering my tartan fabric. Georgia, the owner, pulled out a massive swatchbook of tartans and quickly thumbed to my family's dress tartan. This woman really knows her tartans and is a wonderful resource. She showed me the different weights available and I settled on an 11 oz fabric. It's the same weight as the ready made kilts sold in her shop, and it seemed acceptable to me.

The typical kilt takes 8 yards. Because the fabric is 60" wide only 4 yards is required. The length of tartan is cut down the middle to make 2 long strips. The two selvedges become the bottom hem of the kilt. I ordered 5 yards because I'd also like to have a matching fly, which is a large tartan sash worn over the shoulder, trailing down the back of the jacket. Hey, I'm only going this way once. Right?

4 weeks later I received a phone call that my fabric had arrived, and back to Vermont I went.


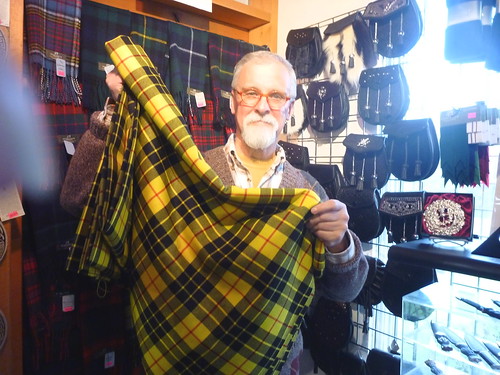
Here is Georgia, of Scotland by the Yard, presenting me with my dress tartan. 100% wool, the real deal from Strathmore Woollen Co., Forfar, Scotland. All you tartan aficionados will be able to figure out my last name now! Have fun with that.


The color here is really off because of a fluorescent light, but here I am with my 88 year old mom. She lives in a retirement community in NH and doesn't get out much. This was such a great field trip for her, she was like a kid in candy store.


Come to think of it, so was I!