Showing posts with label twill tape. Show all posts

Wednesday, January 20, 2016

The Athleisure Jacket

I've really got the Athleisure bug, so I immediately launched into a jacket to go with my new sweatpants. I'm using the black and gray "birchbark" looking knit. I'm hoping the combination will be Armani-esque. One can always dream!


This is the pattern I used for my "Phony Missoni" jackets of last year. This time around I'm going to try the shawl collar version. (The illustration kills me!). Because this fabric is super wide, 72 inches, I only ordered 2 yards. Talk about cutting it close. I was just barely able to eek it out.


There is some serious Snug Hug usage going on with this jacket. Here a strip is sewn into the shoulder seams to prevent stretching. It works like a charm.


The seam allowance edges are covered with cotton bias binding. When the seams are pressed open the Snug Hug is completely hidden. I used this process on the shoulder seams and the side seams.
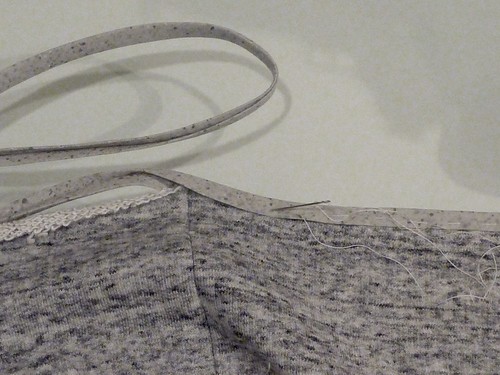


In places where the binding will be especially visible, namely the hem and front facings, I baste it in place before edgestitching. The thickness of the fabric combined with the loopy back made this necessary. Otherwise, I ended up edgestitching into air. Maybe you've been there too?
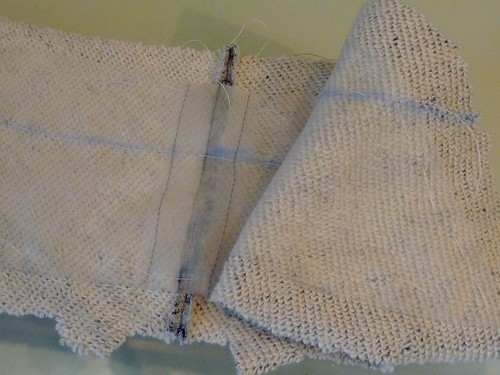


This is a little hard to see, but I interfaced the undercollar with silk organza. A little voice was saying, "what would Laura Mae do?
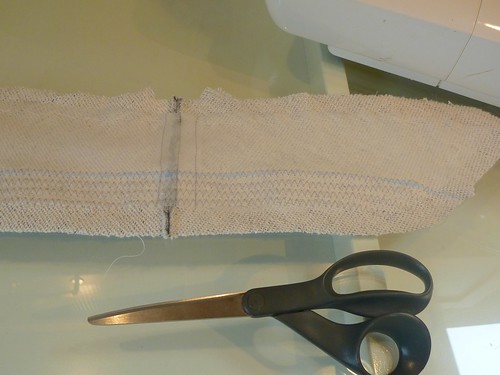


Rows of zig zagging along the foldline help create a little more structure.
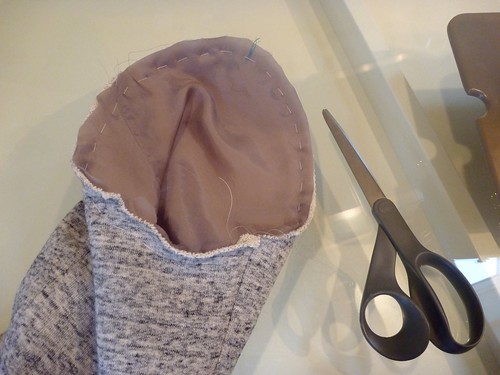


The sleeves are lined with rayon bemberg to make the jacket slip on easily. Otherwise, it's completely unlined.


The world's worst buttonhole. This simply won't do!


Break out the silk organza and Laura Mae's bound buttonhole tutorial! The BEST!


Lastly, the collar and front facings are understitched to help help keep them from rolling out. Below the button the seam allowances are stitched to the facing. Above the button it's reversed, and the lapel / collar seam allowances are stitched to the jacket front and under collar. Sounds confusing, but it becomes obvious when you're doing it.


Next time, the Athleisure reveal. (Arctic Blast reveal may be more like it!).


Wednesday, June 25, 2014

Completing the Jacket Fronts...Tailoring nerds rejoice!

I know that many of you enjoy seeing the tailoring process, so this post's for you! For some, this may look like torture, but I actually enjoy all this hand work. Maybe you do too. It may look complicated, but in reality it's pretty basic stuff. There's a real sense of constructing something as I work through these steps. Tailoring a jacket or building a boat, it's all the same in a way. One little step at a time.


With the canvas basted to the jacket fronts, I move on to pad stitching the lapels. Working parallel to the roll line, small diagonal stitches are worked up and down along the lapel. This job is made infinitely easier with silk thread, and I can't recommend it highly enough. Why? Because it's virtually tangle free in addition to being incredibly strong. I run the thread once through beeswax and stitch away. This is a labor intensive step, so if something as simple as silk thread can make it go easier and faster, I'm all for it.


The stitch should be very small, just catching the fashion fabric under the canvas. Roberto Cabrera says it should just be a "pinprick". That would take more skill than I have. My stitches are clearly larger than that. The underside of the lapel will be peppered with tiny stitches, none of which will be visible in the finished jacket, so I'm not going to agonize over the size of my stitches.


The next step is kind of hard to describe and harder to photograph. After pad stitching about 1 1/2" from the roll line, the work is turned around and the lapel is folded back into the position that it will ultimately take on the finished jacket. Holding the lapel back, the pad stitching continues in rows until the whole lapel is covered. This step puts a permanent curve on the lapel and will make it want to hug the chest when the jacket's worn.


Here you can see all the little stitches on what will be the backside of the lapel. (Bigger than pinpricks I'm afraid!) The shadow hopefully shows how the pad stitching has built a curve into the lapel.

Here the lapel is lifting up off my glass top work table. This always amazes me! The next step is taping the edges of the jacket and the roll line.


The seam allowance of the canvas is very carefully trimmed off prior to taping. The tape is a 3/8" cotton twill tape that has been soaked in cold water to preshrink it. Starting at the neckline the tape is basted along the lapel edges, down the jacket front and across the hem. Tape is also basted over the top 2/3rd's of the roll line.


The tape over the roll line is cross stitched into place. The stitches should be at the outer edges of the tape. Again, silk thread will make this much easier.


The rest of the tape is slip stitched to the canvas on one side, and to the fashion fabric on the other.


This completes the jacket fronts. Next I'll tackle the sleeves.


Sunday, February 24, 2013

Sit by a window, listen to some music....stitch

The next step in the process is to tape the edges of the jacket and reinforce the vents. It's all about handsewing, which I happen to enjoy, probably more than I'm supposed to. I find it very enjoyable. Not only is it satisfying, I also love the fact that I'm participating in an activity, a tradition, with a long history. While I stitch away I fantasize about working in a great atelier, perhaps making a coat for royalty! Fantasy aside, I like to sit by a window, watch the snow fall and listen to some music. My current soundtrack is The Weepies. Love them!


The canvas is oversized so any excess canvas is trimmed away after the fronts have been basted. The seam allowance is then marked on the canvas and very carefully trimmed away. This step always makes me nervous because one risks inadvertantly clipping the jacket fabric. As Cabrera says frequently in his book, "give this step your full attention". The alternative is complete ruin.


The twill tape should be soaked in cool water, dried and pressed before using. Starting at the neck, the tape is basted along the seamline through all layers.


At the break, the tape is cut almost to the edge and a small wedge is clipped out. This insures that the tape will lay flat when the "corner" is turned. The tape runs down the jacket front and then along the hemline.


Now that it's all basted into position, the edges of the tape are slipstitched to the canvas on one side, and into the fashion fabric on the other. None of these stitches should be visible from the right side of the jacket. Put on some music that you love and enjoy the process!


So here is the tape all sewn into position.


Lastly, a crossgrain strip of pocketing is slipstitched at the edge of the vent. Again, these stitches should not be visible from the right side of the jacket. This completes the work on the jacket fronts, and they are ready for the front facing.


At this point the body of the jacket can be assembled, and there's a sudden feeling of huge amounts of progress being made.


Go to your stash (I know you have one!) and cut a strip of "semi-bias" lining. This strip is basted to the front shoulder as a reinforcement. Note how the canvas has been peeled back.


The back shoulder seam is wider and will need to be eased. In this picture you can see how it ripples.


Steam press the wrinkles out, extending the tip of the iron only an inch beyond the seam line. Now stitch the shoulder seams. Pressing out the wrinkles makes this seam so much easier to sew.


Press the shoulder seam over a tailor's ham which will help preserve the shape. Now simply attach the back to the fronts. I like to stitch down to the waistline, remove the piece, and then stitch up from the hem to meet my stitching at the waistline. Thank you Edna Bishop for this tip, which helps prevent distortion of the garment.


So here's where I am so far. The jacket body from the front.


Jacket from the back.

Now it's on to the sleeves and even more tailoring geekery! As always, I hope you are finding this informative.

Thursday, April 14, 2011

When UPS delivers great stuff


Thank God for the internet!  Living here on the coast of Maine isn't ideal when I'm looking for real tailoring supplies.  I occasionally get to NYC, but even then can't always find what I need.  When I picked up the "guts" of my sport coat at Steinlauf and Stoller, they only had one choice for undercollar melton.  It was navy blue and already fused to French canvas.  I passed.

 A Google search led me to B. Black and Sons, in LA.  These guys don't do quilts!  They were extremely helpful.  My goodies arrived yesterday.  Wool blend undercollar felt in gray and  dark olive, 100 yards of 3/8" white cotton twill tape and a box of real tailors chalks, in colors no less!  I can't wait to try it all out.