Showing posts with label watanabe style jacket. Show all posts

Tuesday, July 5, 2016

New Summer Shirts


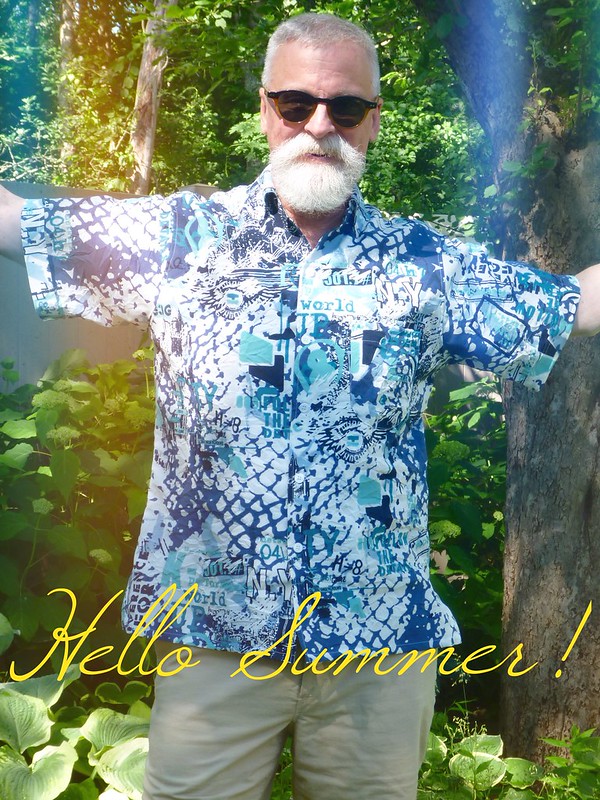
What's better than a new shirt for summer??? Two new shirts!


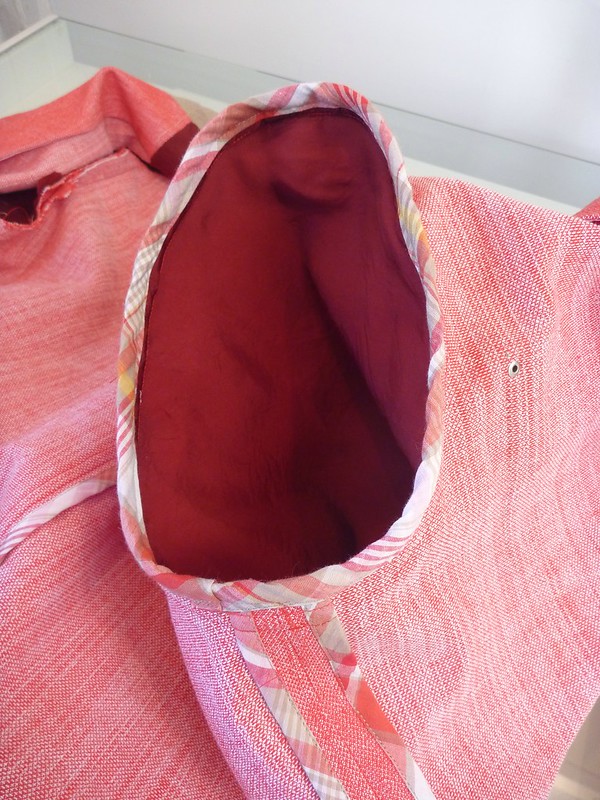
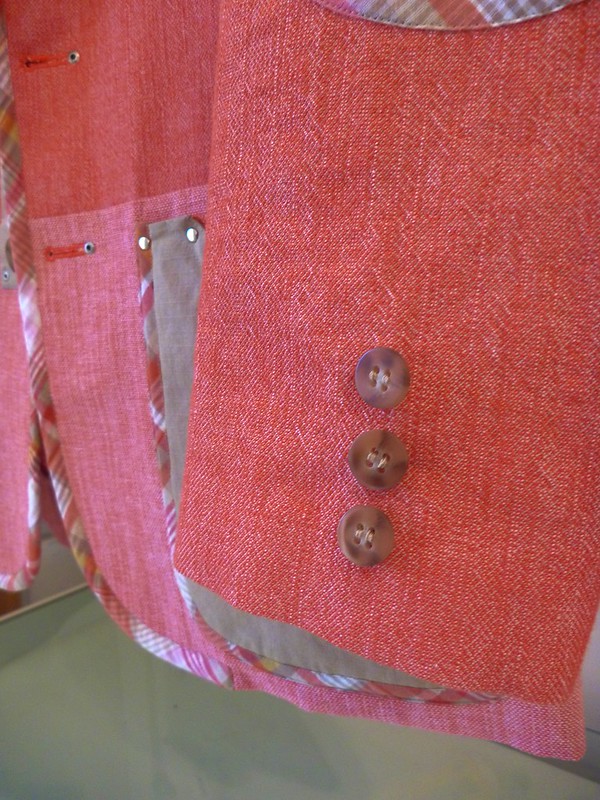
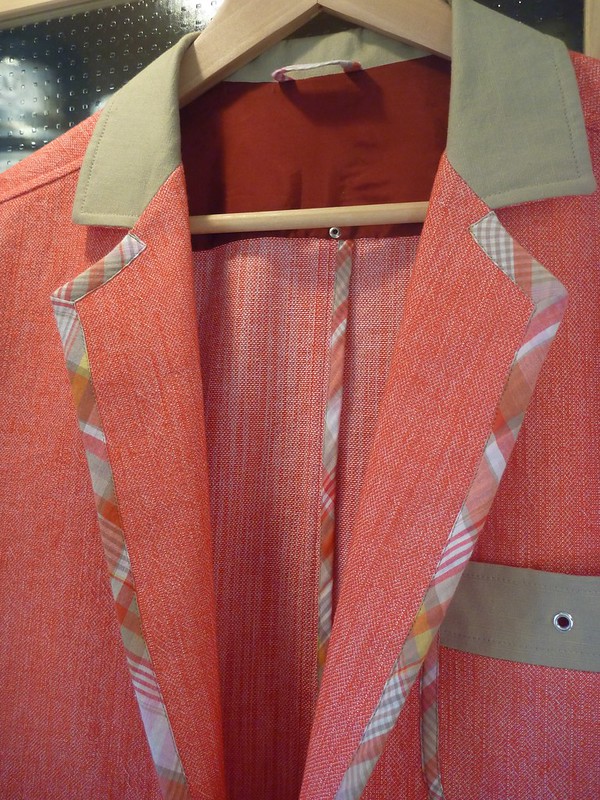
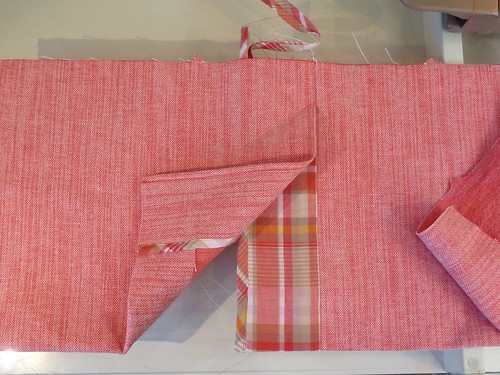
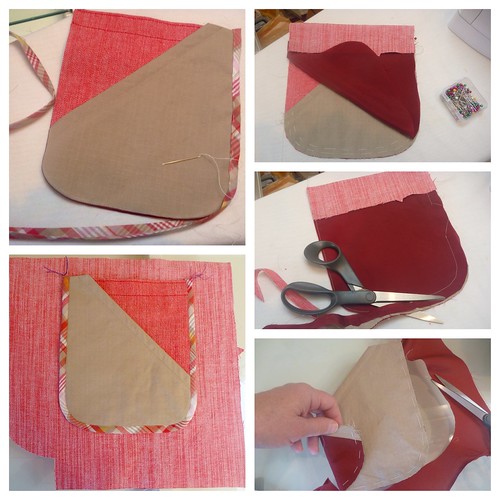
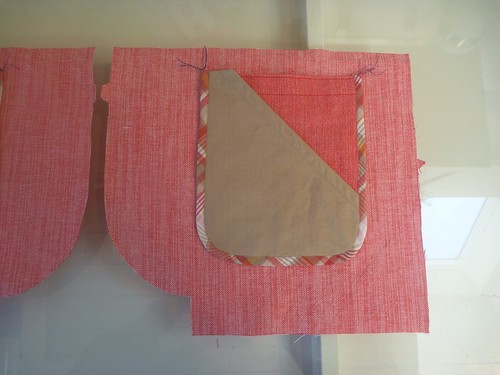
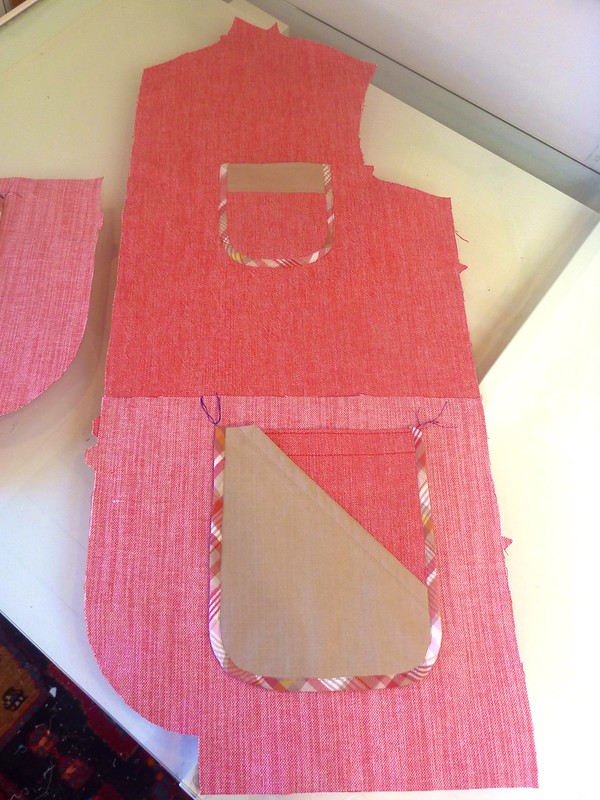
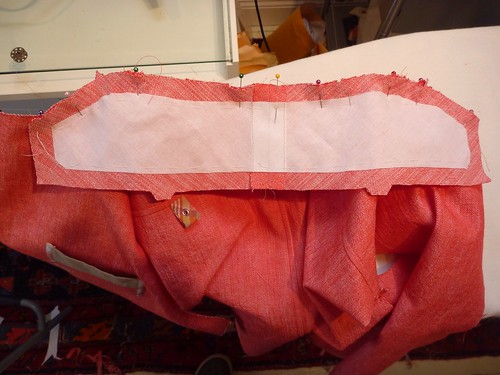
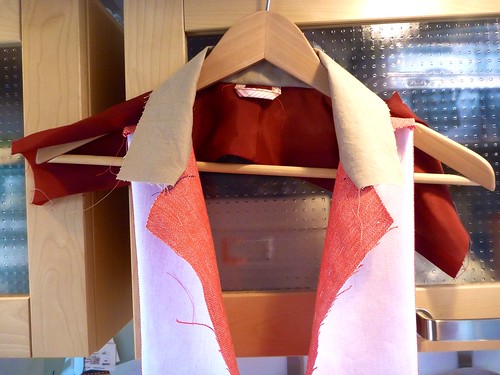
I made just a couple little adjustments to my vintage pattern. I always need a sloped shoulder adjustment (top pic), and I also added a slight curve to the upper back (lower pic). I also cut the undercollar and the collar interfacing on the bias. I think that helps a camp collar fit a little better. Oh, and I added some extra fabric at the lower sides to allow for some small side slits.

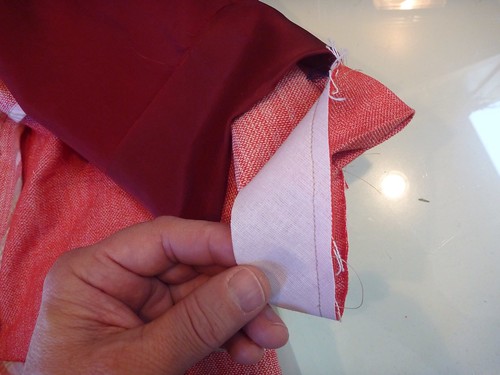
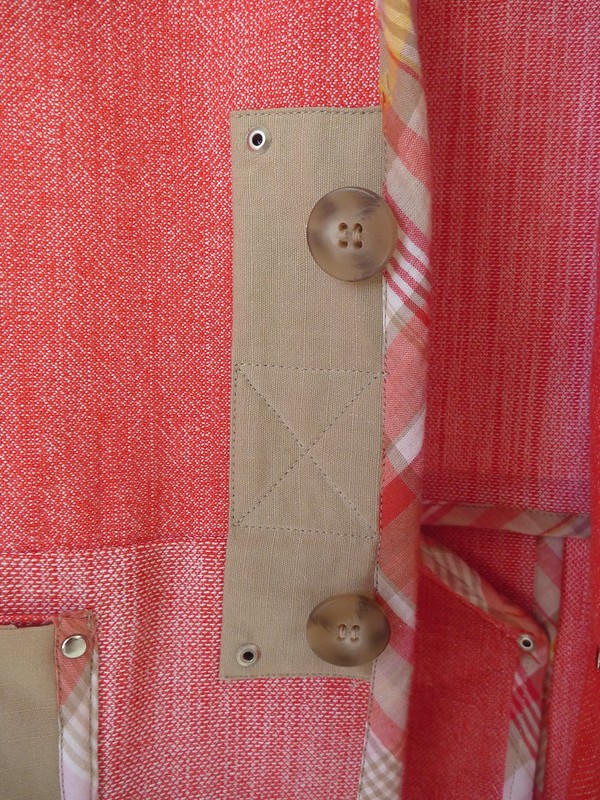
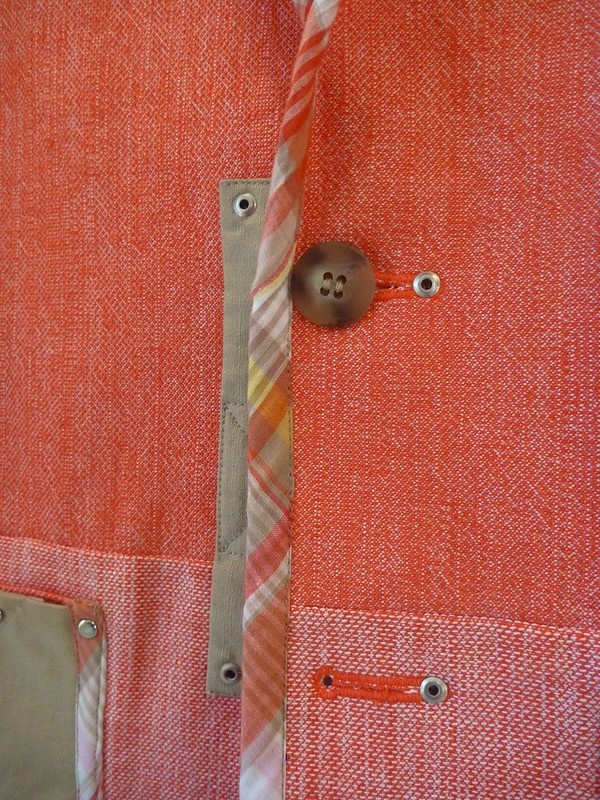
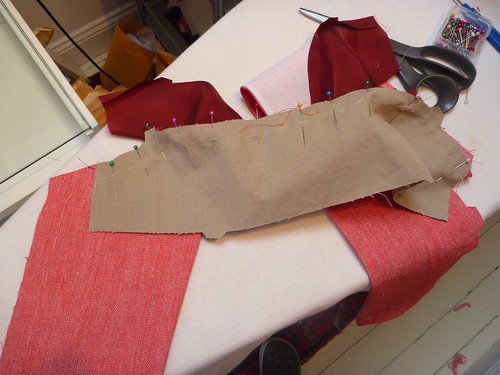
Both shirts have sew-in interfacing. A fusible would have flattened out all the crinkle on the graffiti print, so I used some very lightweight cotton gauze from my stash. I think it was intended to be used for sheer curtains. It's that light, and it worked perfectly. The plaid shirt is interfaced with Fashion Sewing Supply's "light crisp" sew-in. A dream to work with, and it didn't weigh down my fabric. No guy wants a heavy summer shirt.

All the construction was extremely straightforward. Basic shirt stuff.


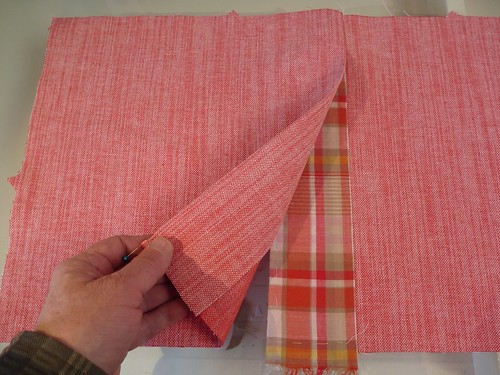
The plaid shirt is a whisper weight cotton madras plaid from Peron Fabrics. It's been patiently waiting in my stash for the right pattern to come along.


I'
 

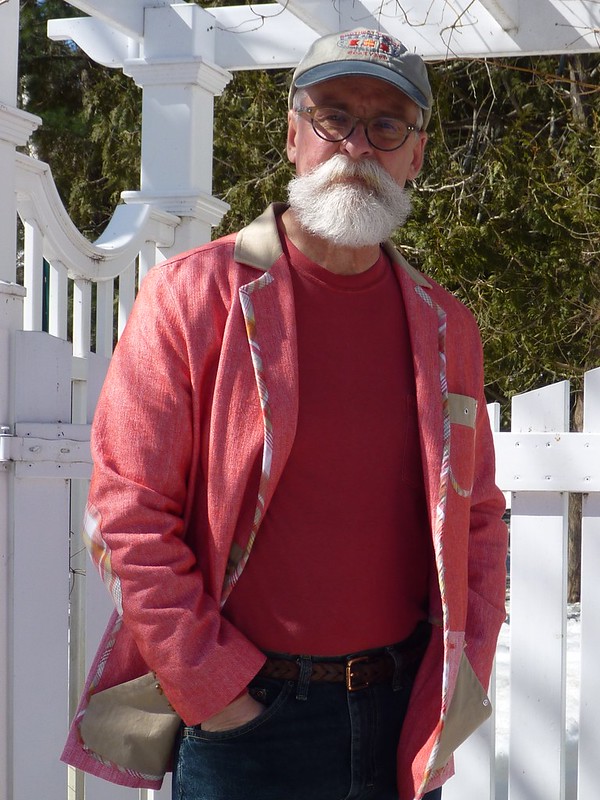
The truly observant will notice that I've used this fabric before... namely as bias binding, elbow patches and other assorted do-dads on last year's Watanabe inspired jacket and fishing vest. It's a lotta look! I'll save it for a day when I'm feeling especially "fashion adventurous". A morning at the laundromat maybe!


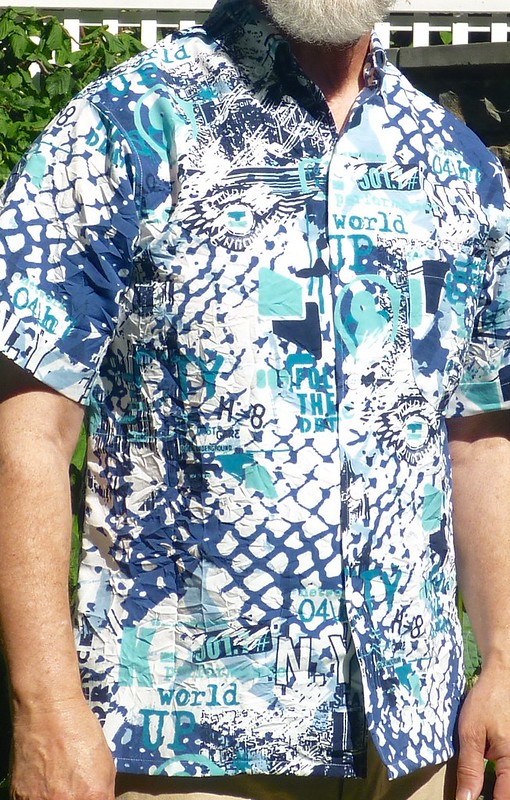
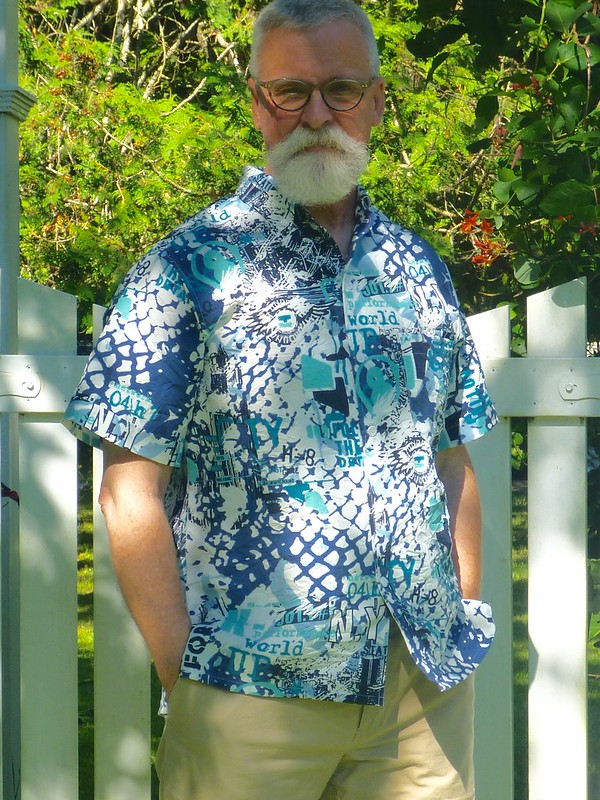
I fell in love with this crazy crinkled graffiti print at Elliot Berman. I don't tend to wear much blue, other than jeans, so this is a big departure for me.... Both color and style wise. It's hard enough getting older, even worse to be old and turn into a stodgy fuddy duddy. No chance of that with this shirt!


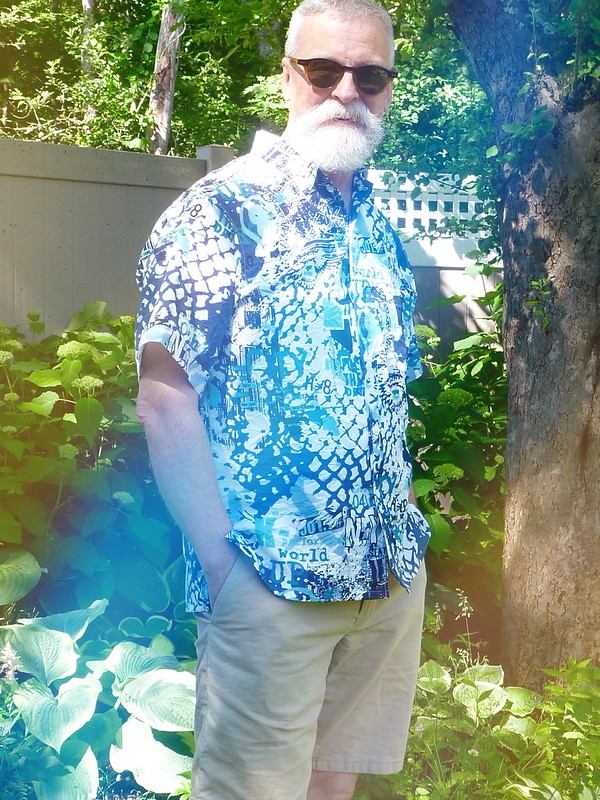
Plus, summer is made for wearing crazy shirts!


So get out there and have your very own......


Wednesday, March 25, 2015

The Watanabe Inspired Jacket. Japanese style meets Nantucket Red

There's still plenty of snow on the ground here in Maine, but today I'm dreaming of summer on Nantucket; an island famous for whaling, cobblestone streets and its own color -- namely, Nantucket red.


I'm sure some of you are scratching your heads. What's he talking about? This is one of those New Englandy prep classics. A faded weathered red (better not call it pink!) that only gets better the more beat up and worn out it is. It's a color I associate with the yacht club set. A year round tan, boats, tennis, martinis and most importantly -- old money; none of which I have!!! Apparently the real deal comes from Murray's Tog Shop on Nantucket, but just about everyone's jumped on the bandwagon -- J. Crew, Ralph Lauren, LL Bean (who calls it Breton red). Oh, and a caution if you're considering wearing it, like white shoes it's only worn in the summer here in New England. Although I'm assuming that the "snowbirds" take it south with them for the winter.


So for a few minutes this afternoon I slipped on my new Junya Watanabe inspired spring jacket and joined the ranks of the idle rich -- minus the tan!


I have to say that I'm really pleased with the fit of this jacket, especially through the shoulders. The combination of a sloped shoulder adjustment and removing all the sleeve ease produced a really natural fit. It still has a slightly structured shape without any actual structure. No shoulder pads, no pad stitching, no unfortunate Miami Vice look.


The back is actually better than I anticipated. This is really a "sack jacket" -- there's no waist suppression whatsoever. The side seams and the center back are a straight shot. Considering that I was really grasping at straws trying to fit the back, it didn't come out all that badly.


It's not exactly the most attractive shape, but then again it's supposed to be a casual jacket not a business suit. Plus, there's so much more that I love about the way this project turned out. I refuse to get hung up on all the "what if's" and "coulda / shoulda's". We're all guilty of way too much of that as sewist. Agreed?


They say that God is in the details, and God knows I had WAY too much fun adding all the bells and whistles to this jacket. At times it was hard to resist the temptation to add just one more thing -- a rivet here, a patch there. It's probably not everyone's cup of tea, but I'm totally digging it.


Just to recap before I grab my paddle and head to the yacht club...


Cotton oxford cloth suiting from Denver Fabrics. I had my doubts, but ended up loving it. Ridiculously cheap.

Cotton madras plaid and khaki cotton from Peron Fabrics. (Not so cheap, but I have tons left for a shirt, shorts, pants and a fishing vest!).

Rivet instructions from Enriquesews Academy.


As always, I wish you all happy spring sewing. This is a great time of year to break out of the rut and make your sartorial dreams come true!


Thursday, March 19, 2015

Watanabe Jacket -- Progress #3, Finishing details

Here are the final details of my Junya Watenabe knock-off project.


The sleeves were very easy to set, since all the ease (1 1/2" of it) was removed. As always, I baste the hell out of everything. The uppermost row of basting is holding the lining and fashion fabric together. After pinning the sleeve in place, I baste again along the seamline. This pretty much eliminates the chance that I'm going to get a little catch in the fabric as I sew the seam. Oy! There's nothing I hate more than having to redo a sleeve. I'd much rather invest the time in basting, and get it done right the first time around.


Bias binding applied to the raw edges.


A bias strip of sew-in interfacing is applied to the cuff. This makes for a much more substantial cuff.


A vented sleeve is simulated by the addition of a few buttons.


The lapel is trimmed with a wider bias binding. This was made with the 25 mm Clover bias maker (the blue one). The trim was basted in place and then edge stitched.


Patches feature heavily in Watanabe's designs, so I added this one.


I only have a 1 1/16" keyhole cam for my buttonholer, which is a little big for a 3/4" button. I shortened the buttonhole by popping in a rivet. Problem solved.


I think I'm getting a little carried away with this project!

Monday, March 16, 2015

Watanabe Jacket -- Progress #2

This post promises to be downright riveting!


I would never have attempted this if it weren't for my cyber sewing buddy Enrique over at Enriquesews. He's made some amazing duffle coats with rivets at various stress points that just blow me away. Plus, his joy of sewing is positively infectious. His blog confirms for me that through our sewing projects, whatever they might be, we make the world a much more interesting and joyful place.


Anyway, after pestering him to make a tutorial on rivets, my man Enrique came through! Check it out here. I ordered some rivets, a setting tool and a rivet anvil online. It came to about $15 with the shipping. I picked up an awl at my local hardware store on the day they offer a senior citizen discount!! Hey, if the shoe fits...... :). I had a hammer, so I was in business.


The setting tool and anvil are both concave, so the rivets remain rounded after they've been hammered. Neither is really necessary, but it's a nice touch.


So here are my finished pockets with rivets and gromets. I followed Enrique's instructions and everything worked perfectly. I can't tell you how much FUN THIS WAS!!!!! It's addictive. Suddenly, I wanted to put rivets everywhere. It's a very slippery slope.


I felt in danger of ending up here! So I backed away from the rivets and continued with the jacket construction.


I spent the better part of a morning making a back center vent (the pattern doesn't have one). The center backs were extended 2". A piece of the madras was placed on the under flap. I did this on my safari jacket, and I've always liked the way it looks. There's a little flash of plaid when the vent opens.


Because this jacket will be unlined, I really had to stop and think about how things would need to work. All the raw edges are covered with bias binding. It's not hard, just a bit of a mind bender on what steps need to be taken when.


A line of diagonal stitching and a couple of rivets finished it off. With the vent completed I finished sewing up the body of the jacket.


The horizontal seam at the lower portion of the jacket made for some very unusual contruction. It was a crazy mess, and a beast to get through the sewing machine. All the vertical seams had to be sewn and bound first, so that the horizontal seam could be one continuous seam around the jacket. Once that seam was sewn, the bulk was reduced by trimming one half of the seam. The other half of the seam was bound, pressed down and tacked in place with a couple of rivets. I just can't stay away from those rivets!


All that craziness paid off in the end, however. Result. -- An unlined jacket with no raw edges anywhere. Gotta love that!


Thursday, March 12, 2015

Watanabe Jacket -- Progress #1

This project has gotten off to a great start. The fabrics are easy to work with, and I have WAY more than I need. That makes it much easier to take risks / experiment, and there's been plenty of it. Basically, I'm just making this whole thing up as I go along.


Since pocket details abound on Watanabe's jackets, I'm starting there first. To keep things simple I'm just using patch pockets. Two lower pockets and an upper chest pocket.


The two lower pockets are a double layer pocket that I made up. The Oxford cloth pocket is based on the actual pattern, the diagonal khaki pocket is layered over it. Both pockets are lined with a burgundy bemberg rayon lining. ( I only had three choices at JoAnn's -- black, gray or burgundy). I used my Clover bias maker to make the madras trim which holds the whole contraption together.


Here it is sitting on the lower portion of the jacket front. I've reversed the Oxford cloth to the lighter side.


As I said, I'm just making this up as I go along. You can sort of see where things are headed.


These are madras elbow patches. I lined them with silk organza by sewing them with a 1/4" seam allowance and turning them. It made the rounded corners much easier to finess, and gave them a little added oomph. One thing to remember, the organza has to be cut on the bias if the patch is on the bias. Otherwise, the whole thing curls up like a potato chip. Glad I have all that extra fabric because my first set was a complete disaster.


And here they are on the finished sleeves. This pattern has a one piece sleeve, simple, which I've lined with bemberg. The sleeve and lining are exactly the same. They are basted together at the top to act as a single layer. Once the sleeve is set, I plan to finish off the raw edges with bias binding.


I completely disagree with the pattern directions where the collar is concerned. The directions call for the upper collar to be interfaced. I think that's just plain wrong. Since I'm improvising so much of this project, I'm just going to ignore the directions and do what I think is right. Here I've interfaced the under collar with bias cut Light Crisp sew-in interfacing from Fashion Sewing Supply. I'm using the same interfacing for the lapels / front facings. It's great stuff.


The upper collar is attached to the front facings and the yoke lining. This is a new construction technique for me, and a bit of a mind bender. I was hoping that I could figure out a way to use the "burrito method" for the yoke lining, but I had to abandon that dream. A little hand sewing never hurt anyone!


The upper collar assembly. (I remembered to add a locker loop this time!)


Which has to get "married" to the under collar assembly. Yeow! That will have to wait for another day.