Showing posts with label Missoni jacket. Show all posts

Wednesday, January 20, 2016

The Athleisure Jacket

I've really got the Athleisure bug, so I immediately launched into a jacket to go with my new sweatpants. I'm using the black and gray "birchbark" looking knit. I'm hoping the combination will be Armani-esque. One can always dream!


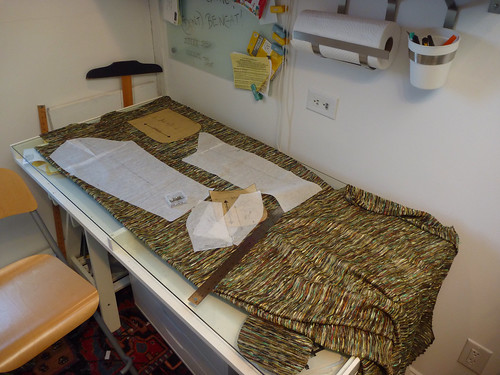
This is the pattern I used for my "Phony Missoni" jackets of last year. This time around I'm going to try the shawl collar version. (The illustration kills me!). Because this fabric is super wide, 72 inches, I only ordered 2 yards. Talk about cutting it close. I was just barely able to eek it out.


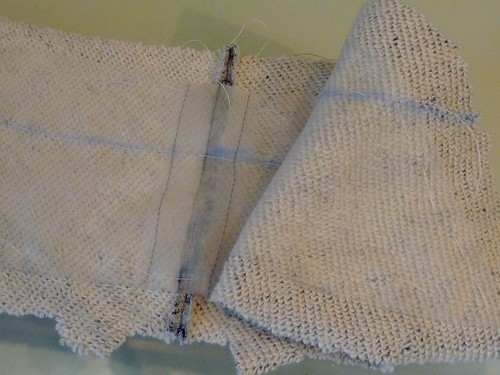
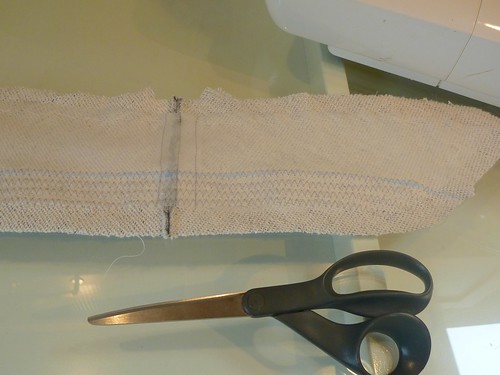
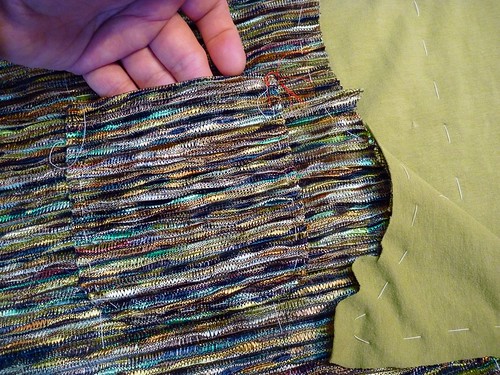
There is some serious Snug Hug usage going on with this jacket. Here a strip is sewn into the shoulder seams to prevent stretching. It works like a charm.


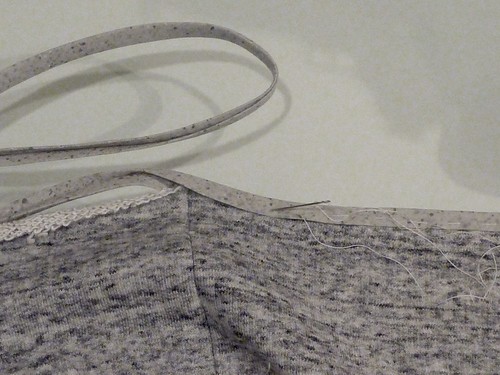
The seam allowance edges are covered with cotton bias binding. When the seams are pressed open the Snug Hug is completely hidden. I used this process on the shoulder seams and the side seams.


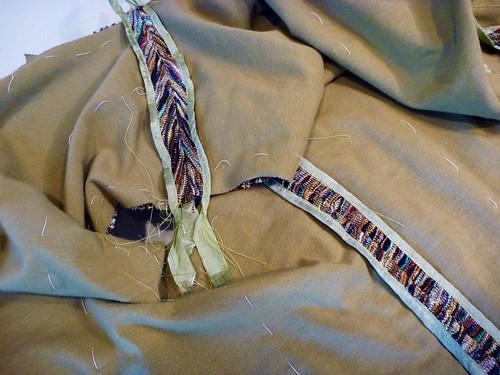
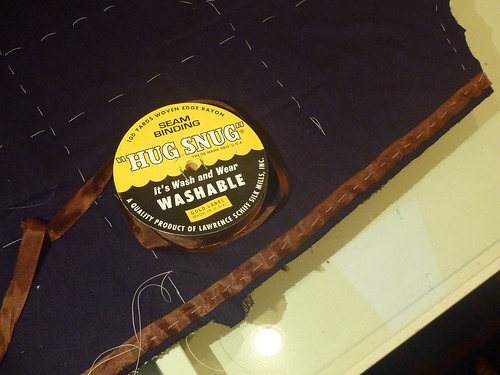
In places where the binding will be especially visible, namely the hem and front facings, I baste it in place before edgestitching. The thickness of the fabric combined with the loopy back made this necessary. Otherwise, I ended up edgestitching into air. Maybe you've been there too?


This is a little hard to see, but I interfaced the undercollar with silk organza. A little voice was saying, "what would Laura Mae do?


Rows of zig zagging along the foldline help create a little more structure.


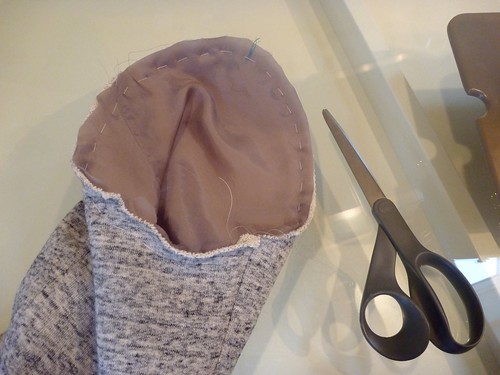
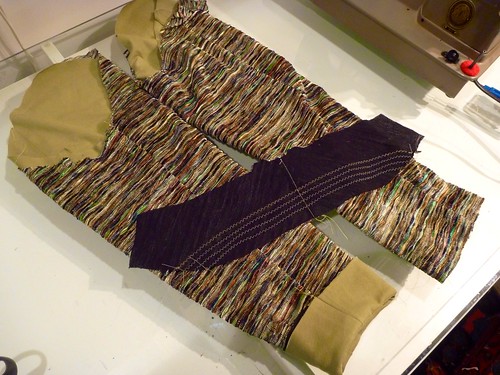
The sleeves are lined with rayon bemberg to make the jacket slip on easily. Otherwise, it's completely unlined.


The world's worst buttonhole. This simply won't do!


Break out the silk organza and Laura Mae's bound buttonhole tutorial! The BEST!
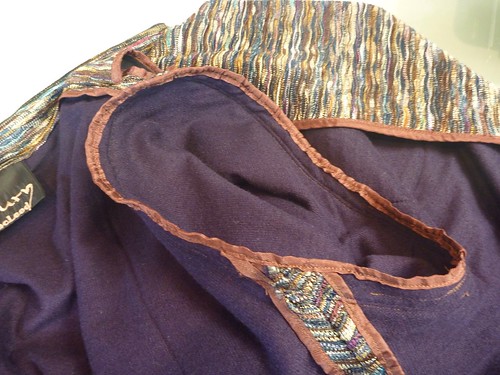


Lastly, the collar and front facings are understitched to help help keep them from rolling out. Below the button the seam allowances are stitched to the facing. Above the button it's reversed, and the lapel / collar seam allowances are stitched to the jacket front and under collar. Sounds confusing, but it becomes obvious when you're doing it.


Next time, the Athleisure reveal. (Arctic Blast reveal may be more like it!).


Thursday, January 22, 2015

No Turning Back Now -- My Entry is Posted

It's a done deal. My Missoni knockoff is officially entered over on Pattern Review. You can check it out here.


I have to say it was no easy task figuring out how to navigate the PR process on my iPad. After a couple of wrong turns, and what seemed like endless shuffling of my photos back and forth between several apps, I finally got it posted. Sewing the jacket was actually the easiest part of the whole process! Still, I have to say it's been great fun. Who knows, I just might enter another contest one of these days.


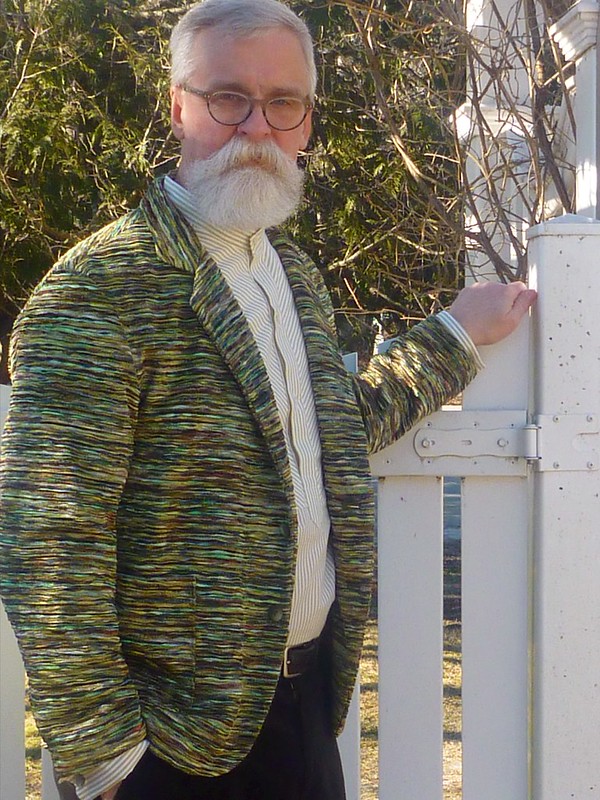
I wasn't lying ....it's very green!


Here I'm wearing the jacket with a version of Folkwear's Victorian Shirt. I changed the front placket slightly and added French cuffs. The pants are my dark brown velvet Jeds.


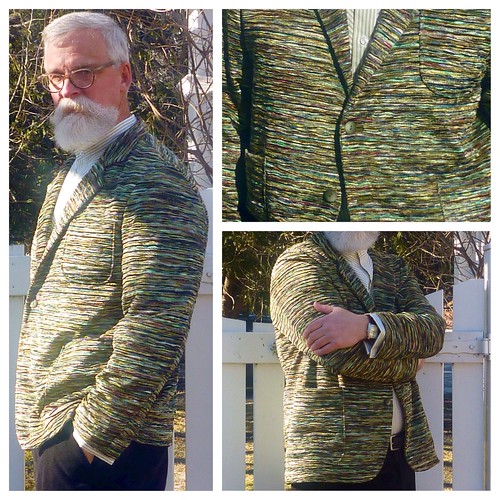
I was limited to only 2 pictures for the contest, so I tried out one of the many free photo collage apps. Yay! I figured it out! I'll probably be using it a lot in the future. It's quite fun to play with.


The voting starts on February 2nd. Hint..hint...


I want to work on one other winter project, a wool / mohair Finlayson sweater, then I'm thinking SPRING! A Junya Watanabe inspired jacket perhaps.


As always, thanks so much for your encouragement. Happy sewing!


Wednesday, January 21, 2015

Missoni Sweater / Blazer #2 -- It's a Wrap!

Yay! I finished before the deadline.


This post is primarily for other PR contest members who may be interested in some of the construction details. The contest rules don't allow for many photos. I think I can submit only 3 photos, one of which has to be the "inspiration" garment.


A little sewing geekery.....


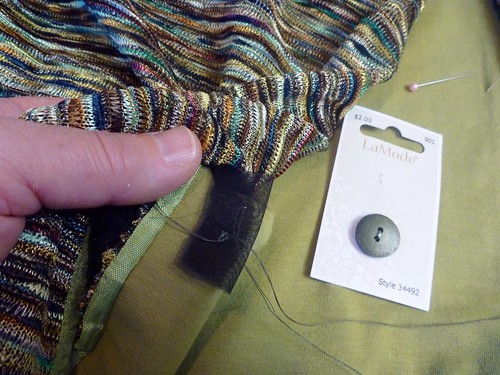
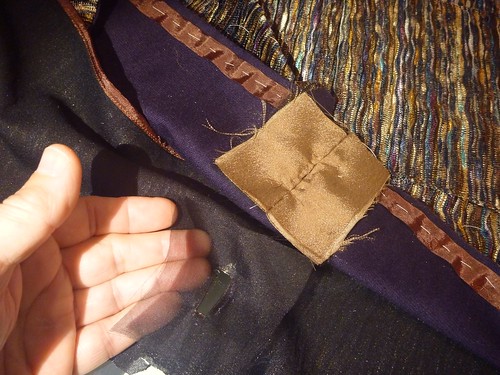
Because the fabric is loosely knit, I reinforced the back of the button with a small scrap of silk organza. This will prevent the button from being pulled out. This picture also gives you a good idea of how many colors are worked into the fabric. It's really quite amazing, and to my mind, beautiful.


All of the seam allowances, facings and hems are finished off with Snug Hug rayon seam binding. Time consuming and at times kind of fussy, but I love how it looks. It's nice to know that if I need to take my jacket off, people will see that it's just as pretty inside as it is outside.


Here are the bound buttonholes, a la Laura Mae over at Lilacs and Lace. I made them with scraps of lining, beefed up with some lightweight fusible interfacing. Her tutorial makes this SO easy. If you've avoided bound bottonholes, by all means follow her well illustrated directions. You'll never fear them again!


So here's my finished jacket. Time to get out the tripod, take of some pictures and post my entry to the contest. Wish me luck ..... Or better yet, throw a vote my way!


Oh..... And have you seen the Missoni offerings for Fall Winter 2015?


How freakin' gorgeous are these!!!


Tuesday, January 13, 2015

Contest Sewing Update

It snowed here most of the day yesterday. So rather than risk a fender bender, or worse, I stayed in and sewed. I'm really making great progress, and feel pretty confident that I'll be able to finish before the deadline. Having made this jacket before is a huge advantage.

I'm not exactly sure how these Pattern Review contests work. Apparently I get to submit two pictures. One of the "inspiration", and one of my interpretation. I'm not sure if I can refer back to my blog. But if I can, it would give people a better idea of my process.

For some of you this is old hat, but here's where things currently stand.


The patch pockets are finished and sewn onto the jacket fronts. They're a big part of the design, so I take my time and sew them as accurately as I can.


My camera really doesn't do this Missoni-esque" fabric justice. Trust me, the overall effect is very green. I'm interlining the jacket with a substantial cotton jersey in a sort of light avacado color.


The knit fabric and jersey are basted together to act as one.


The pattern is very simple, which makes it go together quite quickly. "Snug hugging" the seams is the time consuming part, but it does make for an attractive inside finish.


Lastly, the sleeves are made and lined. The undercollar is interfaced and rows of zigzagging are added along the roll line to beef it up a bit.

The next step will be to add two bound bottonholes to the front. That's something better left for when I'm fresh. Once they're done, things will really move right along.


Saturday, January 10, 2015

Ready, Set....Compete!

I should have my head examined! I've gone and entered my first sewing contest at Pattern Review.


I've looked at these contests before, but they always strike me as impossible. One Pattern -- Many Looks. Oh, man, I'd be lucky to complete ONE look! Or something like, A Complete Coordinated Wardrobe. Seriously?


Anyway, I've decided to enter this designer knockoff challenge. I have the materials to make another "Phoney Missoni" jacket, and I figure this contest will be the push I need to get it made. Hopefully, I can complete it before the end of the month. Speedy I'm NOT!


BTW the grand prize is a new ironing board cover!


Better get cutting! Dad needs that cover badly.


Saturday, December 27, 2014

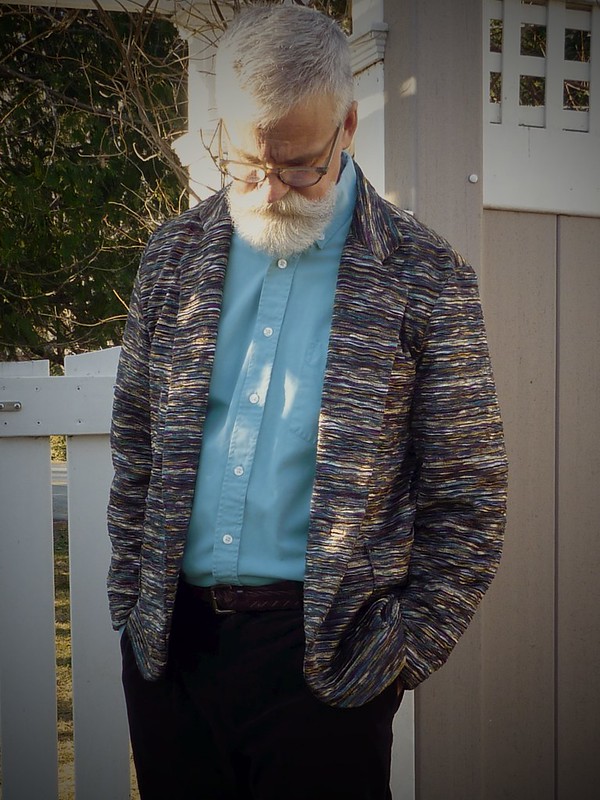
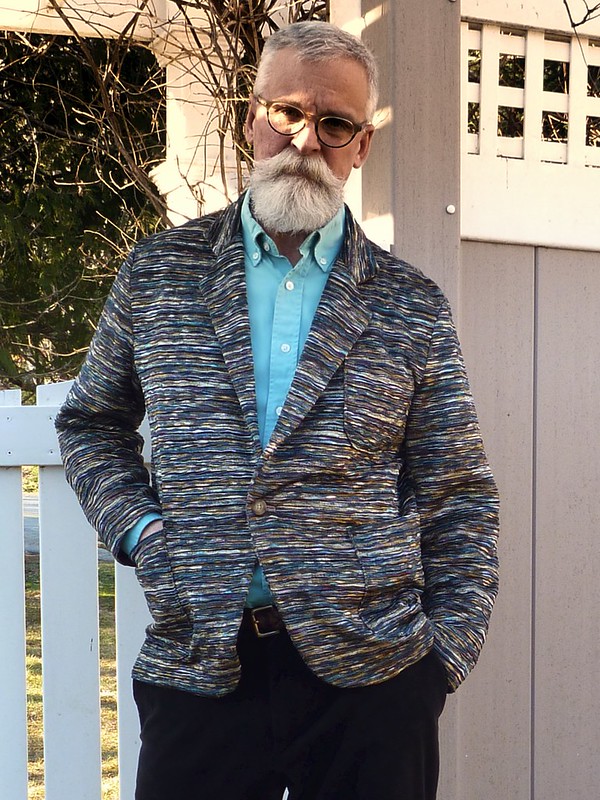
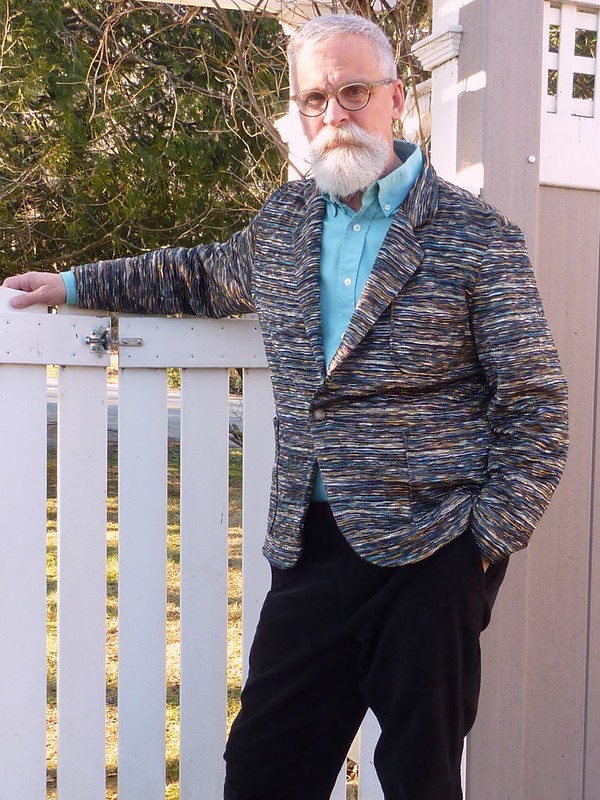
Finally! The completed "Missoni" jacket

Wow, this has taken forever! Not the making...waiting for a chance to get outside and snap some pictures of the finished product.

Finally, it stopped raining, I wasn't working and the sun came out. I grabbed my tripod and took advantage of our unseasonably warm, almost spring-like weather. So here it is....


This may not be every man's cup of tea, but I'm totally loving it.


It "works" both buttoned and unbuttoned. I'm very glad that I increased the width of the front facings. Nothing "falls out".


Like the Missoni model, it has rounded patch pockets and soft shoulders. I like to think of it as a jazzed up cardigan sweater.


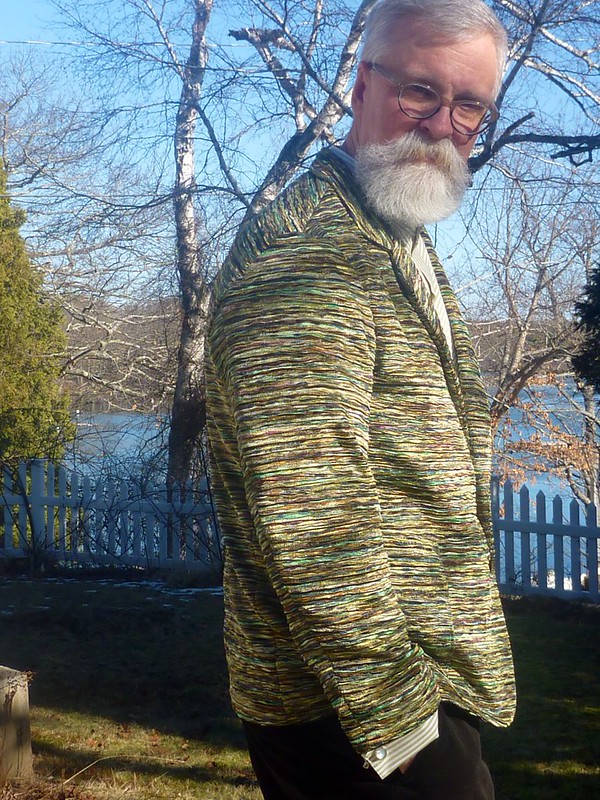
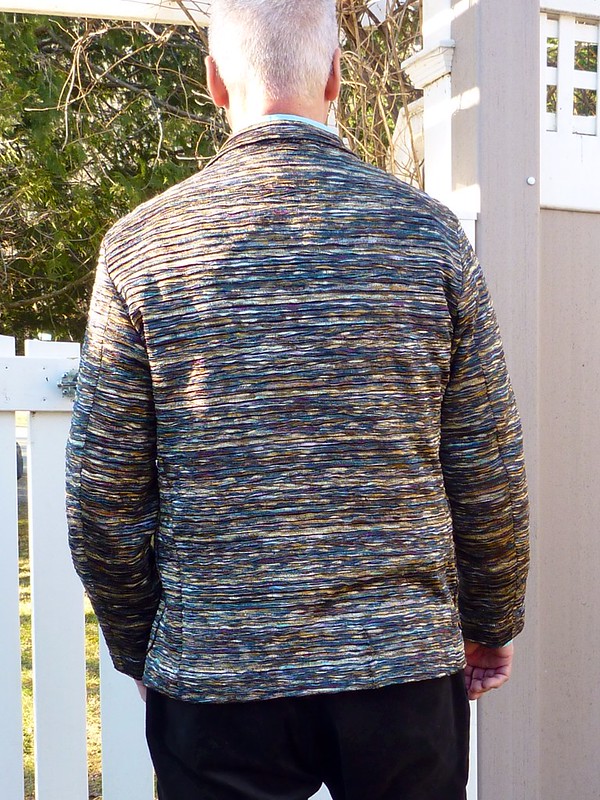
The texture of the knit really shows in this back view. (Please excuse the wrinkle... my stylist had the day off)

What I feared was going to be a very difficult fabric to sew, turned out to be incredibly easy to work with.

I have this fabric in a green color-way, and will no doubt be making another one of these "Phoney Missoni" sweater / blazers in the future. I love it that much.


I've already worn this several times, and always to rave reviews. It looks great with jeans and also with my velvet Jeds as shown here. All in all, a very satisfying project, and a garment that I can dress up or down depending on the occasion.


Just to recap since it's been so long....

Fabric -- "Chase Crush" from Vogue Fabrics. (I think no longer available)

Lining -- Bamboo terry knit, Eggplant from Vogue Fabrics

Pattern -- Simplicity 9293 (1979)


Wishing you all a Happy New Year filled with sewing adventures.


Monday, November 24, 2014

Taking a page from the Laura Mae playbook

I'll admit it. I'm a big time lurker on Laura Mae's blog, Lilacs and Lace. I'm never, in a million years, going to be making a beaded gala ball gown, but I love watching her process. Surely, in a prior life, this woman was one of "Les petites mains" in a Paris couture house. My current "Phoney Missoni" is going to need some couture touches, so Laura Mae is the "go to" gal for this couture wannabe. Break out the silk organza!


Laura Mae has some excellent tutorials on her blog. I'm always blown away by sewists who are not only incredibly talented, but generous in what they share with the rest of us. For this project I followed her instructions for making bound buttonholes, and applying Snug Hug seam binding. Both tutorials are crystal clear and easy to follow. I highly recommend them.

First up, Bring on the Snug Hug!


I actually ordered this roll of Mimi Brown Snug Hug from Amazon. The seller turned out to be A. Feibusch Corp., 27 Allen Street on the lower east side of Manhattan. They've been "zipping the world since 1941", so I've got a new place to explore the next time I get to the city. One roll of Snug Hug and I'm a believer!


What can I say about this stuff? It's amazingly light yet stable, adds almost no bulk, is easy to both sew and press, AND you get 100 yards so you can Snug Hug with reckless abandon.


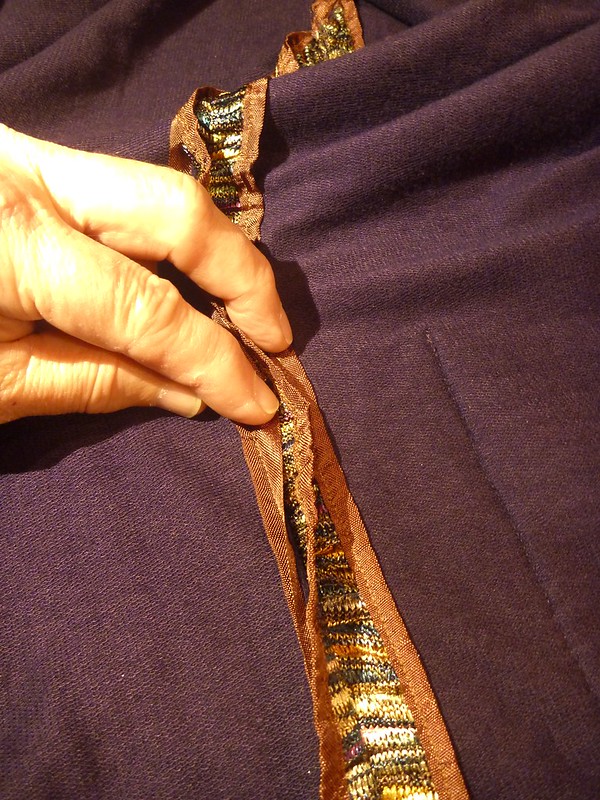
So where did I use it? First, I basted a strip along the edge of the lapel to help it keep its shape. (See the top photo). It's so lightweight one would never know it's there. Certainly much more appropriate than the cotton twill tape that's usually used in menswear. I also inserted a strip along the shoulder seams to prevent them from stretching. I would normally have done this with a piece of leftover lining material. This was much faster, unroll a bit and it's done. Plus there's nothing to unravel, which is important in an unlined jacket.


I sewed a strip into every vertical seam to prevent sagging. When both layers of knit fabric were sandwiched together there was a surprising amount of weight pulling / stretching the jacket down. By simply inserting a strip into the seam I was able to stabilize the knit vertically and maintain the shape of the jacket. Again, it added almost no bulk.


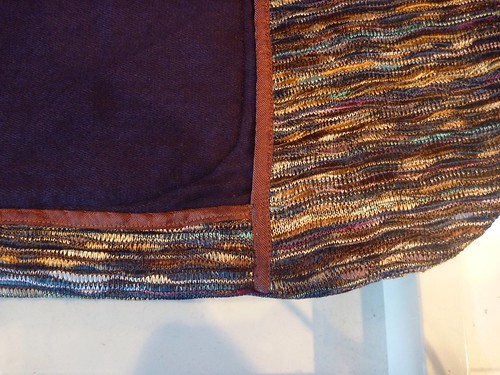
All the raw edges were finished. Once you get going it's hard to stop, especially when things look this great.


What's going on here? I started to reinforce the armscye a la Roberto Cabrera, but changed my mind. Suddenly things were becoming too structured, and I was losing the "sweaterness" that I was after. Out came this strip.


I ended up setting the sleeve and sewing around the armscye twice (three times at the underarm), trimming out the fashion fabric and then binding the lining fabrics together. This was a bit tricky since Snug Hug is only 1/2" wide, but I was able to make it work. First I pressed the Snug Hug in half, and then basted it in place before sewing it on the machine. A little more time consuming, but worth the effort I think.


With all the seams snugly hugged, I moved on to the bound buttonhole.


Laura Mae's tutorial is well illustrated and easy to follow, so I won't go into all the steps involved.


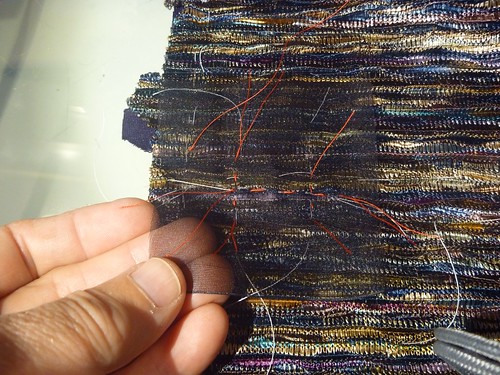
In a nutshell, I placed a square of silk organza on the outside of the jacket and plotted out the position of the buttonhole with basting thread (red). The organza supplies structure that the loosely knit fabric just can't. Without it I think the fabric would just unravel / disintegrate. I wasn't willing to risk a machine made buttonhole on this project. And a bound buttonhole is just WAY more classy!


Once the rectangular opening of the buttonhole is sewn, slashed and clipped, it's turned to the inside of the jacket forming a little "window" as you see here. Note: this "window" is actually on the front facing and has been positioned to finish off the back of the buttonhole.

Scraps of lining fabric were used to form the "lips" of the buttonhole. They are handsewn into the window opening, which is surprisingly easy to do. Handsewing gives you complete control over what's happening.


Here is the finished buttonhole from the front (it's basted shut until the garment is completed).


And here it is from the rear, pinned back so you can see the organza reinforcement.


Thanks, Laura Mae, for holding my hand and guiding me through these techniques! I'll never fear a bound buttonhole again. A big takeaway for me has been the similarity of a welt pocket and a bound buttonhole. If you've done one, you've pretty much done the other.

The jacket is complete and I've actually worn it a couple of times to rave reviews. I hope to be posting a photo shoot soon.


In the meantime, Happy Thanksgiving to all!