Wednesday, December 31, 2014

The Finlayson Sweater

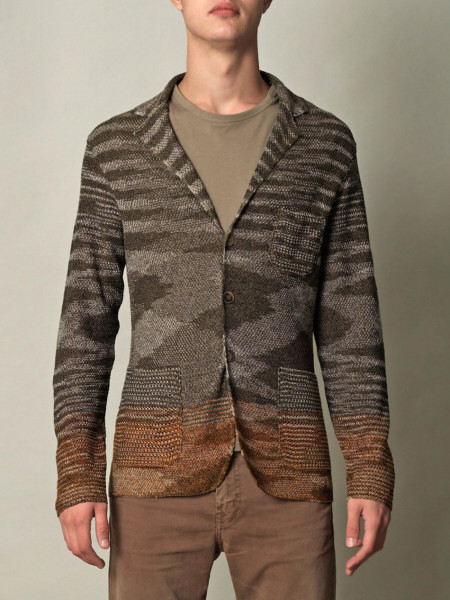
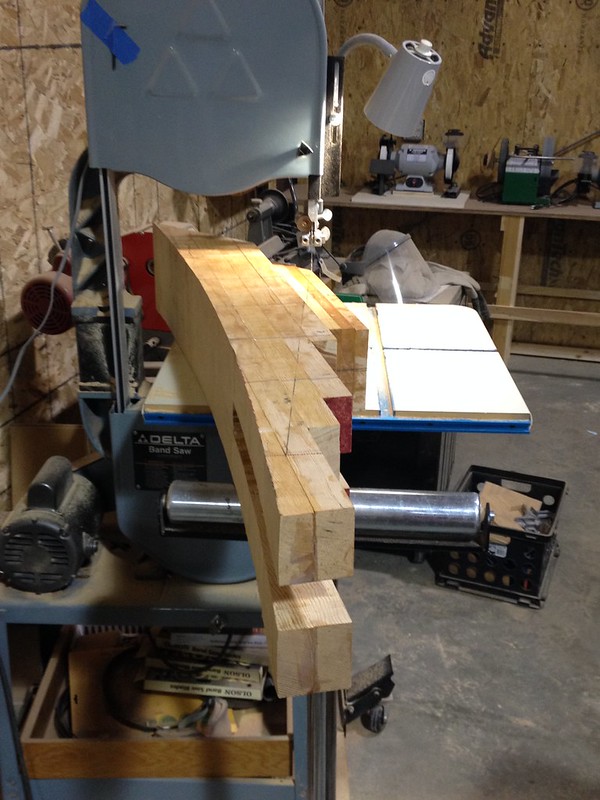
Now that I've conquered my fear of knits, I decided to try Thread Theory's Finlayson Sweater. They have an entire sew-along tutorial on their website, so I won't bore you with a lot of construction details.

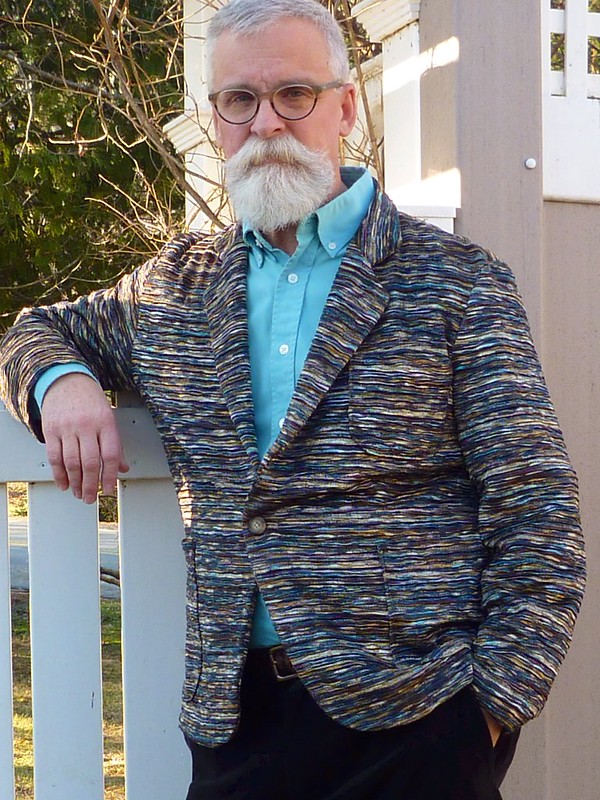
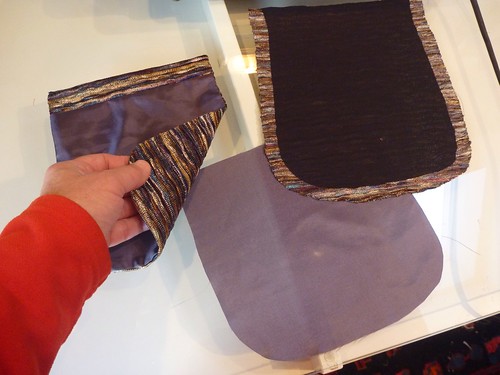
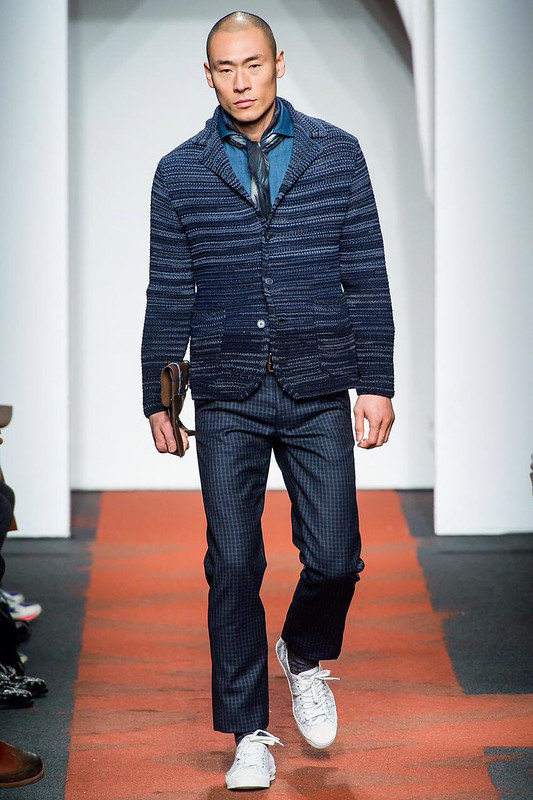
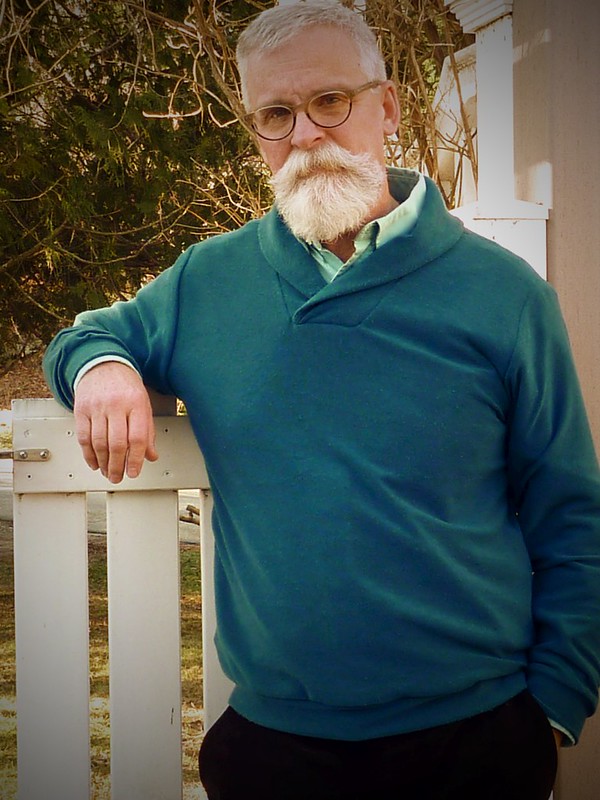
I like that this pattern can be made up two ways, with either a shawl collar or a hood. Personally, I'm not the hoodie and kangaroo pocket type, so I went with the shawl collar. LL Bean used to sell a rag wool sweater with a shawl collar. I think I wore it till it fell apart, so it's nice to have a replacement.


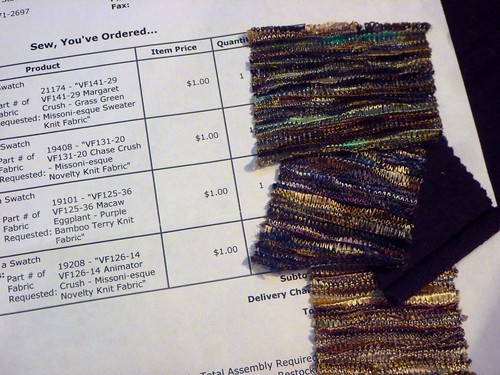
This is a lightweight acrylic knit that I picked up at Metro Textiles in NYC. Metro is one of those fabric haunts that's very "hit or miss", but can be worth the elevator ride up to the 9th floor (I think). The owner, Mr. Kashi, is very helpful and low pressure. While I was visiting he pointed me towards some gorgeous Japanese mens shirting, unfortunately not in colors that I would normally wear. One actually had a contrasting border running down the selvedge that could be used for inside the cuffs or neck band. Pretty cool, and silly cheap at something like $6/ Yd.

I went for this teal blue sweater knit, also $6.


I purchased the PDF version of the pattern. I work entirely off an ipad these days, and I struggled to find an app that would open the zip files. There are some seriously useless apps out there! I could get the directions, but not the actual pattern. Arrrgh!!! Matt and Morgan were SO supportive of my dilemma and pointed me in the right direction. (The solution was iZip BTW) Once that obstacle was surmounted it was clear sailing.


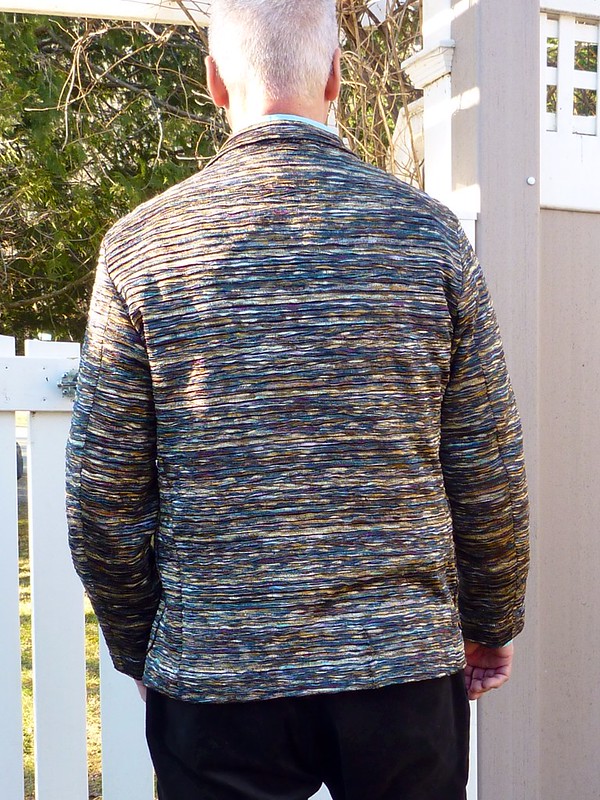
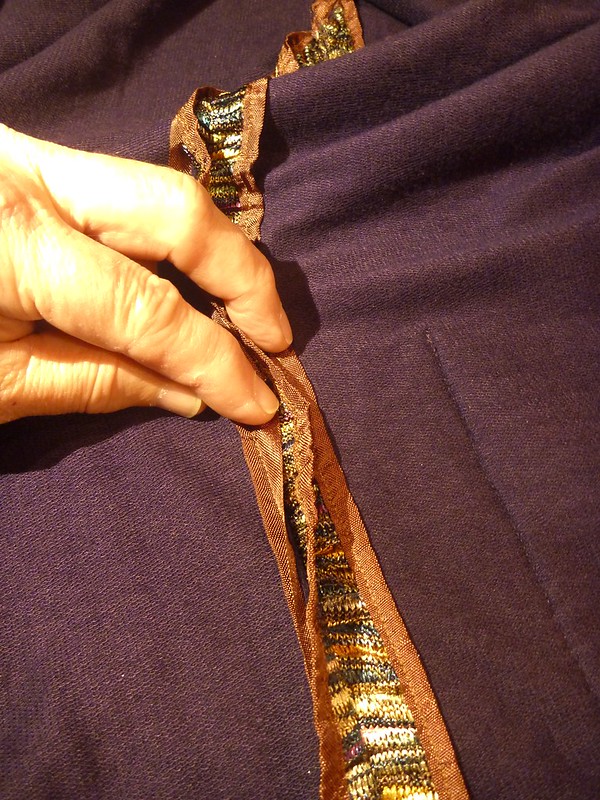
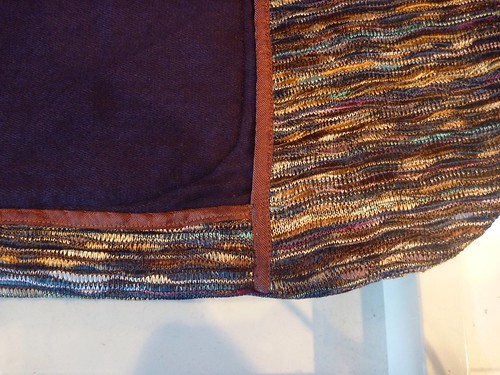
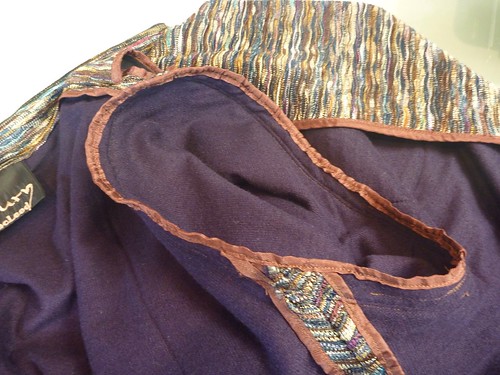
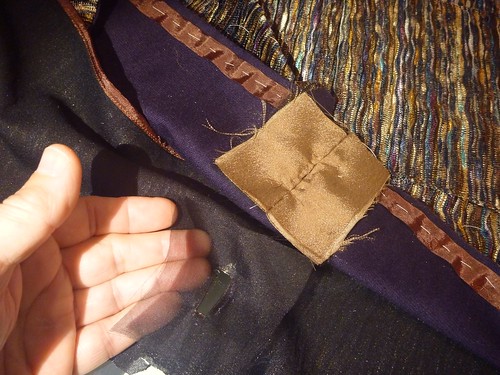
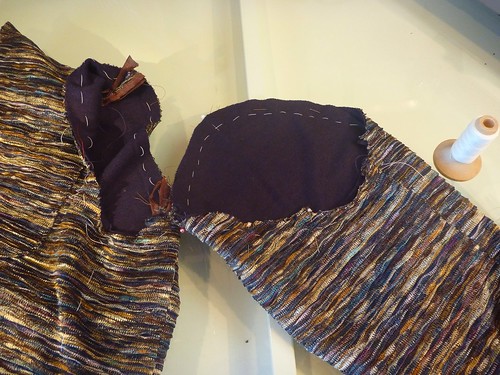
The pattern calls for an optional contrasting back neck facing. It's a good opportunity to use up some of those scraps that I just can't seem to throw away! It's also just a nice touch.

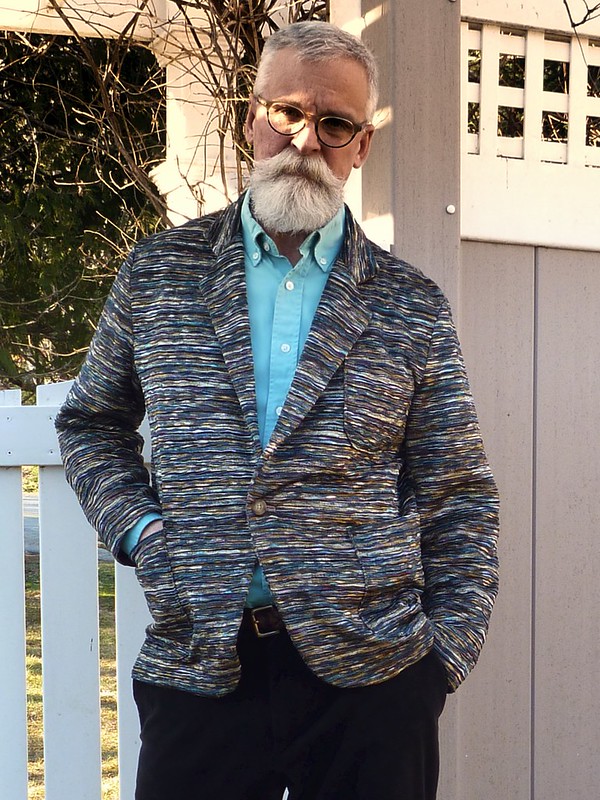
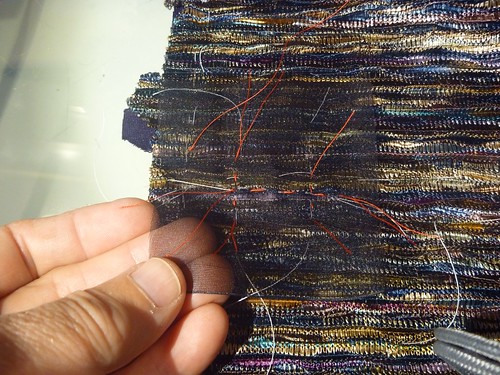
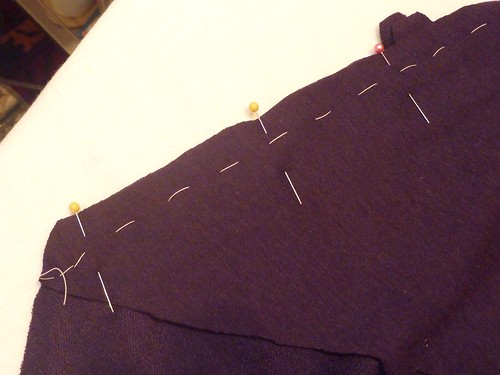
As you can see here my collar / placket isn't perfect. The pattern has separate upper and lower collar pieces, the upper collar being just slightly larger to allow for the turn of the cloth. I decided to understitch my collar to keep the seam out of sight. In retrospect I should have stopped the understitching about 4" from each end. That way it wouldn't show where the collar twists. Speaking of the collar, I'm not entirely convinced that the directions are right. Then again, I may be misinterpreting the diagrams. If you make this sweater, I'd spend some time playing with it so that your upper collar really ends up on the outside.


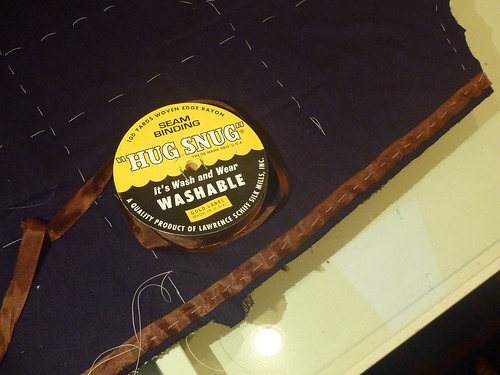
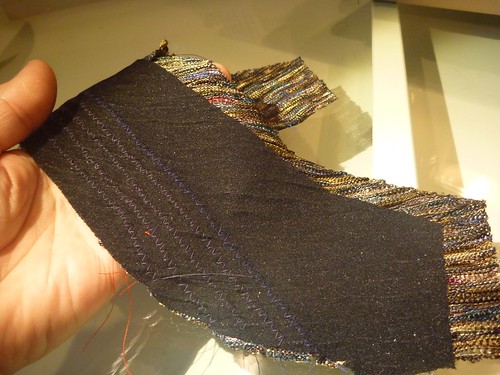
I "Snug Hugged" the raw edges inside. They could be zig zagged or serged, which would probably be a lot easier. I'm just sort of addicted to Snug Hug.


The neck seam can be covered with bias tape, twill tape or even shoelacing!


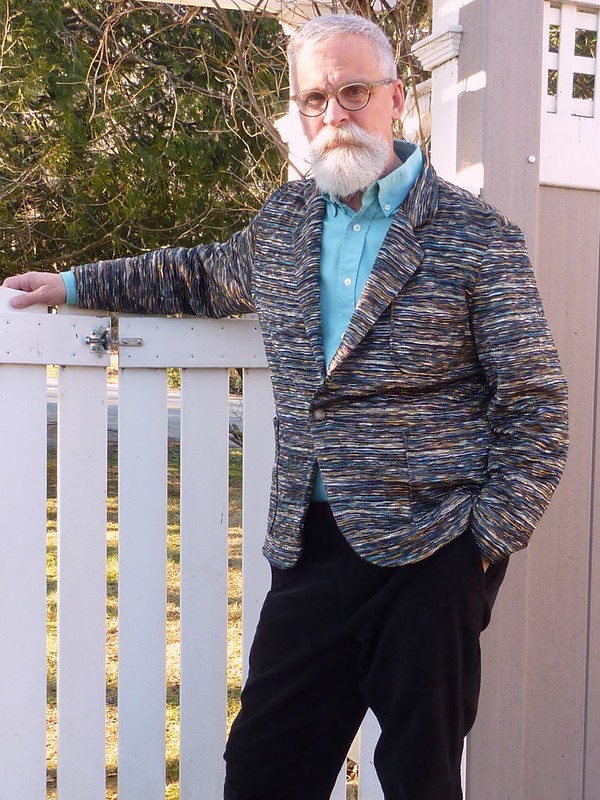
What else did I do? I shortened the arms by 2" and the body by 1". It went together easily and I will definitely be making it again, next time in significantly more luxurious materials. Stay tuned.

In the meantime I have a shirt I want to make.

As always, I wish you happy sewing!


Saturday, December 27, 2014

Finally! The completed "Missoni" jacket

Wow, this has taken forever! Not the making...waiting for a chance to get outside and snap some pictures of the finished product.

Finally, it stopped raining, I wasn't working and the sun came out. I grabbed my tripod and took advantage of our unseasonably warm, almost spring-like weather. So here it is....


This may not be every man's cup of tea, but I'm totally loving it.


It "works" both buttoned and unbuttoned. I'm very glad that I increased the width of the front facings. Nothing "falls out".


Like the Missoni model, it has rounded patch pockets and soft shoulders. I like to think of it as a jazzed up cardigan sweater.


The texture of the knit really shows in this back view. (Please excuse the wrinkle... my stylist had the day off)

What I feared was going to be a very difficult fabric to sew, turned out to be incredibly easy to work with.

I have this fabric in a green color-way, and will no doubt be making another one of these "Phoney Missoni" sweater / blazers in the future. I love it that much.


I've already worn this several times, and always to rave reviews. It looks great with jeans and also with my velvet Jeds as shown here. All in all, a very satisfying project, and a garment that I can dress up or down depending on the occasion.


Just to recap since it's been so long....

Fabric -- "Chase Crush" from Vogue Fabrics. (I think no longer available)

Lining -- Bamboo terry knit, Eggplant from Vogue Fabrics

Pattern -- Simplicity 9293 (1979)


Wishing you all a Happy New Year filled with sewing adventures.


Monday, November 24, 2014

Taking a page from the Laura Mae playbook

I'll admit it. I'm a big time lurker on Laura Mae's blog, Lilacs and Lace. I'm never, in a million years, going to be making a beaded gala ball gown, but I love watching her process. Surely, in a prior life, this woman was one of "Les petites mains" in a Paris couture house. My current "Phoney Missoni" is going to need some couture touches, so Laura Mae is the "go to" gal for this couture wannabe. Break out the silk organza!


Laura Mae has some excellent tutorials on her blog. I'm always blown away by sewists who are not only incredibly talented, but generous in what they share with the rest of us. For this project I followed her instructions for making bound buttonholes, and applying Snug Hug seam binding. Both tutorials are crystal clear and easy to follow. I highly recommend them.

First up, Bring on the Snug Hug!


I actually ordered this roll of Mimi Brown Snug Hug from Amazon. The seller turned out to be A. Feibusch Corp., 27 Allen Street on the lower east side of Manhattan. They've been "zipping the world since 1941", so I've got a new place to explore the next time I get to the city. One roll of Snug Hug and I'm a believer!


What can I say about this stuff? It's amazingly light yet stable, adds almost no bulk, is easy to both sew and press, AND you get 100 yards so you can Snug Hug with reckless abandon.


So where did I use it? First, I basted a strip along the edge of the lapel to help it keep its shape. (See the top photo). It's so lightweight one would never know it's there. Certainly much more appropriate than the cotton twill tape that's usually used in menswear. I also inserted a strip along the shoulder seams to prevent them from stretching. I would normally have done this with a piece of leftover lining material. This was much faster, unroll a bit and it's done. Plus there's nothing to unravel, which is important in an unlined jacket.


I sewed a strip into every vertical seam to prevent sagging. When both layers of knit fabric were sandwiched together there was a surprising amount of weight pulling / stretching the jacket down. By simply inserting a strip into the seam I was able to stabilize the knit vertically and maintain the shape of the jacket. Again, it added almost no bulk.


All the raw edges were finished. Once you get going it's hard to stop, especially when things look this great.


What's going on here? I started to reinforce the armscye a la Roberto Cabrera, but changed my mind. Suddenly things were becoming too structured, and I was losing the "sweaterness" that I was after. Out came this strip.


I ended up setting the sleeve and sewing around the armscye twice (three times at the underarm), trimming out the fashion fabric and then binding the lining fabrics together. This was a bit tricky since Snug Hug is only 1/2" wide, but I was able to make it work. First I pressed the Snug Hug in half, and then basted it in place before sewing it on the machine. A little more time consuming, but worth the effort I think.


With all the seams snugly hugged, I moved on to the bound buttonhole.


Laura Mae's tutorial is well illustrated and easy to follow, so I won't go into all the steps involved.


In a nutshell, I placed a square of silk organza on the outside of the jacket and plotted out the position of the buttonhole with basting thread (red). The organza supplies structure that the loosely knit fabric just can't. Without it I think the fabric would just unravel / disintegrate. I wasn't willing to risk a machine made buttonhole on this project. And a bound buttonhole is just WAY more classy!


Once the rectangular opening of the buttonhole is sewn, slashed and clipped, it's turned to the inside of the jacket forming a little "window" as you see here. Note: this "window" is actually on the front facing and has been positioned to finish off the back of the buttonhole.

Scraps of lining fabric were used to form the "lips" of the buttonhole. They are handsewn into the window opening, which is surprisingly easy to do. Handsewing gives you complete control over what's happening.


Here is the finished buttonhole from the front (it's basted shut until the garment is completed).


And here it is from the rear, pinned back so you can see the organza reinforcement.


Thanks, Laura Mae, for holding my hand and guiding me through these techniques! I'll never fear a bound buttonhole again. A big takeaway for me has been the similarity of a welt pocket and a bound buttonhole. If you've done one, you've pretty much done the other.

The jacket is complete and I've actually worn it a couple of times to rave reviews. I hope to be posting a photo shoot soon.


In the meantime, Happy Thanksgiving to all!


Friday, November 14, 2014

Constructing my Faux Missoni

The "Chase Crush" Missoni-esque knit that I've chosen for this project is pretty light weight and VERY stretchy. It just doesn't feel substantial enough for a jacket. I had also ordered a dark purple bamboo knit from Vogue Fabrics, thinking that I would use it for Thread Theory's new Finlayson Sweater, but it also feels too light. My solution is to combine the two fabrics. Interlining with the bamboo will give me the heft I need. It's also incredibly soft. I wish you could feel this fabric. Soft as any cashmere sweater.

So here we go!


I'm a "baste-a-holic" so none of this bothered me. The pattern pieces were cut and then sandwiched together to act as a single layer of fabric. This process went quickly using cotton basting thread. It's amazing how having the right thread can make all the difference. This type of thread is virtually tangle proof, so you just zip along. Highly recommended. I threw in some extra vertical and horizontal lines of basting to keep everything in place.


I learned from making my muslin that knits want to roll up after they've been cut. My Missoni-esque fabric is no exception. It's also quite loosely knit and I was worried about its stability. (Probably totally unfounded, but I'm new to knits and they unnerve me!). As extra insurance I applied a fusible knit interfacing to the hem of the jacket. This is Pro-Tricot Deluxe Fusible interfacing from Fashion Sewing Supply. This is a whisper weight stretch fusible, and was SO easy to work with. It fused effortlessly with very slight pressure on a wool steam setting. All my rolling and stabilization issues solved! Maybe I can work with knits after all.


The patch pockets were stabilized with interfacing, and then lined with some leftover acetate from my stash of scraps. The pattern doesn't include this step, but then again it's a "quick and easy" pattern. I figure if you can make something better, why not take the time. It can sometimes make the difference between a garment you really love to wear, and one that just sits in the closet.


All the seams were both basted and pinned before stitching. I'm happy to report that I had absolutely no difficulty sewing this on my Singer 301(a no frills straight-stitch).


I wanted the sleeves to be lined so that there would be no raw edges to be finished. I used the technique from Roberto Cabrera's book on men's tailoring, (minus all the handstitching!). The inside out lining is place on top of the inside out sleeve with the seams aligned. I then zigzagged the seam allowances together so there would be some stretch. (Here you can also see the interfacing appplied to the cuff hem.) After zigzagging the seam allowances, I reach down through the lining and pull the sleeve up through it. Bam! A perfectly lined sleeve.


The two layers are then basted together at the top to keep the fabric acting as a single layer.


While I had my little Brother zigzag machine out, I added parallel rows of stitching along the roll line of the under collar toward the neckline as suggested in the pattern directions. This helps make a more substantial and stable collar.


Things are moving along, and I'm thrilled with my results so far. Next up is figuring out how to make a buttonhole in this kind of fabric.


Thursday, November 13, 2014

The "Phoney Missoni" Muslin

I figure that this sweater / blazer will cost somewhere in the $100 range to make. Considerably less than the real deal, but still enough of an investment to deserve the full muslin treatment.


A $2 jersey knit sheet from Goodwill turned out to be the perfect muslin material. It looks a little crazy but it served the purpose. It also gave me some practice working with a knit, which was much easier than I was anticipating. Talk about a whole lot of worrying over nothing!


So here is version #1, right out of the gate. All things considered not too bad. One of the defining features of the Missoni jacket is its soft shoulders. My inspiration garments don't appear to have any shoulder pads. My pattern, however, is designed for them. So my major alteration will be to adjust the sleeve head.


I measured the sleeve cap of my pattern and compared it to the armscye. Result --- There is 1.5 inches of ease in the sleeve cap. This is what gives the little "poof" at the shoulder which gets filled out with shoulderpads and sleeve heads. Exactly the look I DON'T want! So I set about removing the extra ease.


I'm not exactly sure where I first saw this little You Tube video, but it turned out to be the perfect solution.


The process is quite simple. First the pattern is slashed from side to side at the armpit level. Then a second slit is made perpendicular up to the "dot" at the apex of the sleeve cap. The two pattern pieces are then rotated (in my case, overlapped) to take out the ease. Ridiculously easy. Note: If you have a two piece sleeve just tape the two pattern pieces together before slashing.


It ends up looking like this.


And here is the result. My right shoulder has had the ease removed. The left shoulder is the pattern as drafted, and you can see how a shoulder pad would fit in there. Definitely NOT the look I'm going for. Removing the ease made the right shoulder a little too wide, so I ended up cutting about a 1/2" crescent off the shoulder between the front and back notches. This eliminated the "dropped shoulder" look.


The completed shoulder adjustment. The sleeve went in perfectly without any ease. Talk about easy!


My only other adjustment was the overall length of the jacket. I had already taken out 1.5", but it was still much longer than any of my inspiration models (in which the sleeves and body are pretty much the same length).


Out came another 2 inches.


This is much more like it! I'm happy with the fit and ready to dive in.


Wednesday, November 5, 2014

Laying the Groundwork for my Next Project

This project has me really excited. It's all about having the clothes that I'd love to wear, but could never afford. It's also a new challenge because it involves knits, something I've never tried.


First, my inspiration....


The Missoni sweater / blazer.


I LOVE this look. There's something about Missoni that I find very approachable. It always looks so put together, but in a very relaxed way. I guess I'd call it "friendly fashion". It's soft, relatively unstructured, and most importantly....colorful! Unfortunately, I don't have a spare $1800 hanging around right now! Plus it would be so much more fun to try to make something like this.


The artistry here just blows me away!


Armani does this sweater / jacket look too, but somehow it just seems a little severe and off putting. (Inspite of the raglan sleeves). Could you be friends with this guy?


Or you have to be Adonis with it stretched across your gym toned pecs!

But I digress!


With a vision in my head I went on the search for colorful sweater knits via Google and ended up at Vogue Fabrics. They had several "Missoni-esque" knits which really got my wheels spinning. I'm glad to report that I'm getting smarter about buying fabric online. No more fabric disappointments for this guy. I still haven't quite recovered from the "cheap stretch velvet" incident! Vogue Fabrics offers a swatch service for $1/ swatch. I ordered 4 and had them within a week. Best $4 I've spent in awhile.


Not huge swatches ( about 2" square), but enough to get the general idea. All four were really winners, but I limited myself to ordering just three. Again, I had my fabric within a week for a mere $6 shipping charge. Score!


Next I turned to Etsy in search of a pattern, and came up with two choices.


From 1979, this Simplicity unlined blazer specifically for stretch knits. Check out the shoulders on the green version!


Also this Butterick, which promises a time saving shortcut!


The Butterick is different for a man's blazer, in that it has a back yoke and one piece sleeves. It's very straight "boxy" through the torso. Appealing, but just not right for this project. I think this would make a great linen Spring jacket, so I've filed it away for the future.


The Simplicity has a two piece sleeve and is more fitted. It also has the requisite patch pockets. There are only 2 vertical seams opposed to the 3 seams of the Butterick. Simpler is better in this case. Especially since I've never sewn a knit before. So the Simplicity wins!


I'm off to buy ball point needles (the only thing I really know about sewing knits), and then I'll get started on a muslin.


And since some have asked.....

I'm facing new challenges with the boat as well! One step at a time


Happy sewing!