Thursday, March 27, 2014

Wearing my Jedediah pants!

I've been waiting for a decent day to model my new Jeds. The threat of a major snowstorm has passed, so finally, here they are. Undoubtably, the best pair of pants I own! Beautiful inside and out. Thank you, Thread Theory, for this great pattern. I can't wait to make more, especially the shorts version for the upcoming summer.


I made my Jeds with a brushed cotton twill from A & K fabrics in NYC. The color is a dark teal. It works perfectly with almost every shirt I've made. Here they are with a patchwork madras shirt. A total knock out! The season for wearing this shirt is very short, basically from now until the hot weather arrives. I plan on wearing this combination a lot.


Here I'm wearing them with one of my controversial ombré dyed shirts. I love this color combination! No one else has this look, so it make me feel like a million bucks.


I added a little whimsical "Levi's" type tag to the back pocket. Just a piece of my bias trim fabric sewn in. I omitted the decorative topstitching on the patch pockets. Just a personal preference.


This was my "Christmas" shirt, which I riffed off a vintage McCall's pattern from 1983. One of the male residents at my mom's nursing home really liked it! I like it too (even if the stripes on the pockets don't line up perfectly).


Love them with last year's spring buttondown! Like they were made for each other.


So when are YOU jumping on the Jeds bandwagon???


Tuesday, March 11, 2014

Making my Jeds


There's a complete sew-a-long for these pants on the Thread Theory website. The instructions are very easy to follow, and things go together flawlessly.

Other than shaving some off the hips and back seam, I only made one significant change to the pattern. I increased the width of the cut-on fly to 2.5 inches, as suggested by David Coffin in his book Making Trousers. This allows the topstitching on the outside of the fly to be wider. I increased it from 1", as called for in the instructions, to 1 3/8". Just a personal preference.

I just tape on a scrap of tracing paper and redraw. Easy.


I experimented with topstitching the patch pockets on some scraps. My fabric is a brushed cotton twill that I picked up on MPB day this past summer. It looks grey in my photos but it's actually a dark teal. Very substantial, and best of all... No stretch!


I prefer the pocket in the foreground that's edgestitched and then stitched again 1/4" away. It creates less shadow and that "stuck on" look.


I'm making my own bias binding with quilting cotton from JoAnn's bargain bin. This gizmo is the best thing since the Play Doh fun factory! I love it.


Inside the patch pockets. No one will ever see it, but I love knowing it's there.


The brushed twill that I'm using is quite heavy. I lined the fly shield with the quilting cotton to reduce the bulk. I skipped the interfacing.


I finished all the seams with my homemade bias binding. It was surprisingly easy to do, and SO worth the little bit of extra time it took. These pants are prettier inside than out! The "luxury" label is a gift from my daughter and it's the icing on the cake.
Tout fini! Time to try them on.

Sunday, March 9, 2014

The Jeds Muslin -- Oh, my saggy butt!

Yesterday I launched into the Jedediah pants muslin. Nothing ventured, nothing gained. I cut the size 36 thinking that the 34's would never fit. Wrong! They ended up way too big. Frightening. All I could think of was Betty Draper in her jodhpurs! They looked great on her, on me?... Not so much. Lesson learned.....go ahead and cut your usual size for these pants.

What follows is pretty scary!


OMG, where to start! Basically I have two issues here. First, I've cut the wrong size. Secondly, I have no hips and a flat buttock.


Even if I HAD cut out the right size, I just don't have the body to fill these pants out. But hey, we have to work with what we've got, or NOT GOT in my case.


My plan is pretty straight forward. I'll take in each side seam 3/4" and draw a new side seam that tapers down to just below the pockets. The pant width will stay the same at the bottom (they're already much slimmer than what I'm used to.) I'm also going to take a 1/2" out of the back seam in hopes of reducing the fullness there.

 
So here's my after shot. It may not be perfect, but it's much better. I've basted the pockets on and will go with the higher placement on the right. My flat butt always makes jeans pockets look like they're just hanging off me. I think this just looks better. Plus it physically feels better.


From the side. A very different silhouette for me.

My first ever zipper!


I know this doesn't look like much, but the pockets on this pattern are amazing. So much fun to make, and the end result blows me away. I probably put more effort into this muslin than necessary, but I always like to have an idea of where the difficulties are going to be. I'm slowly grasping the zipper and fly, I've got the pocket down, and I've practiced flat felled seams. I'd say my muslin has served its purpose, and it's pretty well trashed.
Time to move on to the real thing.


Saturday, March 8, 2014

Jeds

Pants -- A new frontier in sewing for me! For my first pair I'm making the Jedediah Pants from Thread Theory Designs. Let me just start by saying that these "kids", Morgan and Mattt, are doing some pretty amazing things out there in Vancouver. They've launched their own pattern company devoted exclusively to MENSWEAR. A very gutsy move, and I wish them all the success that they deserve. God knows there's a need. Please visit their website (which is gorgeous BTW) and see how innovative and stylish menswear can be.

You will find an entire sew-a-long on the Thread Theory website devoted to these pants, so I won't be going into a lot of construction detail. I'm sure this will eventually become the "trials and tribulations" of a first time pants maker, so I'm just going to jump in. Will they be perfect? Probably not, but I'm OK with that.

My goals are twofold. First, I just need to demystify the whole pants making process for myself. I can read and look at pictures all day, but I can't really grasp it until I physically DO it. It's just how I'm wired. Secondly, I'm hoping to "fine tune" this pattern over time, so I'll have a "go to" pattern when I need a pair of pants. It may take many pairs before I get there, but that's how it goes.


So here are the Jedediah pants. I think this design is brilliant. It's essentially a mash-up of jeans and khakis. There are slant pockets on the front (think Dockers), and patch pockets and a yoke on the back (think Levi's). The leg is quite slim and slouchy at the bottom. It's a young look and I'm not sure if I can pull it off, but I'm gonna try.


This is my first ever PDF pattern. I know lots of people hate them, but I thought it was actually kind of fun to put together. Everything seemed to line up very well. I roughly cut out the various pieces and then traced the size 36 using my Swedish tracing paper. I usually wear a 34, but after wrapping the waistband pattern piece around my middle, I convinced myself that I would never squeeze into it. You'll see the results of that decision next time. Yup, I'm making a muslin!


Thursday, March 6, 2014

Velvet jacket update, and moving forward

Thanks SO much for all the positive feedback on the velvet jacket. I just want to let you all know that it was a HUGE hit at the engagement party. I'm so glad that I both made it AND wore it. I have to admit that I almost chickened out at the last minute, knowing full well that I would be the only man not wearing a suit and tie... which I was. But no other guy got touched as much! The grandmother of the bride-to-be, a very stylish woman, was particularly taken with it, and threatened to rip it off me on several occasions. I lost track of how many martinis she'd had! It was an amazing party and great fun.

 
I know I wasn't feeling all that positive about the jacket, which was foolish in hindsight. I think we all have a tendency to judge our work quite severely. I know I do. As home sewists it's easy to get all caught up in every little detail, and fail to see the bigger picture. I don't think anyone was scrutinizing my seams or buttonholes. What they saw was ME, wearing a fabulous jacket, and that's quite enough. Now I'm actually looking forward to an event where I can wear it again! And isn't that one of the best things about making our own clothes? The joy of wearing things that we truly love.


Engagement party over, now it's on to the wedding which will take place on tony Martha's Vinyard in late August. Hmmm what does the eccentric uncle wear to this shindig? On my mental "Pinterest board" I'm pinning random ideas... wedding, New England enclave of the rich and famous, nothing too formal, fun vs stuffy, casual but classy, lighter vs darker, strong "prep" vibe, colorful, outside reception in tents overlooking the ocean, potentially very hot (or raining). The image forming in my head.... A suit (yes, the real deal, jacket and trousers), cotton, poplin, maybe seersucker or pincord, with a floral shirt and a vintage Rooster skinny knit tie. Are you still with me? Now to make it happen!

I had the chance to be in NYC for just a day, and I took full advantage of it. I was a man on a mission, so I made a beeline to Elliott Berman on W 35th. I just can't say enough about this place. A treasure trove. Just be warned that they're not open on weekends. As I'd hoped, I was able to "knock it out of the park" in just one store. As always, thanks to Eugenia of EBT for encouraging me to "go bold, or go home"!

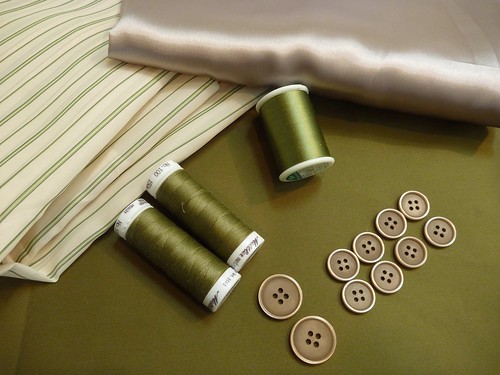
So here's the result.
A French floral cotton shirting in tones of peach, orange, gold and mulberry on a black background. An Italian olive poplin (actually a micro twill) which is 80% cotton, 20% silk with NO stretch.

This shirting was love at first sight! It was the boldest of three prints I considered, all gorgeous in their own right. It's a full 54" wide, so I can easily get a shirt out of 2 yards. End result....a very Liberty looking shirt for $24. Score! I'm wanting to make this up right away and start wearing it. It's no secret, I'm completely enamored with floral shirts these days.

The olive poplin has a wonderful weight and crispness to it, and best of all....NO stretch. I've really come to dislike stretch fabrics for tailored garments. They just don't "act right". Olive is a great color for me and I always feel confident wearing it. So this fabric has all the makings of great classic summer suit.

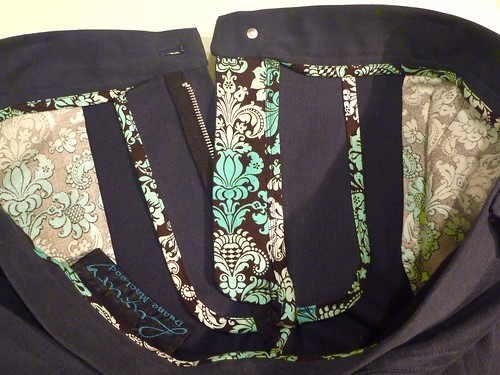
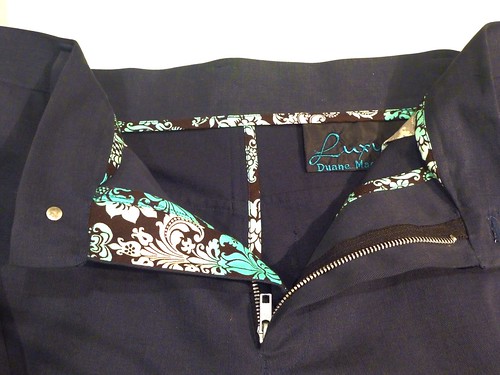
Not wasting any time, I scurried around the garment district getting the other supplies I'll need. The linings are from A&K fabrics. I picked up both polyester and a spool of olive silk thread at SIL for all that hand sewing I'll be doing. The buttons I'm not 100% sold on. They looked great in the store, but not so hot now that I have them home. That's easy to fix, and there's plenty of time to swap them out. I'll be using a set of premade lightweight hair canvas jacket fronts from B Black and Sons. I'd rather put my efforts into other more technically challenging parts of the project.


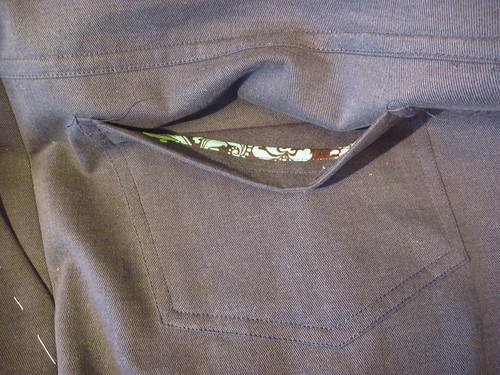
I'm going to be using this vintage Bill Blass pattern which is all over eBay and Etsy. It's a two button jacket with moderate lapels and double back vents. The trousers are basic flat front. This is a classic pattern that looks as relevant today as it did when it was originally issued IMO. Some of you may recall that I riffed off this pattern last year to make my lapel-less silk patchwork jacket. I've gotten into the habit of saving my muslins, so a big chunk of the fitting has already been done. I'll just need to redo the fronts, add the collar and possibly adjust the back. It will be nice not "reinventing the wheel" this time.

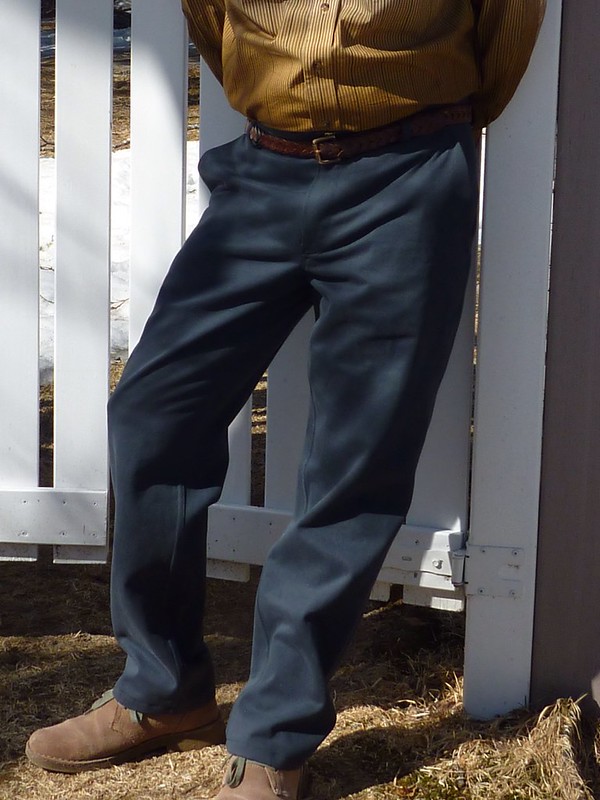
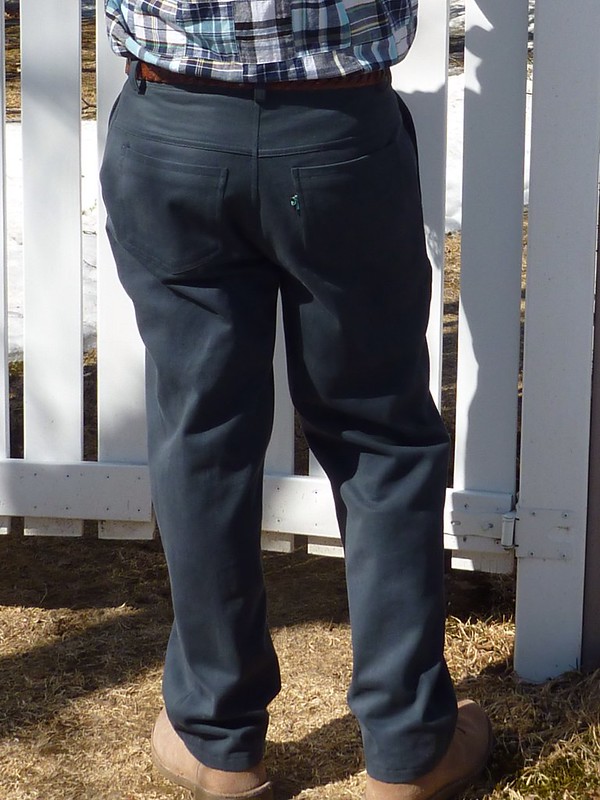
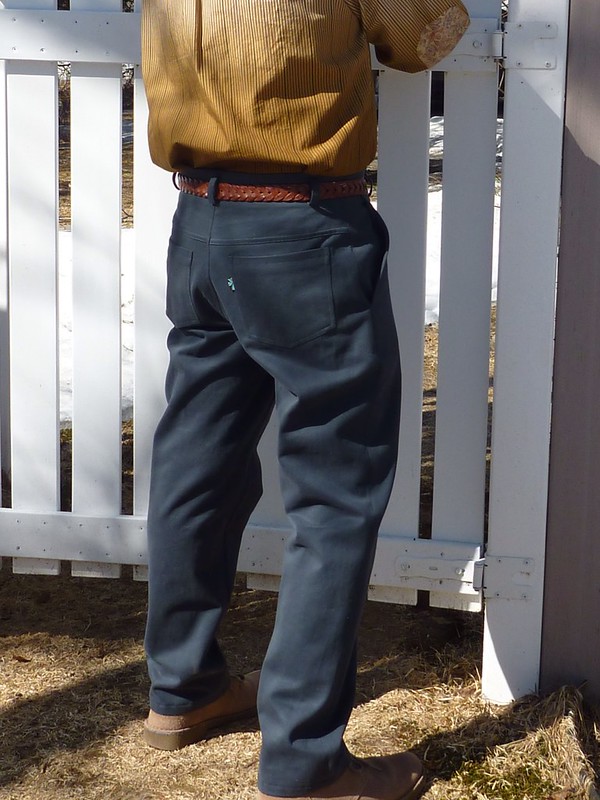
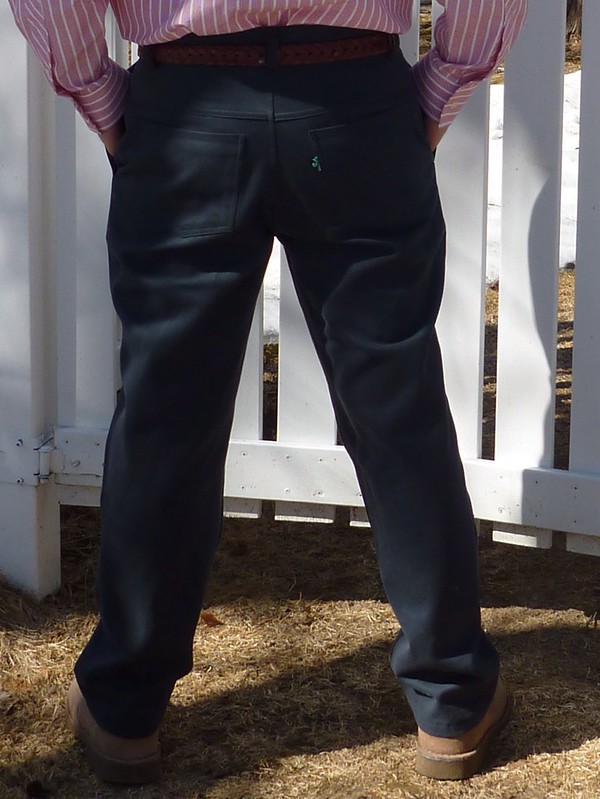
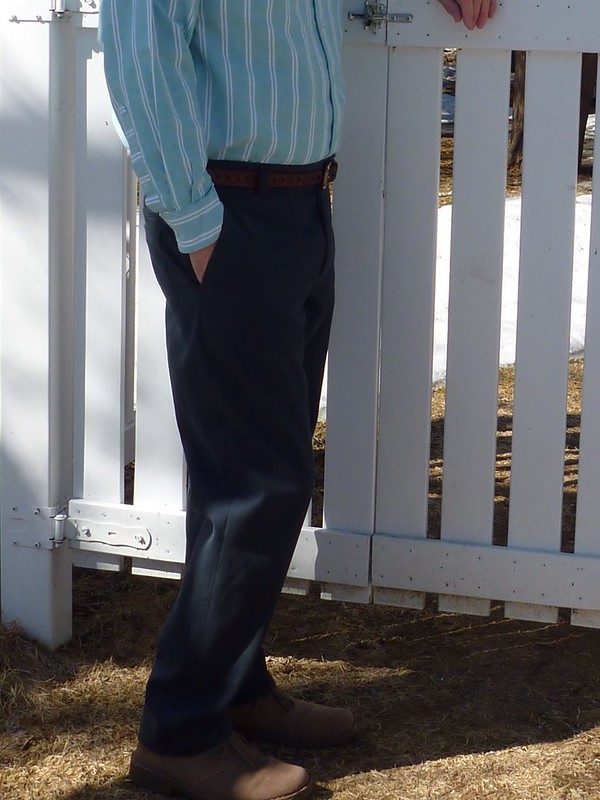
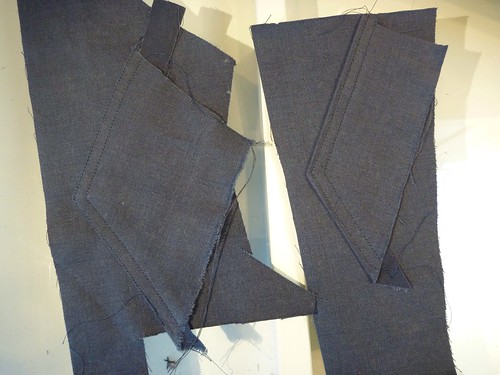
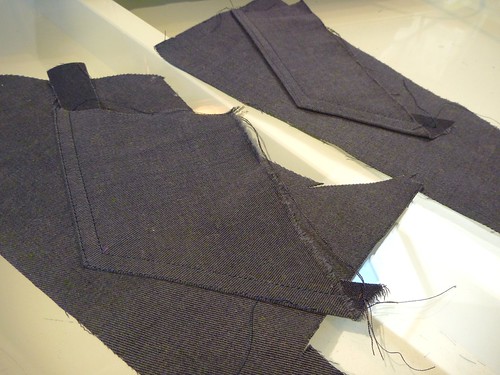
As much as I'd like to dive into that floral shirting, I have another project in the pipeline.... My first pair of pants! Wish me luck.