Showing posts with label alterations. Show all posts

Wednesday, November 30, 2016

Repairs Completed or..... Rip, Sew, Scream, Rip, Repeat.

OK. This exercise is completed, and it's been a journey for sure. At one point I was screaming louder than the collective scream heard from coast to coast a few weeks ago. My strategy was to take a break, go to yoga class, breath and then calmly return to the whole mess.


Yes, it got messy! The shirt in particular. But first up...the safari jacket.


This was the easier of the two repairs. I opened up a slit in the lining's side seam just big enough to put my hand through (I didn't want to mess with the armhole). Then it was easy to reach up inside and pull the sleeve head down and out. And what to my wondering eyes did appear?


Why, a sleeve head and seam allowance clips everywhere! All part of my failed attempts to improve the set of the sleeves way back when.


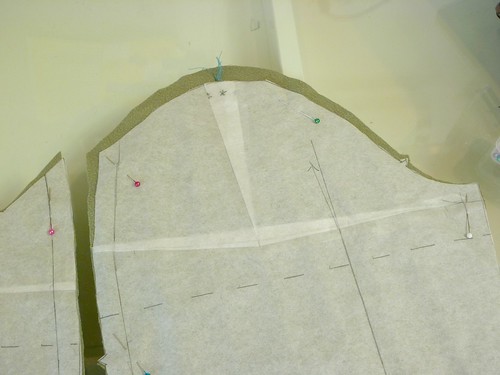
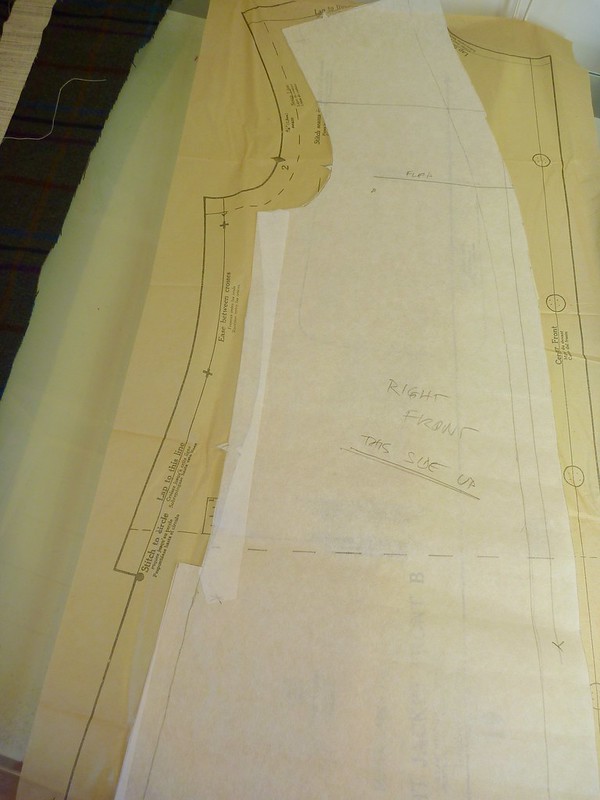
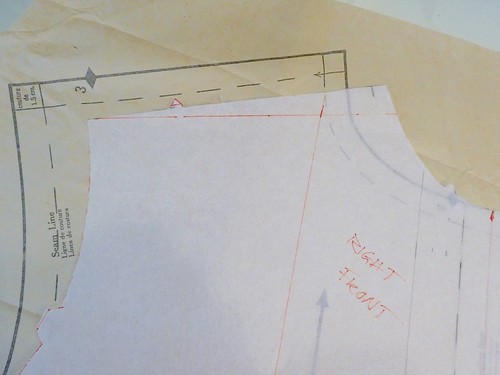
This time around I reduced the height of the sleeve cap by 5/8" at the apex, and then graded the curve down to the front and back notches. This greatly reduced the amount of easing required.


After sewing the new seam, I stitched in a new wool sleeve head over the top of the sleeve. This technique is from The Bishop Method of Sewing Construction, by Edna Bishop. A bias cut strip of wool 1 1/2" wide is lined up with the edge of the seam allowances, and then hand sewn in close to the seam. It sounds more difficult than it is. When the sleeve is turned rightside out the strip will fold over on itself and fill out the top of the sleeve. That's the theory anyway.


And here's how it turned out. It's not perfect by any stretch of the imagination, but still a big improvement. If it weren't for the Lycra in the fabric, any little dimples could have been steamed out. Alas, they just spring right back. Still, this repair is a win in my book. The safari jacket is back in rotation! (And I will continue my resolve to NEVER buy stretch fabrics again!).


On to the shirt.....


Picking apart a shirt is an exercise in patience and perseverance, especially when it's sewn with about 20 stitches per inch.


After what seemed like hours, I had a pile of abandoned parts. Cuffs, collar, stand, interfacing and the entire left front placket. From there, things actually progressed quickly. I had more than enough fabric to remake the replacement parts which I interfaced with Shirt Crisp interfacing from Fashion Sewing Supply. Everything was assembled and wouldn't you know, my old Singer 301 refused to make a buttonhole. Ugh!


I pulled out the Janome Magnolia, my backup machine, and figured out how its buttonhole attachment works. I had never used it before. My practice buttonholes were coming out perfectly. I bet I made at least 10. Everything was working flawlessly. The buttonholes on the placket and cuffs came out perfectly. I was cruising towards the finish line. And then....I had to make the small buttonholes on the collar.


Wouldn't you know. The F'ing contraption just took off on its own and decided to make a huge butttonhole. To make matters worse I had set the machine for its most dense stitch. Needless to say there were some choice words said. By the time I picked it out, the fabric was pretty well shredded. In fact there was actually a hole on the undercollar.


In another act of brilliance, I though a dab of Fray Check might help. Wrong! It bled through to the upper collar and left a stain. At this point a cooling off period was in order, so I put the whole mess aside for at least a week.


I had just enough fabric to make another collar, so I ripped the whole thing out again and started over. This time around the buttonhole gizmo worked perfectly, but I still held my breath through the whole operation. So what did I end up with other than frazzled nerves....?


A shirt that will actually get worn. I made a few stylistic changes this time around. The placket and collar are cut on the cross grain, I added a buttoned pocket, and swapped out the light colored buttons for something darker. The shirt will always have its flaws (I've learned a lot about shirtmaking since I made this), but overall it fits in better with my wardrobe, and I no longer feel guilty about the clothes that I never wear.


What's next? Some "secret sewing", and then a fresh project. Wishing you all happy sewing!


Wednesday, October 26, 2016

The Troubling Ethics of Clothes That I Never Wear

Maybe you caught this little post from Sewing on The Edge which linked to an article about a minimalist / capsule wardrobe? While my wardrobe is hardly minimalist, I do try to make clothes that I want to wear. Still, there are clothes that I've sewn that, for one reason or another, I NEVER wear.


There's something vaguely unsettling about this. I don't regret the time and effort involved in making these clothes; but to never wear them seems a waste of resources. To remedy this situation I'm going to undertake "rescuing" two items that never see the light of day.


First up....


My safari jacket.


I should be wearing the hell out of this jacket right now, but I cringe every time I see the horrible set of the sleeves. This mess is the collision of two problems....one, too much sleeve ease...and two, a stretch fabric that doesn't allow the extra ease to be steamed out. Note: this project made me swear off stretch fabrics forever. I've replaced this jacket with my wool Halston shacket, but I truly miss wearing it, especially this time of year.


This jacket was both a ton of work, and a joy to make. To have it languishing in the closet because I'm too embarrassed to wear it is a shame. My plan is to open the side linings and pull the sleeve through, shorten the sleeve cap and put things back together. I may even put in a little wool sleeve head to give the shoulders more structure. Here's hoping!


Next problem child...


The first shirt I ever made!


I made this shirt when Peter had his Shirt Sewalong (I think he was making the Negroni?). I think I've worn it once, which is a shame because it's a fine Italian cotton in a great color for me. Sadly, it has some issues. Some I can fix, others I'll just have to live with.


The biggest problem is lack of decent interfacing. It's just interfaced with white cotton fabric with little to no body. Since making this shirt I've learned just how important good interfacing is to a shirt. Hence, my addiction to Fashion Sewing Supply's "shirt crisp" interfacing. For me it's the difference between a shirt that gets worn, and one that's relegated to the back of the closet.


Next problem, the full French cuffs. Fun and novel as they are, they're just not me. They've gotta go.


Ummm...this was the best I could do at the time. Reality check, I still can't sew a curve worth a damn, so I'll replace the whole collar and stand (God willing). This time around it will be a button down, which is much more my style (and NO curves involved!). With a little love, I'm hoping to get this sad shirt back into the game.


Thankfully, I saved a good sized hunk of this fabric. Vindication for all us sewists who save all our scraps, and sometimes scratch our heads wondering why we do it!

Time to break out the seam ripper.


Thursday, May 12, 2016

Muslin #2, Mrs. Mole's fix and MORE!


The fitting battle continues.... First, thanks Mrs. Mole for your suggestion. I took your advice for my Dowager's hump, and the result is perfect. Plus it was extremely easy. Here's what it looks like...


I sliced across the back at yoke level, and swung the top half up to create a curve at the upper back. Simple. Also visible here is my forward shoulder adjustment, which I hope will move the seam closer to the apex of my shoulder. An equal amount was subtracted from the front shoulder seam to balance out the equation, so to speak.


I then went looking for clues as to why the jacket won't hug my neck. Check this out.....


So this is the neckline of the Bill Blass suit that I made a couple years ago. Note the nicely curved lined where the front joins the back. Also see that the back shoulder is wider than the front, which is correct.


Now look at my current pattern....


How is this jagged line supposed to curve around anyone's neck? No wonder it won't fit!


I've taped in a scrap of paper and drawn the missing curve. And while I'm tweaking things, I added a 1/4" to the lapel width (just a little too 60's narrow), and reduced the curve at the bottom edges of the jacket fronts, which seemed to "cut away" too much for my taste. (I think this was due to the high positioning of the buttons on the original).


So here's Version 2.0.


Much better fit around the neck, and across the upper chest. (You have to excuse my left arm, which is permanently bent due to an old injury, hence all the wrinkles).


My fitting issues seem to have moved from the front to the back, where excess fabric is bunched up behind my arms. It's not the end of the world, but I think it could look better.


I spent the rest of an afternoon trying to work it out.


This is version 2.1. I took out 1/4" from the back armscye. I'm way out of my depth here, but this is looking better to me. I still have room to move, and more importantly, I haven't screwed up the front. Sometimes I feel that I fix one thing only to f$&@ up something else. Have you been there?


These are details of Version 2.2. I think I've removed 1/4" from both the back armscye and the under sleeve. It's easy to loose track of what I'm doing. I've changed my shirt with each adjustment so I can keep them straight. I'm not a fitting expert, so I'm just going with what I think will work. Also, I haven't physically trimmed anything. I'm just taking in what I think is excess fabric and basting a new stitching line.
 
Lastly here is version 2.3, where I think I pulled the jacket side up 1/4" at the underarm. I can honestly say I'm at the end of my rope with fitting at this point. I wish I had the persistence of Michael over at Line of Selvedge, a guy who can work through muslin after muslin after muslin. Sadly, I don't have that patience. I'm burning out here. Fast.
 
This is, after all, just a bedsheet. I'm going to let the dust settle and read your suggestions, which are always so helpful. In the meantime I'll work on the boat; one project where I'm actually making some progress!
 
 
I've built in little side storage lockers (room for a life vest and lunch), and I'm preparing to install teak floor boards. Finally a level surface to stand on!
 
I hope all your projects, sewing and otherwise, are going well. Cheers!


Tuesday, October 13, 2015

Halston shacket progress....Jumping in

I went ahead and made a quick and dirty muslin, and I'm SO GLAD I did.


I wasn't far into the process before issues started popping up. First up, the sleeves had way too much ease in the sleeve cap. It might be fine for a leisure suit jacket (some shoulder pads would be in order to fill out the "puffiness"), but I'm wanting this to fit like a shirt. Sorry, no puffy shirts for me. The ease was especially dreadful from the shoulder seam down the back. Eeek! I calculated that there was 1 1/2" of ease in the sleeve cap, so I removed all but 1/4" of it.


Here you see the pattern adjustment and the excess fabric that will be cut away. The sleeves are so much easier to set without all that "pulling up a thread" mishegas, not to mention that it just looks better.


My next problem was with the side seams. The guys at Studio 54 must have been very trim, because there is a large amount of waist suppression to this pattern. There was no way this old man could ever button it up. I don't even think Spanx for men would help.


I reduced the curve of the side seams and the back seams. This provided an extra 2" of wearing ease. Although this picture makes the adjustment look perfectly straight, there's still a very slight curve.


Surprisingly, I didn't have to do a sloped shoulder adjustment.


This is my TNT shirt pattern laid over the Halston pattern. The shoulder slopes are just about identical. It was nice to dodge that bullet!

I shortened the sleeves by 1 3/4". I also played around with the collar, and decided that the original 70's version was actually the best.


Having made all the pattern adjustments it was time to cut this bad boy out. Cutting out any plaid garment is a time consuming process, but it can also be intensely satisfying. I relied heavily on the expertise of Suni over at a Fashionable Stitch for this project. I have such huge respect for this woman. Her talent is off the charts, and she was responsible for a large number of people finding my blog back when I was working my way through the Japanese coats.


If you're smitten with plaid this fall, be sure to check out the Plaid Chonicles


Next time I'll have some actual progress to show!

Tuesday, March 10, 2015

Getting Started -- The Watanabe Jacket

I'll admit it, I look at some fashion websites. It's a good source of inspiration for me, even if 99% of what's shown is a perpetual theme and variation on one thing -- Black.


I'm just NOT that person.


And don't get me going on sleeveless jackets for men!


I've been drawn to the work of Junya Watanabe for the past few seasons, especially his offerings for spring / summer. I didn't realize that he collaborated with Brooks Brothers a couple of years ago, which on some subliminal level may explain my attraction to his clothes. There's a definite "prep" vibe, but in a very light handed, whimsical way. I do like traditional style, and it's "age appropriate" for me; but I don't want to look like an old fuddy duddy either.


I love all these little details. Pockets, piping, patchwork. So my goal is to create my own version.


I'm also interested in the look of Engineered Garments. In particular the "fishing vest" look worn over a jacket.


I love this short over long look. I'm not sure I can pull it off, but I'm gonna try!


Here are the fabrics I've chosen. A heavy red "Oxford cloth" suiting that's been in my stash for a couple of years now. I bought this sight unseen from Denver Fabrics for something like $3 / yard. It's got an interesting weave, so the front and back are entirely different. I'll be using both the light and dark sides for the body of the jacket. Even though I've washed and dried this fabric twice, it's still quite stiff. It makes me wonder what it was really intended for. Upholstery maybe? Hopefully it won't be the downfall of the whole project. The other fabrics are a madras plaid and a khaki cotton with a subtle grid texture.


This photo shows the textures a little better.


I'm going to be using this Butterick pattern for an unlined blazer. As you may recall this pattern didn't make the cut for the "Phoney Missoni" jackets. Still, I'm intrigued by the yoke and the unfitted boxy style. The goal is an unstructured jacket that I can throw on over a polo shirt or a t-shirt. The spring barn jacket alternative? Perhaps.


I won't go into all the gory details, but I fought with the muslin for what seemed like days. Maybe picking this pattern wasn't such a good idea after all. The "intriguing yoke" rapidly lost all its appeal! In the end I felt that I was really grasping at straws to get the damn thing to look halfway presentable. There's definitely a point of diminishing returns with fitting, and I'd reached it. To preserve my sanity I decided to move on, cut it out and hope for the best.


In short, here's the rundown of what happened....


The ease was removed the the sleeve cap.

The apex of the sleeve cap was moved forward.

The armscye was enlarged (it was uncomfortably high at the underarm).

Excess fabric was removed from the upper back.

The side and back seams were taken in slightly.


Will any of this work? Here's hoping.


Thursday, July 31, 2014

Wedding Suit -- The pant muslin

All that remains on the jacket are the finishing details, things like sewing on buttons and adding some pick stitched details. These are all little projects that can be done in little snippets of time. If I have a few minutes I can sew on a button or two. But my deadline is looming, so it's time to move ahead on the pants.


I've only made one other pair of pants, so my knowledge of them is pretty shaky. I know that they can be difficult to fit (I struggled a bit with my Jeds), but I've decided going into this project that I'm not going to agonize over them. I don't have either the time or the desire to work through muslin after muslin, looking for that elusive "perfect fit". I'll be more than happy if they fit around my waist and aren't too saggy in the butt.

So, I made a very quick and dirty muslin out of a flimsy Goodwill sheet. It's about as minimal as I could make it. No zipper, no pockets. Just the basic shape sewn onto a waistband of sorts. So here's what I learned about these Bill Blass pants right off the bat. They are very straight legged.


Here I've laid a Jeds leg on top of the white Blass muslin. The Bill Blass pant leg is at least 4" bigger. Palazzo pants? The Jed pant leg is a little too slim for a suit IMO, especially for a guy my age. So I've decided to split the difference and remove 2" of width from the leg.

I also need another inch in the waist to accommodate my little gut. This was actually an easy fix.


Here's where the side seam is hitting the waistband. I added a 1/4" to the seam (sewn in the darker thread), which will give me an extra inch of waist circumference. This adjustment also straightens the hip area, which I'm learning is usually too full on most patterns. I'm just not that curvy in the hip.


The left leg has been tapered, removing 2" of width at the hem. Look how that change has improved the fit at the bottom of the buttocks! I never anticipated this. Fitting Score!


Here the extra fabric in the right pant leg is more evident. It makes the pant visually bottom heavy. Of course,the pattern appears to have been drafted for a 6' 4" man. I've shortened the inseam by 6" and they're still too long!


Are they the perfect fitting pair of pants? Hell no! Will they work? Yes! Time to cut out these bad boys and delve into the mysteries of sewing trousers. Zippers, flys, crotch shields, Oh My! So much new sewing territory.