Showing posts with label Folkwear Victorian shirt. Show all posts

Tuesday, February 28, 2012

Victorian shirt #2 -- Afternoon tea


Welcome!  Today we're having tea.  I'm pulling out the tartan English bone china and wearing Victorian shirt #2 for the occasion.  


This is my own revised version of Folkwear # 202.  The bib sections have been cut on the bias and the placket has been redesigned to simplify construction.  The new placket also eliminates the center front box pleat of the original design.  


The fabric is a celery green and white stripe Italian cotton shirting from Denver Fabrics.  It was wonderfully easy to work with. 


The fabric is very finely woven so I made this version with a doubled back French cuff.  The buttons on the placket are white genuine shell that I found at the flea market.  The cufflinks are vintage pearlized green button links that I found on Ebay.  The steampunk brooch is gift from my daughter.  


It all goes wonderfully with my brocade vest.  I now have two versions of this shirt, and feel prepared to face any special occasion with style! 

Wednesday, February 15, 2012

My worst day of sewing ever!

Today was one rough day for Victorian shirt #2.  It hurts just to think of it.  Things actually started out well, but spiraled out of control.  


I drafted a pattern for the doubled back cuff based on an idea from David Coffin's book.  The cuff flairs out a bit from where it attaches to the sleeve.  Things were moving along well.  The cuffs were cut, interfaced, attached and I was ready to edgestitch them.  While edgestitching I suddenly felt a lump in the cuff.  A piece of fabric that I had trimmed from the seam ended up inside the damn cuff.  I had to rip out a bit of the cuff seam and fish out the piece of fabric. Little things like this can really make me come unglued. I fixed the problem and regrouped.   


With everything edgestitched I moved on to the buttonholes.  13 of them.  I'm not superstitious but after today I may be.  Things were moving along when......8 buttonholes into the process my ancient Singer buttonholer stopped working.  Holy crap!  What do I do now!  

For those of you unfamiliar with these devices they "wiggle" the fabric back and forth while stitching.  Suddenly I wasn't wiggling anymore.  I never dreamed I'd be taking this contraption apart, but that was my only alternative.  


So here are the guts of a Singer buttonholer.  I'm no mechanical engineer, so it took me awhile (more like forever)  to figure out what goes on here.  


This is the center of the action.  The part on the left that looks like a bird's beak is attached to the shank of the machine.  As the shank moves up and down the ratchet behind it pushes the cogged gear.  This in turn produces the much needed wiggle. The problem was that the ratchet wasn't quite connecting to the gear when the needle was at its lowest point.  It took me forever to figure this out, and I won't go into all the gory details.  If you have one of these gizmos, be sure you have a 1/8" allen wrench.  'Nuf said. 


I kept struggling to get a damn buttonhole made.  Here are some of my attempts.  Needless to say there was a lot of foul language.  After about 2 hours I finally got the damn thing to consistently make a buttonhole.  I made the final 5 buttonholes and was holding my breath the whole time.  


There was one bright spot to the day.  My baltic amber cufflinks arrived from Moscow this afternoon.  Thank you Etsy for restoring sanity to my life! 

Victorian shirt # 2 is now finished.  I hope to post some photos next week.  I hope you all have easier sewing than I did today.  

Tuesday, February 14, 2012

Sewing between chapters of The Count of Monte Cristo

Readers, my Christmas gift to myself this past year was an Amazon Kindle.  There are some features that could be improved, but I can honestly say that I totally love it.  For the past couple of weeks I've been reading the unabridged version of The Count of Monte Cristo.  Hands down this is the most fun I've had reading since the whole Harry Potter series.  I was basically aware of the part about tunneling out of prison, but it's SO much more than that.  I can't recommend it enough.  Just beware, it will impact your sewing projects.  I've been working on Victorian shirt #2 between chapters.  "Ok, I'll pin on the collar and then I can read a chapter."  "Ok, I'll baste the collar and then read a chapter."  "Ok, after sewing the collar I'll read a chapter."  You get the picture.  


The sleeve plackets were a walk in the park after having dealt with the front bib and placket construction.  Because my shirting is very fine, I've decided to go with a full doubled back 
French cuff.  Of course this means searching for cufflinks!  These little guys came in the mail yesterday.  They're little green pearl buttons, although they don't photograph that way.  


Cute, vintage and cheap.  Only $3.99!  


I seem to be forever altering  this pattern.  The original pattern, shown at the top, has a one piece collar that folds over.  It's easy to make, but at the same time kind of unsubstantial.  I've decided I'd rather have a two piece collar with a seam at the top edge.  This should add some much needed body to the collar.  Below the original is my new collar pattern.  I lowered the front neckline when I increased my sloped shoulder adjustment.  As a result the collar needs to be 1/2" longer.  You can see where I cut and taped in little sections of paper.  At the bottom of the photo are my new collar pieces, one of which is interfaced. 


The neck edge is staystitched and clipped.  In addition to pinning on the collar, I also take the time to baste it below the staystitching.  This helps avoid any little gathers that will just have to be ripped out and re-sewn.  Oh, how I hate that!  


It's finally starting to look like a shirt.  Now I can go read a few more chapters!  :)


Thursday, February 2, 2012

The Victorian shirt.....fini!


It's a wrap.  The Victorian shirt,  Folkwear #202, is done.  I'm sorry for the poor quality of the photos.  It was a very dreary day here in Maine, so the combination of low light and a very dark purple shirt made it difficult.  

Still, wearing this shirt makes me feel like a king!  The fabric has wonderful heft and a fluid drape.  The color I adore.  The cufflinks are fun and give me a reason to haunt Etsy for more. But most importantly, it really fills a gaping hole in my wardrobe.  This is the shirt I need to wear to a party or, God willing, out on a date.  


The single French cuff is from David Coffin's shirtmaking book.  It's not as bulky or ostentatious as the doubled back variety, which really needs to be worn with a jacket in my opinion.  This option lets a guy have a little fun with his clothes without looking stupid.  Trust me, we care about that stuff.  I added one of the little glass buttons to the placket to hold it shut.  A little detail that actually serves a purpose.  


There's some interesting construction with this shirt.  The placket formation ends up producing a box pleat below it.  I'm no spring chicken and I have a bit of a belly.  The combination of a box pleat forming just below the sternum and a belly isn't exactly a good thing.  Think maternity wear.   To keep the pleat under control I stitched it "shut" below my belt line.  I would suggest this to anyone who isn't going to be wearing this as a nightshirt.  


I'll be hearing confession in the kitchen in 15 minutes!  


When the occasion calls for pulling out all the stops I can add my shawl collar brocade vest.  Now it's a party!  


It's also the perfect way to sport the gorgeous steampunk pocket watch that my daughter gave me for Christmas.  

To recap, here are all the changes I made to Folkwear #202 

1. I shortened it by 4 inches, and next time will shorten it by 5.  I truly think this pattern was designed for women to wear as a tunic or dress.  

2. I shaped the back and consolidated all of the pleats into a center box pleat. 

3. I did a sloped shoulder adjustment.  It could use just a touch more I think, but I would definitely have to lower the neck opening for that.  

4. I added a sleeve placket (with a buttonhole) and again reduced the number of pleats.  

5. I redrafted the cuff to accommodate cufflinks. 

6. I moved the "x" topstitching from the placket down below the waistline to control the front box pleat.   

Thanks to everyone who made this project possible!  


Credits: 
Olive wool trousers   Jos A Bank 
Charcoal wool trousers  Brooks Brothers 
Fragrance  Boucheron pour homme 

Tuesday, January 17, 2012

Shirtmaking -- How slow can you go?


It's amazing how much precision sewing goes into even the cheapest RTW man's shirt.  I'm sure there are all sorts of special machines and feet that create the various seams.  Nonetheless, the craftsmanship is pretty amazing, especially when you're trying to re-create that level of exactness on a home sewing machine.  

It's been awhile since I've made a shirt and I forgot how challenging, yet at the same time satisfying, the process can be.  Truly, the devil IS in the details when it comes to making a shirt. My only suggestion is to just proceed very slowly.  I just crawl along taking it one seam at a time.  

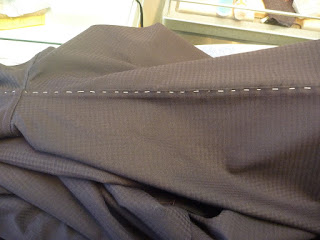
As usual, I baste the hell out of everything.    


Here I'm working on the plackets and bibs.  This is the major design feature of this pattern and I want it to come out well.  The seam allowance of the bib is pressed under and it's edgestitched to the shirt front.  There is a lot of edgestitching on a shirt, and I find it extremely challenging to do well.  I just go very slowly and take it a few inches at a time.  


This is the presser foot of my Singer 301.  To edgestitch, the fold of the fabric is aligned with the inside edge of the right side of the foot.  This will make a line of stitching about 1/16" from the edge.  It takes some practice.  Basting the seam before edgestitching helps hold the fold in place.  I also find having a very high intensity light focused on the presser foot helps me see better, which in turn helps keep me "on track".  


I think my fabric is a cotton / polyester blend with a touch of lycra.  It has a great drape, but it doesn't take a pressing very easily.  I've decided to make the flat felled seams of the body and sleeves on the inside of the shirt.  I basted the folded over seam allowance in place, and then stitched 1/4" from the seam from the outside of the shirt.  Not exactly Kosher, but it looks better than a poorly done flat felled seam out where everyone can see it.  Oh, BTW, the pattern calls for 1/2" seam allowances.  I think that would be incredibly difficult to flat fell, so I increased it to 5/8".  Why make hard things harder than they have to be?  


Here is the cuff basted in place ready to be edgestitched.  I consolidated the excess sleeve fabric into two tucks rather than the nine small tucks called for by the pattern.  I've also made the cuff a single French cuff.  I picked this idea up from David Coffin's book on shirtmaking.  It's a little bit dressier than a typical barrel cuff, yet not as heavy and clunky as a double backed French cuff.  


A final shot showing some of the details.  I'm totally loving how this is turning out.  I've been looking at vintage mother of pearl shirt studs on Ebay and Etsy.  I have no idea how they work, but they could be a unique option for this shirt.  

Thursday, January 12, 2012

The revised muslin


I'm sure I can get this shirt to fit better.  I'll start with some easy fixes and hope it will be enough. 

I'm not a fitting expert.  These are just a couple of techniques that have worked for me in the past.   


Fix #1 is the easiest -- adding some shape to the back.   I start by laying a piece of Swedish tracing paper over the pattern.  As you can see the top of the back on the pattern is completely straight where it attaches to the yoke.  Therefore, there is no shaping to the back.  The shirt will fit better if the back seam is curved.  Starting at the shoulder seam I've drawn an arc up to a point 1.5" above the existing pattern.  That's it.  The curved back sewn to the straight yoke will act like two horizontal darts pointing to the center of the back.  You may also notice that the pattern as drawn has 7 small tucks across the back.  Personally I think that's more woman's blouse than man's shirt, so I'm going to fashion the excess fabric into a center box pleat.  


Now I move to the front for fix #2 -- the sloped shoulder adjustment. The pattern as drafted would only fit me through the shoulders if I inserted HUGE shoulder pads.  So I need to increase the slope of the shoulder seam.  It's a two step process.  The neck opening and front edge of the shirt will stay the same.  I drop the sleeve edge of the shoulder seam down 2" and redraw the cutting line from the original neck line.  Above you will see my new pattern laying over the original.  

On to step 2. 


Now I slide the pattern up until the new shoulder / sleeve point meets the original armscye.  The armscye is then retraced.  This process raises the center front of the shirt somewhat, so it may be necessary to drop the neckline just a touch.  I'm OK with it, so I'll leave it alone.  But if I did want to make that adjustment it would be very small, no more than 1/4".  


Here's what these adjustments have done after pulling the shirt apart and roughly basting it back together. The shirt now fits better across my upper chest, and the huge diagonal folds are gone. Yay! 


The back now has some shape across the shoulders.  I've also tapered the side seams and taken 4" out of the shirt's circumference.  Is it perfect?  No.  Is it better?  Hugely!  I'm satisfied with the improvements,  so I'm moving on and cutting this baby out.  

Wednesday, January 11, 2012

The - "what was I thinking???? - muslin


I'm not sure what on earth made me think I could just cut this shirt out and it would fit.  I really deserve a good "dope slap" for this one,  especially after participating in Peter's MPB shirt sew-along last year.  


Hopefully you can look past the crazy fabric.  This was a $2 twin sheet at Goodwill.  As always, I need a sloped shoulder adjustment.  Why I just didn't start there I'll never know.  Essentially this pattern, apparently based on an historical garment, is just a rectangle with sleeves stuck on it.  It really isn't going to fit anyone.  I'm not planning on attending any historical re-enactments any time soon, so I've got some work to do.  


The huge diagonal fold coming from my arm pit is a sure sign that a sloped shoulder adjustment is in order.  It sounds horrible, but I've learned that it's not hard to do.  On the positive side, the bib and plackets were very easy to do.  I've put in the "X" topstitch detail called for in the directions, but have decided to leave it out.  It's a little too Timberland for a dressy shirt IMO.  There's lots I don't like about this pattern, which I'll get into eventually. 


As if the front isn't bad enough, the back is voluminous.  


I added a sleeve  placket, a la David Coffin.  This alone is worth the price of his book.  I just wish his editor had made the instructions accompany the illustrations.  They don't, so one is constantly flipping from page to page to make sense of it all.  It's totally maddening.  I'm happy with the sleeve length, but the cuffs are too small.  That's an easy fix.  

Time to start ripping this mess apart!  There's hope for this shirt yet.