Showing posts with label NY Elegant Fabrics. Show all posts

Monday, September 26, 2016

Pantone, Progress and Problems

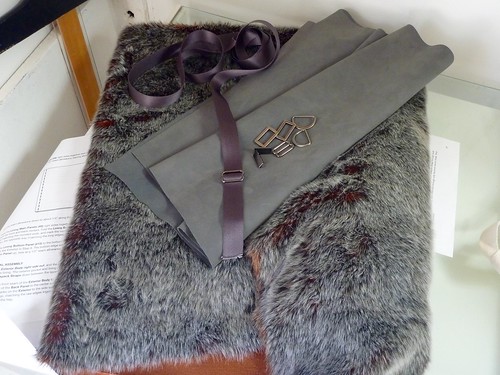
Clearly the Pantone prognosticators were watching me last March at the MPB Winter Frolic! Were they hiding behind the rolls of faux fur at NY Elegant? Did they watch me pick out this fur, knowing that I'm always way ahead of the fashion curve?


I picked this.....


Low and behold.....what do they pick for this Fall's color trends???


Potter's Clay and Sharkskin!


Of course, I'm being silly here. But I do find it amusing that my current project fits in with their color predictions. Truthfully, I would never have known about their color selections if Peter, over at Male Pattern Boldness, hadn't just finished a great work jacket in Aurora Red. Or is it Cranberry? Maybe Tomato?


In the end, who really cares? Certainly not me.
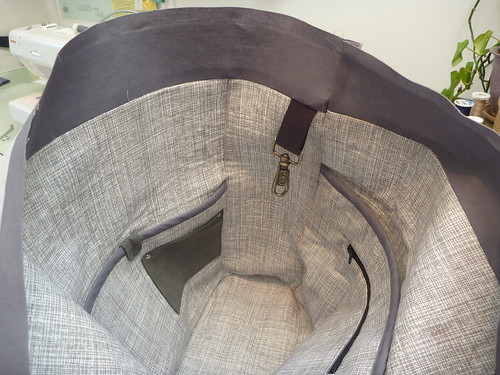


I completed the lining, which includes the scavenged swivel clip for my car keys.


I took my readers' advice and added a handle. It's not visible here, but the folded ultrasuede is held together with Wonder Tape (another gift from Kyle over at Vacuuming the Lawn). It's " secret weapon #2". It made the assembly so much easier. I added a couple of rivets for added reinforcement (plus, I just love using them).


The Janome had no difficulty sewing through all the layers here, which are considerable!
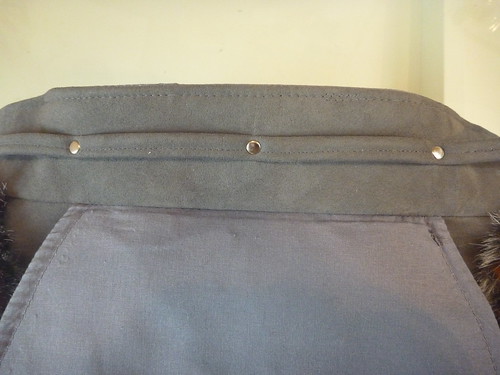


The drawstring is also attached with rivets. It's actually easier than the directions, which say to sew through all layers along the stitching line of the drawstring.


The upper band of ultrasuede is interfaced with a midweight fusible Pelon product that I picked up at JoAnn's. I have to say that I've been spoiled by the interfacings from Fashion Sewing Supply. However, the ones I had on hand all fuse at high temps, and I was worried about melting the faux suede. JoAnn's was the expedient choice, but it's hard not to feel that I paid a price "performance wise" with what I purchased there. When I make my next bag (I'm sure there'll be another) I'll take the time to order in some better products.
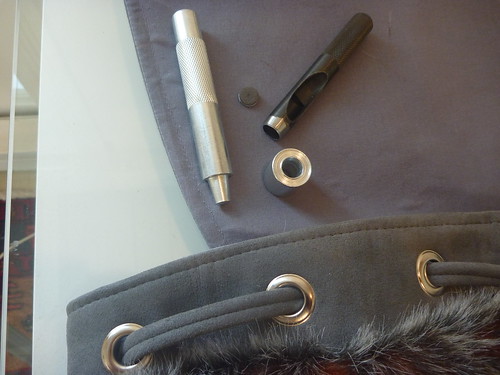


Setting the grommets was much easier than I had imagined. I bought this set on Etsy. Basically... Punch hole, insert the hardware, place on base and pound with a hammer. Tout fini!


I took my new backpack on a test drive this afternoon. I had a service appointment for my car which would take about 1 hour. I packed my iPad, Kindle and ear phones into their appropriate slots and headed out. A pretty significant problem became immediately noticeable.


Because the lining is only attached at the very top edge of the bag, the weight of items in the pockets allows them to shift around, mostly front to back. When than happens the top of the pack gets pulled down. It gives the impression that the backpack is collapsing in on itself. Not a good look!


Upon returning home I went to work correcting the problem. I secured the lining to the back panel of the exterior bag with four rivets. Not the easiest thing to do with the bag all assembled, but where there's a will there's a way. No more shifting lining, (and it looks good too!).


Next time....the completed backpack. Here's a little tease.


Saturday, August 27, 2016

Backpack Crush!


Oh, MIchael, you may not dig the hairy forearm look, but I'm totally crushing on your hairy / fur backpack for Fall 2016.


Talk about "Love at First Sight" !!!


Even though this backpack is plastered all over MK's website, I can't find it for sale anywhere. NOT that I would ever be able to afford it. The closest thing I can find is a black shearling version at Saks for $798. Yes, people have that much $$$ to blow on a backpack.


My mission is to create my own version which, admittedly, is whole lot more fun. Plus, this will be my first foray into bag making.


I started collecting the materials for this project at Peter's MPB Winter Frolic back in March. (I'm hoping for a repeat in 2017!). I purchased a half yard of faux fur at NY Elegant on W 40th St. They have a huge selection of furry delights up in the mezzanine. Their inventory truly runs from the sublime to the downright ridiculous. Don't, however, expect to find any "bargains" here. Sometimes a splurge is in order. And somehow, having so many furs to choose from can justify the price of admission. I fell hard for this silver tipped number with a rust undercolor that's revealed when the fabric folds. I wish you could feel how deliciously soft it is. Yummy!


I've gradually been collecting the other bits and pieces I'll need. I'm going to substitute gray ultrasuede for the leather portions of the MK bag. The webbing is actually a better match than it appears in these photos. Trust me, it's not lavender! I still need to get a grommet kit and 3/8" grommets. I'm also reconsidering some of my hardware choices. There are lots of options out there! Swivel clips, D rings and slides, Oh MY!


I've also hit JoAnn's for some interfacing and stiffening products I'm not familiar with. Pellon Shapeflex (which is a fusible stiffener for the back and bottom), and Pellon Thermolam (a fleecy fusible that I'll pad the lining with). If anyone has experience with these please chime in!


I looked around on the Internet and Etsy and settled on this pattern. The Lucy backpack from Swoon Sewing Patterns. It has the overall shape of the MK, a drawstring top with grommets and a good sized flap. It has some features I don't like, but those are easy to omit. I'll configure the inside to suit my needs. Basically, a padded pocket to hold my iPad, one small zippered compartment and other open pockets for pens, checkbook, fabric swatches etc.


I picked up a remnant of upholstery tapestry for $2 at Goodwill and banged out a rough "muslin". The directions were well illustrated and very easy to follow. Kudos to Swoon!


I poked holes in the top band to simulate grommets and threaded some SnugHug through to get the gist of the drawstring. It really helps me to work through all this in advance, especially since I've deviated from the pattern in places.


This is just some twill tape to simulate the straps.


Overall, I think I'm off to a good start. The bag may be just a touch on the small side, so I may lengthen it by an inch or two. The next step is to research how to work with faux fur. I hear I'll need a good vacuum cleaner!


My sewing and blogging has really taken a backseat to the boat this summer. I'm really wanting to have the whole project wrapped up before the snow flies, but there are days when I have my doubts. Recently I've been making the spars (mast, boom, gaff and jib club). Basically, planing and sanding square stock into round parts. I'm pleased with the results, but can't honestly say that any of it has been fun.


Bring on the backpack!