Showing posts with label silk thread. Show all posts

Sunday, February 25, 2018

Suit progress and... learning some new skills

With the jacket fronts complete I moved on to the sleeves. It was a nice break from all the detail work (pockets, taping and pad stitching). The sleeve construction is really quite simple, it just gets fussy where the lining meets the vents.


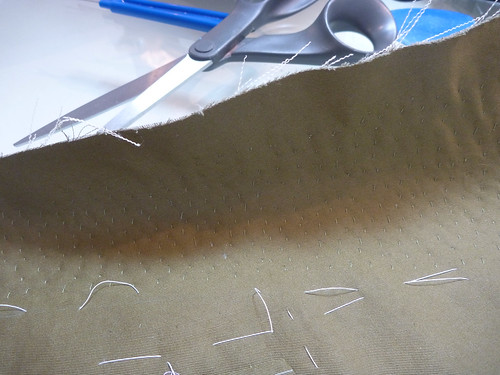
A wide strip of pocketing cut on the bias is basted into sleeve cuff. The vents and hem are folded into position and slip stitched into the pocketing.


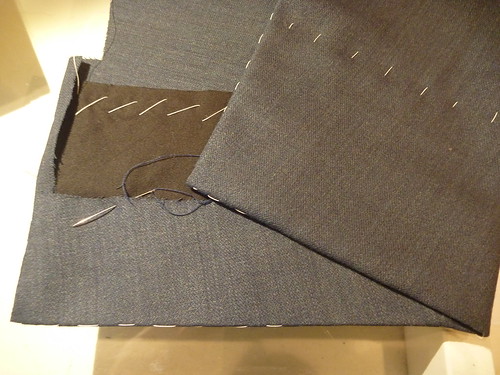
No stitches are visible from the outside. It's like the hem is held in place by magic!


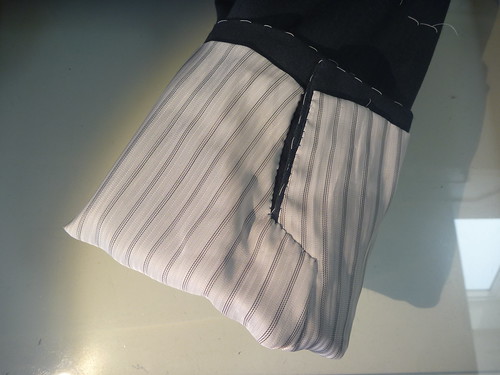
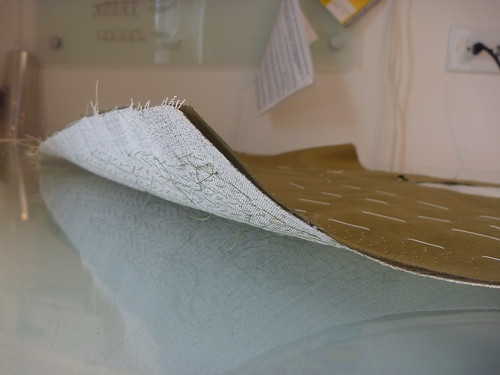
Getting the lining in around the vents is NOT magic! It took me awhile to figure out what part overlaps what, and how to get from one side to the other. Working with lining material is its own special hell. It's a lot of frustrating work for something that will never be seen!


Moving on.....


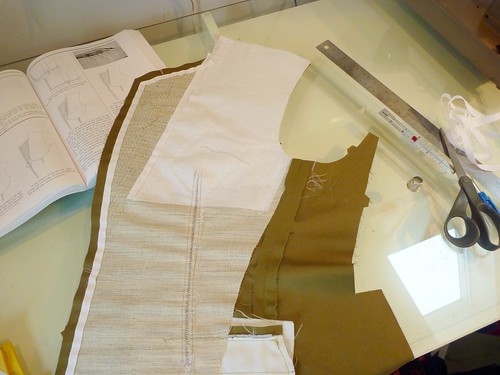
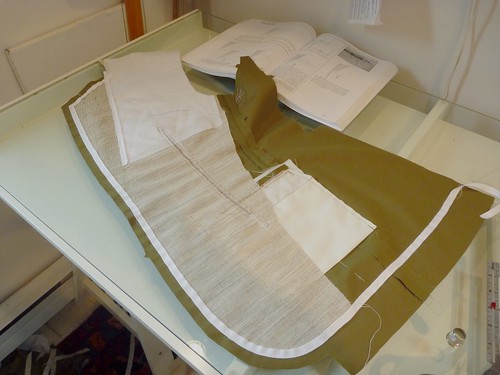
Are there any perfect patterns? Hmmmmm. This pattern, as much as I like it, has its issues. The first issue to rear its head turned out to be the jacket front facing (which becomes the lapel when it's folded back). The lapel edge is curved. Why is this a problem? If you're working with a stripe, the stripe will fall off the lapel rather than be parallel to it. My fabric has a subtle striation to it, so the front facing needs to redrafted.


The original pattern piece is on the bottom. Notice the curved edge. The new pattern piece on top is drawn with a straight edge. Using an iron and LOTS of steam, the new facing is curved to match the original pattern piece. Steam is used to shrink the other side of the facing which will ripple up during the process. This is where working with wool is a wonder!


Once this step is accomplished a new front lining will have to be drafted. Usually I make an inside breast pocket that slightly overlaps onto the facing. This is pretty standard stuff on all RTW jackets. But now all my usual pattern pieces are out the window. Arghhhh, what to do?


I turn to Cabrera's "Barcelona" pocket.


Confession..... I can get totally freaked out by sewing illustrations.


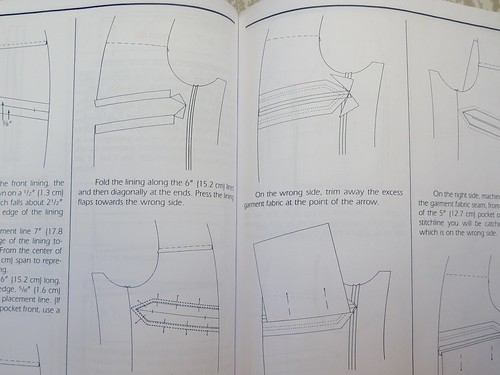
Just looking at this scares the sh** out of me! In my head I just assume that this is WAY beyond my ability. I've always skipped over these pages of Cabrera's book, and retreated to familiar territory. But this time I'm pretty much forced to confront it. And guess what?


It's way easier than I ever imagined!


Like so many things in tailoring, it really comes down to careful measuring and taking things one little step at a time. Making the Barcelona was actually less work than the usual double piping pocket that I've used in the past. I'm sold! If you can measure and cut a rectangle, you can make this pocket.


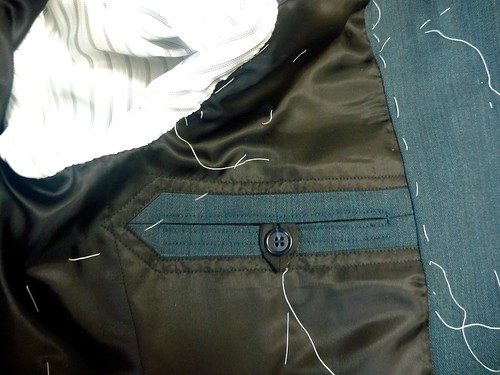
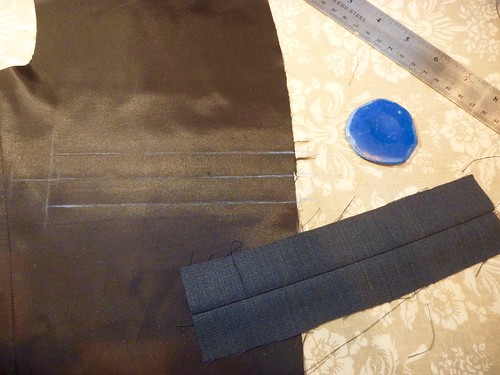
And here is the completed pocket. I did add one extra step....I fused a very lightweight interfacing to the back of the lining. This made it much easier to work with, and I'm all for that.


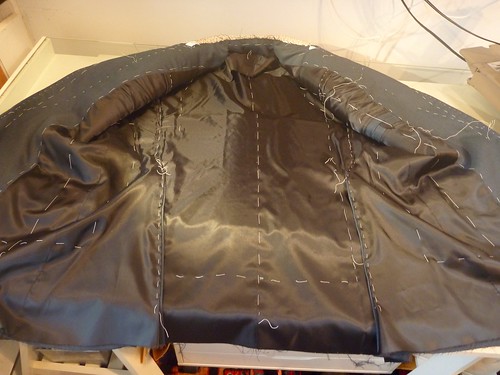
Working along, the jacket pieces get sewn together and the lining pieces are basted into position. I know this isn't everyone's cup of tea. The combination of basting and having extra wide seam allowances on the lining pieces makes this process much easier. This is the essence of "slow fashion", and it can actually be very satisfying. Using silk thread for the slipstiching makes it go so much easier because it's much less inclined to tangle.


My next issue turned out to be the collar. I've made this jacket a few other times and have fiddled with the pattern piece multiple times. Somehow I've lost the revised pattern, because what I have doesn't come close to fitting the neck opening. GRrrrr. I should take better care of my patterns when I file them away.


Enter more intimidating illustrations!


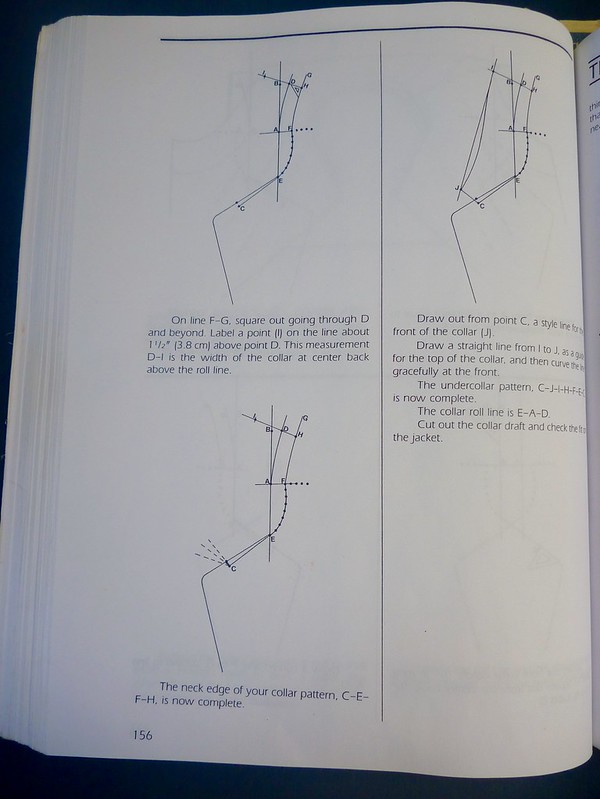
This takes me back to the nightmare of Algebra II in highschool. I never dreamed that I'd be using this page from Cabrera, but here I am needing to draft a new collar. And guess what..... this was F'ing easier than the Barcelona pocket!!!


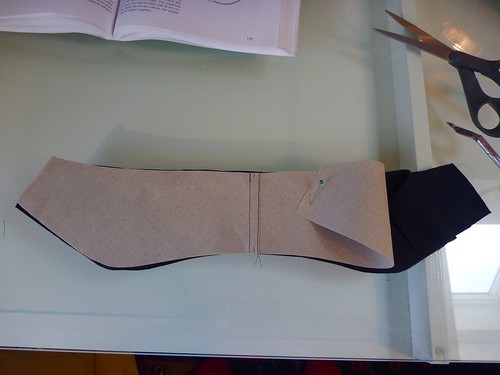
I just followed along step by step, and voila! Here is the original pattern piece (white) sitting on top of the new pattern (brown). Any wonder I couldn't get it to fit? Another new skill obtained.


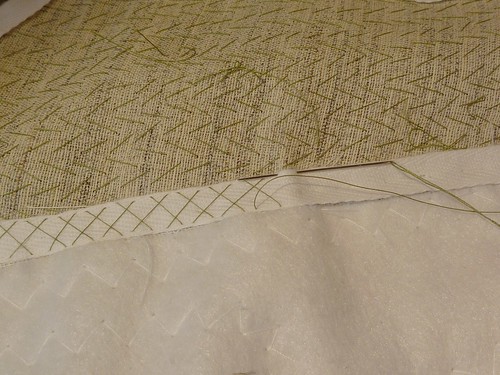
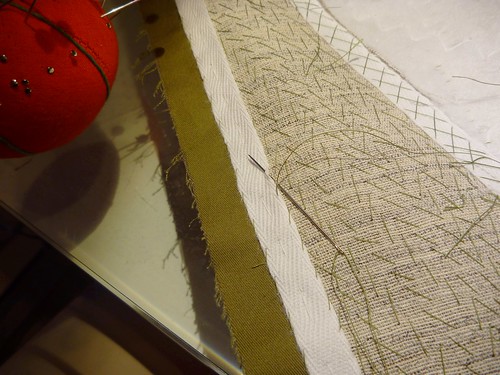
The collar is constructed on a base of French canvas and undercollar felt. It doesn't show in this picture, but a piece of pocketing is sandwiched between the layers at the collar ends to add even additional body.


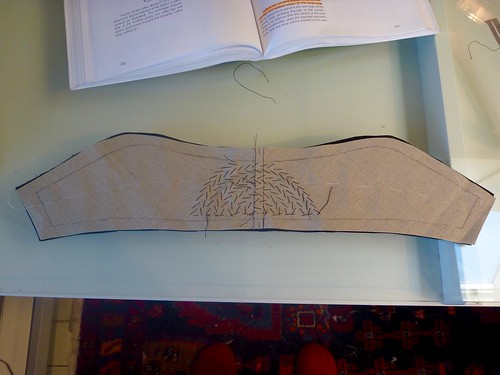
The whole assembly is pad stitched together in a circular pattern. Because the components are very stiff, it's sort of like pad stitching a cardboard box. Silk thread makes the process easier. After pad stitching the collar it's shaped on a tailor's ham with lots of steam. The result is well worth every bit of effort; and having done it a few times, I wouldn't consider making the collar any other way.


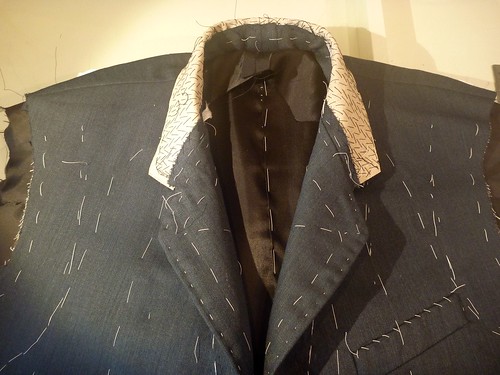
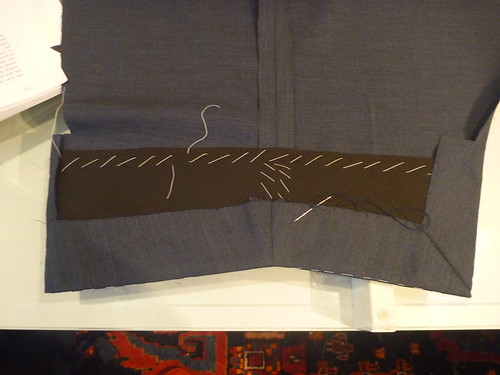
Here is the collar attached to the neckline of the jacket. The newly drafted pattern fit perfectly. This is a good place to stop for now.

Wednesday, June 25, 2014

Completing the Jacket Fronts...Tailoring nerds rejoice!

I know that many of you enjoy seeing the tailoring process, so this post's for you! For some, this may look like torture, but I actually enjoy all this hand work. Maybe you do too. It may look complicated, but in reality it's pretty basic stuff. There's a real sense of constructing something as I work through these steps. Tailoring a jacket or building a boat, it's all the same in a way. One little step at a time.


With the canvas basted to the jacket fronts, I move on to pad stitching the lapels. Working parallel to the roll line, small diagonal stitches are worked up and down along the lapel. This job is made infinitely easier with silk thread, and I can't recommend it highly enough. Why? Because it's virtually tangle free in addition to being incredibly strong. I run the thread once through beeswax and stitch away. This is a labor intensive step, so if something as simple as silk thread can make it go easier and faster, I'm all for it.


The stitch should be very small, just catching the fashion fabric under the canvas. Roberto Cabrera says it should just be a "pinprick". That would take more skill than I have. My stitches are clearly larger than that. The underside of the lapel will be peppered with tiny stitches, none of which will be visible in the finished jacket, so I'm not going to agonize over the size of my stitches.


The next step is kind of hard to describe and harder to photograph. After pad stitching about 1 1/2" from the roll line, the work is turned around and the lapel is folded back into the position that it will ultimately take on the finished jacket. Holding the lapel back, the pad stitching continues in rows until the whole lapel is covered. This step puts a permanent curve on the lapel and will make it want to hug the chest when the jacket's worn.


Here you can see all the little stitches on what will be the backside of the lapel. (Bigger than pinpricks I'm afraid!) The shadow hopefully shows how the pad stitching has built a curve into the lapel.

Here the lapel is lifting up off my glass top work table. This always amazes me! The next step is taping the edges of the jacket and the roll line.


The seam allowance of the canvas is very carefully trimmed off prior to taping. The tape is a 3/8" cotton twill tape that has been soaked in cold water to preshrink it. Starting at the neckline the tape is basted along the lapel edges, down the jacket front and across the hem. Tape is also basted over the top 2/3rd's of the roll line.


The tape over the roll line is cross stitched into place. The stitches should be at the outer edges of the tape. Again, silk thread will make this much easier.


The rest of the tape is slip stitched to the canvas on one side, and to the fashion fabric on the other.


This completes the jacket fronts. Next I'll tackle the sleeves.


Monday, August 12, 2013

Losing my velvet virginity

I must confess that the boat project has been taking precedence over sewing lately, but a glitch with a piece of machinery has caused my progress to come to a grinding halt. Just for the heck of it, here's where I left off. I'm not even going to try to explain what's going on here.


Back on the sewing homefront...

It was nice to finally start the velvet jacket. I haven't sewn for a long time. Was it in May?? I've had the pieces cut out for awhile, and now that I have the coordinating fabric there really isn't an excuse not to jump in.

I've had so many suggestions and tips from my readers regarding working with velvet. It's been a huge help and I'm so greatful. The consensus has been that I cut with the nap down. I stood in front of a mirror flipping my fabric back and forth trying to determine the difference. It's a subtle one that's for sure. In the end I decided to take your advice and cut with the nap down. The effect was somehow just a bit softer visually. At times there's almost a silvery sheen which I find very attractive. Plus, as some of you mentioned, it just feels divine.


What's this mess? I experimented with a few seams and pressing before lauching into the real deal. I just didn't know what to expect. So here's what this velvet virgin has learned so far.

1. I had no difficulty sewing a seam that had been basted. Any of you that have followed my sewing adventures know that I'm a baste-a-holic anyway. I haven't had to adjust my methods much. I usually use a white cotton basting thread, but because of the delicate nature of my fabric I'm using silk thread for the first time. They say it doesn't leave any marks, which is completely true. What they don't tell you is that it's a dream to work with. You can toss the beeswax. I haven't had a tangle yet!

2. I'm able to "press" the seams by just hovering my steam iron over them. I started on the silk setting but have been able to dial it back to synthetic on medium steam. I'm working from the back and not applying any pressure at all. The iron never touches the fabric.

3. Don't even think about pressing from the front. Hey, I had to at least try! :)

4. You don't have to run out and invest in a velvet pin board. I took the advice of one of my readers and covered my pressing surface with a scrap of velvet. So far it's working just fine.


So this my set up. Just a scrap draped over my tailor's ham. Then steam from the backside.


The back of this jacket has princess seams. Are they prince seams on a man's jacket? I can't say that I'm a huge fan, and I find them challenging to do well. Normally I would ease the curve of the side piece with machine basting, but I'm sure that would spell disaster with velvet. Using my silk thread I eased the back with a line of small basting stitches just inside the seam line. After taking up the thread just a touch, I had no difficulty basting the side to the middle back and sewing it on the machine. BTW I'm taking a reader's suggestion and sewing all my seams in the direction of the nap, top down.


To prevent stretching of the shoulder seams, I use a technique from Roberto Cabrera's tailoring book. A semi-bias strip of lining material is basted to the forward shoulder seam so that it will be caught in the seam when it's sewn on the machine. Easy and effective.

I will be tackling the sleeves next, and I expect them to be a challenge.