Wednesday, November 30, 2016

Repairs Completed or..... Rip, Sew, Scream, Rip, Repeat.

OK. This exercise is completed, and it's been a journey for sure. At one point I was screaming louder than the collective scream heard from coast to coast a few weeks ago. My strategy was to take a break, go to yoga class, breath and then calmly return to the whole mess.


Yes, it got messy! The shirt in particular. But first up...the safari jacket.


This was the easier of the two repairs. I opened up a slit in the lining's side seam just big enough to put my hand through (I didn't want to mess with the armhole). Then it was easy to reach up inside and pull the sleeve head down and out. And what to my wondering eyes did appear?


Why, a sleeve head and seam allowance clips everywhere! All part of my failed attempts to improve the set of the sleeves way back when.


This time around I reduced the height of the sleeve cap by 5/8" at the apex, and then graded the curve down to the front and back notches. This greatly reduced the amount of easing required.


After sewing the new seam, I stitched in a new wool sleeve head over the top of the sleeve. This technique is from The Bishop Method of Sewing Construction, by Edna Bishop. A bias cut strip of wool 1 1/2" wide is lined up with the edge of the seam allowances, and then hand sewn in close to the seam. It sounds more difficult than it is. When the sleeve is turned rightside out the strip will fold over on itself and fill out the top of the sleeve. That's the theory anyway.


And here's how it turned out. It's not perfect by any stretch of the imagination, but still a big improvement. If it weren't for the Lycra in the fabric, any little dimples could have been steamed out. Alas, they just spring right back. Still, this repair is a win in my book. The safari jacket is back in rotation! (And I will continue my resolve to NEVER buy stretch fabrics again!).


On to the shirt.....


Picking apart a shirt is an exercise in patience and perseverance, especially when it's sewn with about 20 stitches per inch.


After what seemed like hours, I had a pile of abandoned parts. Cuffs, collar, stand, interfacing and the entire left front placket. From there, things actually progressed quickly. I had more than enough fabric to remake the replacement parts which I interfaced with Shirt Crisp interfacing from Fashion Sewing Supply. Everything was assembled and wouldn't you know, my old Singer 301 refused to make a buttonhole. Ugh!


I pulled out the Janome Magnolia, my backup machine, and figured out how its buttonhole attachment works. I had never used it before. My practice buttonholes were coming out perfectly. I bet I made at least 10. Everything was working flawlessly. The buttonholes on the placket and cuffs came out perfectly. I was cruising towards the finish line. And then....I had to make the small buttonholes on the collar.


Wouldn't you know. The F'ing contraption just took off on its own and decided to make a huge butttonhole. To make matters worse I had set the machine for its most dense stitch. Needless to say there were some choice words said. By the time I picked it out, the fabric was pretty well shredded. In fact there was actually a hole on the undercollar.


In another act of brilliance, I though a dab of Fray Check might help. Wrong! It bled through to the upper collar and left a stain. At this point a cooling off period was in order, so I put the whole mess aside for at least a week.


I had just enough fabric to make another collar, so I ripped the whole thing out again and started over. This time around the buttonhole gizmo worked perfectly, but I still held my breath through the whole operation. So what did I end up with other than frazzled nerves....?


A shirt that will actually get worn. I made a few stylistic changes this time around. The placket and collar are cut on the cross grain, I added a buttoned pocket, and swapped out the light colored buttons for something darker. The shirt will always have its flaws (I've learned a lot about shirtmaking since I made this), but overall it fits in better with my wardrobe, and I no longer feel guilty about the clothes that I never wear.


What's next? Some "secret sewing", and then a fresh project. Wishing you all happy sewing!


Wednesday, October 26, 2016

The Troubling Ethics of Clothes That I Never Wear

Maybe you caught this little post from Sewing on The Edge which linked to an article about a minimalist / capsule wardrobe? While my wardrobe is hardly minimalist, I do try to make clothes that I want to wear. Still, there are clothes that I've sewn that, for one reason or another, I NEVER wear.


There's something vaguely unsettling about this. I don't regret the time and effort involved in making these clothes; but to never wear them seems a waste of resources. To remedy this situation I'm going to undertake "rescuing" two items that never see the light of day.


First up....


My safari jacket.


I should be wearing the hell out of this jacket right now, but I cringe every time I see the horrible set of the sleeves. This mess is the collision of two problems....one, too much sleeve ease...and two, a stretch fabric that doesn't allow the extra ease to be steamed out. Note: this project made me swear off stretch fabrics forever. I've replaced this jacket with my wool Halston shacket, but I truly miss wearing it, especially this time of year.


This jacket was both a ton of work, and a joy to make. To have it languishing in the closet because I'm too embarrassed to wear it is a shame. My plan is to open the side linings and pull the sleeve through, shorten the sleeve cap and put things back together. I may even put in a little wool sleeve head to give the shoulders more structure. Here's hoping!


Next problem child...


The first shirt I ever made!


I made this shirt when Peter had his Shirt Sewalong (I think he was making the Negroni?). I think I've worn it once, which is a shame because it's a fine Italian cotton in a great color for me. Sadly, it has some issues. Some I can fix, others I'll just have to live with.


The biggest problem is lack of decent interfacing. It's just interfaced with white cotton fabric with little to no body. Since making this shirt I've learned just how important good interfacing is to a shirt. Hence, my addiction to Fashion Sewing Supply's "shirt crisp" interfacing. For me it's the difference between a shirt that gets worn, and one that's relegated to the back of the closet.


Next problem, the full French cuffs. Fun and novel as they are, they're just not me. They've gotta go.


Ummm...this was the best I could do at the time. Reality check, I still can't sew a curve worth a damn, so I'll replace the whole collar and stand (God willing). This time around it will be a button down, which is much more my style (and NO curves involved!). With a little love, I'm hoping to get this sad shirt back into the game.


Thankfully, I saved a good sized hunk of this fabric. Vindication for all us sewists who save all our scraps, and sometimes scratch our heads wondering why we do it!

Time to break out the seam ripper.


Thursday, October 6, 2016

The Fur Backpack -- It's a Wrap


Fall, Folliage and FUR!


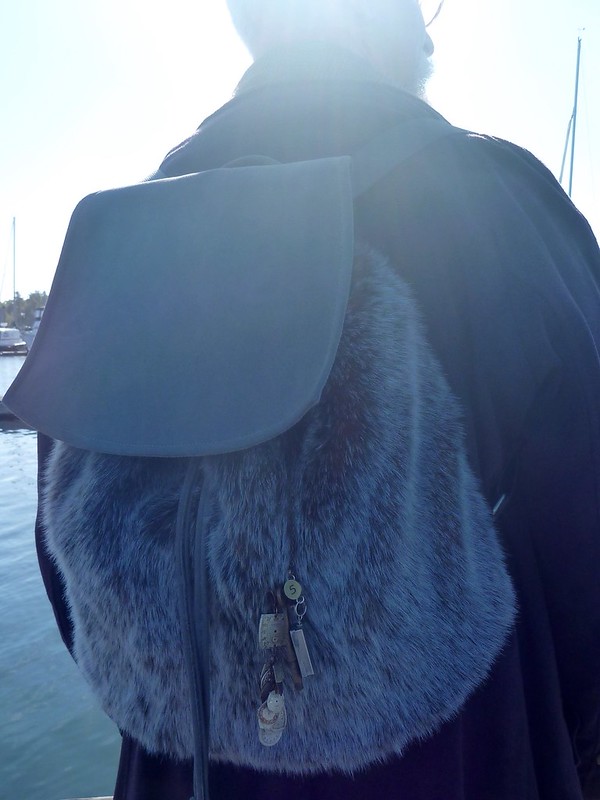
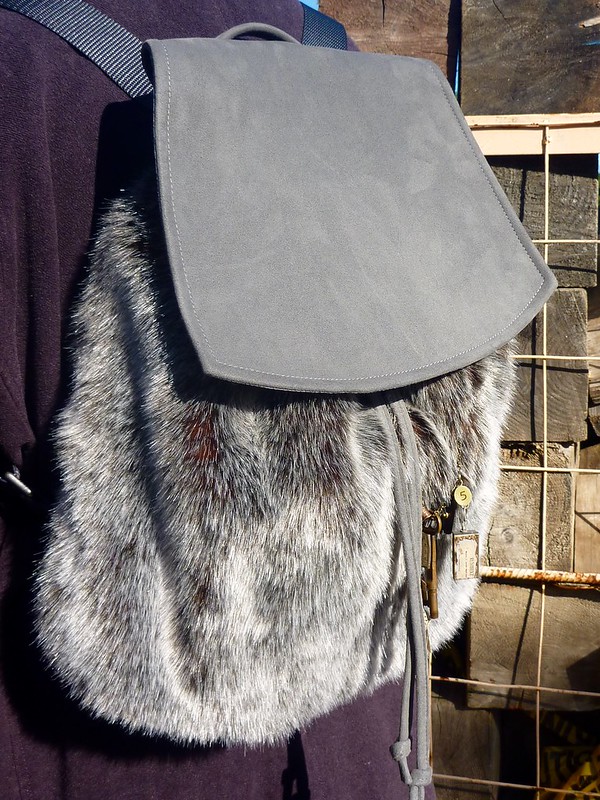
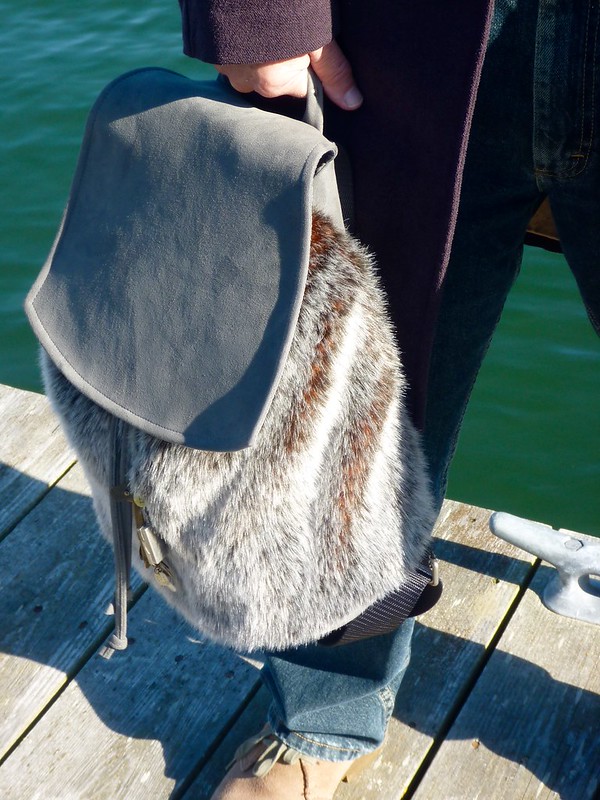
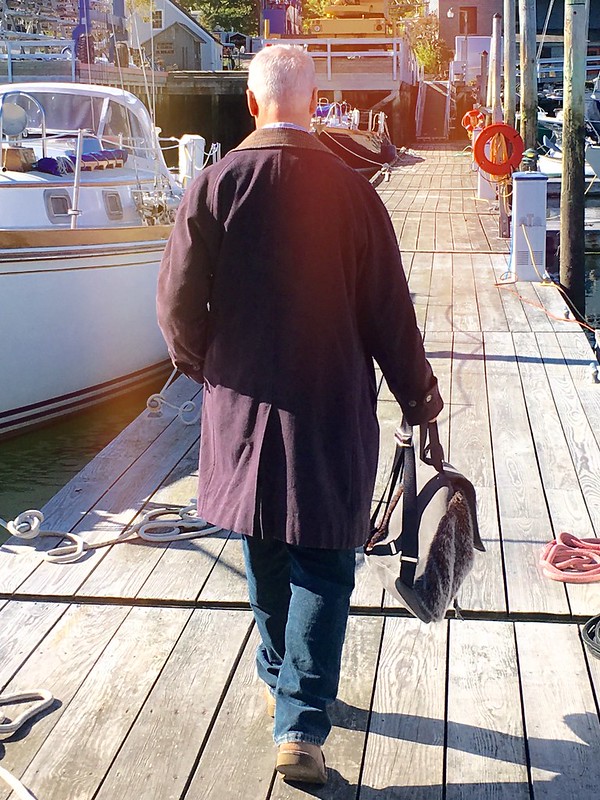
It's finally done, my Michael Kors knockoff fur backpack. There's not a whole lot to say, other than I'm totally loving how it turned out. Perhaps the best part of the project was how much FUN I had working on a non-apparel project. It was really refreshing, and I'm already collecting materials for my next bag! (This one has to stay a secret).


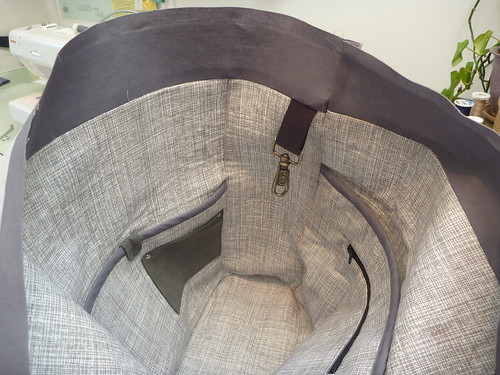
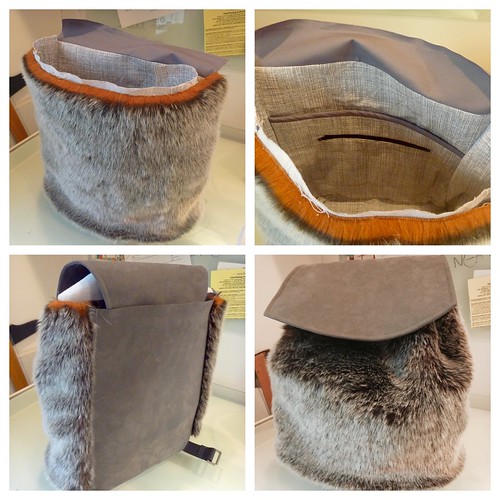
To recap, this is essentially the Lucy Backpack from Swoon Patterns, enlarged an inch in each direction; otherwise it looked a little too childish. I left out some details that I didn't like (or were never going to work with my materials), and personalized the interior to suit my needs.


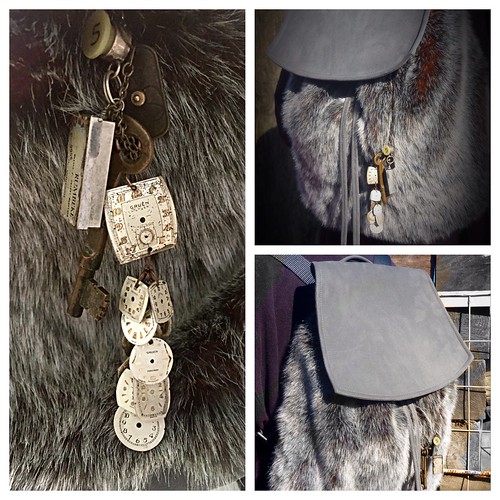
I love a little "bag bling", so a big shout out to Lauren's Creations. If you're a steampunk lover, check out her Etsy shop here.


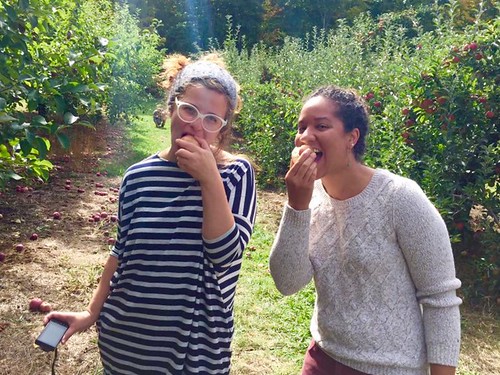
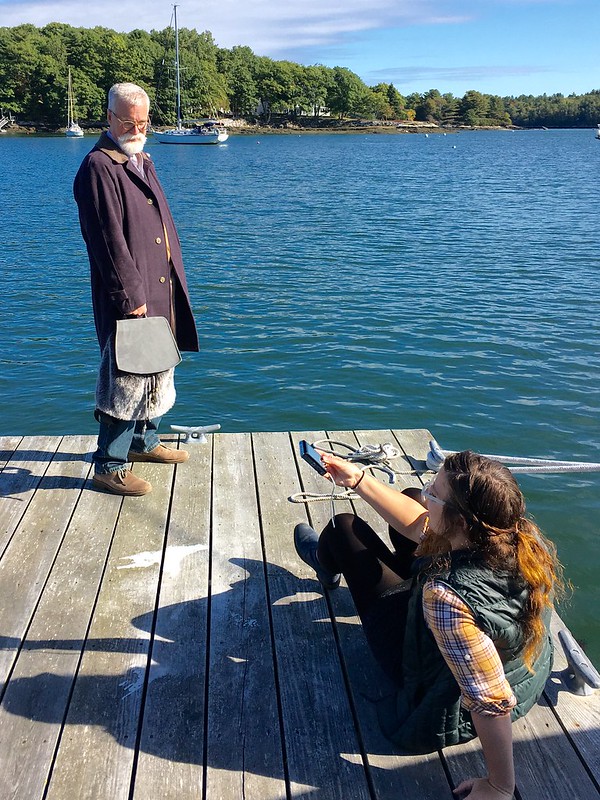
And while I'm shouting out......thanks to my beautiful daughter and equally beautiful son's fiancé for helping with the photo shoot. Without you, I would have been back in my yard with the tripod, setting the timer, running in front of the camera and hoping for the best. It was so much fun doing this with you!
 

(Apple picking, Rocky Ridge Orchard, Bowdoin, ME)


Photo location -- Derecktor / Robinhood Marina, Georgetown, ME


So it's a wrap! Time to head home and start a new project.


As always, thanks for all the support and encouragement I get from the sewing community. Be well!


Monday, September 26, 2016

Pantone, Progress and Problems

Clearly the Pantone prognosticators were watching me last March at the MPB Winter Frolic! Were they hiding behind the rolls of faux fur at NY Elegant? Did they watch me pick out this fur, knowing that I'm always way ahead of the fashion curve?


I picked this.....


Low and behold.....what do they pick for this Fall's color trends???


Potter's Clay and Sharkskin!


Of course, I'm being silly here. But I do find it amusing that my current project fits in with their color predictions. Truthfully, I would never have known about their color selections if Peter, over at Male Pattern Boldness, hadn't just finished a great work jacket in Aurora Red. Or is it Cranberry? Maybe Tomato?


In the end, who really cares? Certainly not me.


I completed the lining, which includes the scavenged swivel clip for my car keys.


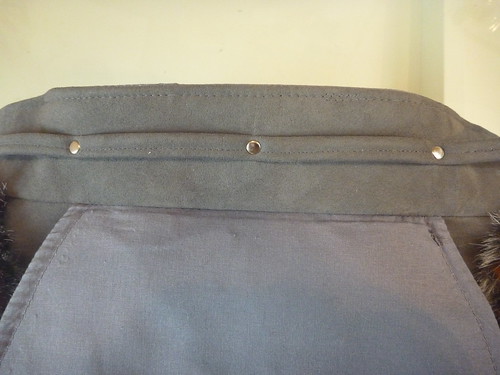
I took my readers' advice and added a handle. It's not visible here, but the folded ultrasuede is held together with Wonder Tape (another gift from Kyle over at Vacuuming the Lawn). It's " secret weapon #2". It made the assembly so much easier. I added a couple of rivets for added reinforcement (plus, I just love using them).


The Janome had no difficulty sewing through all the layers here, which are considerable!


The drawstring is also attached with rivets. It's actually easier than the directions, which say to sew through all layers along the stitching line of the drawstring.


The upper band of ultrasuede is interfaced with a midweight fusible Pelon product that I picked up at JoAnn's. I have to say that I've been spoiled by the interfacings from Fashion Sewing Supply. However, the ones I had on hand all fuse at high temps, and I was worried about melting the faux suede. JoAnn's was the expedient choice, but it's hard not to feel that I paid a price "performance wise" with what I purchased there. When I make my next bag (I'm sure there'll be another) I'll take the time to order in some better products.


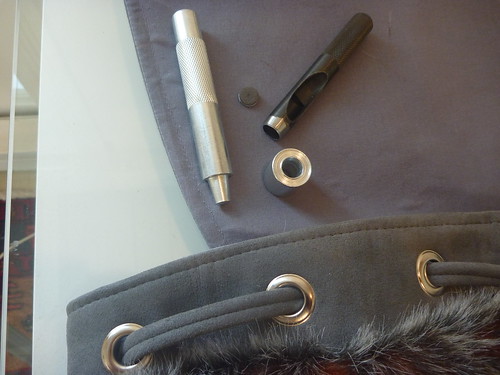
Setting the grommets was much easier than I had imagined. I bought this set on Etsy. Basically... Punch hole, insert the hardware, place on base and pound with a hammer. Tout fini!


I took my new backpack on a test drive this afternoon. I had a service appointment for my car which would take about 1 hour. I packed my iPad, Kindle and ear phones into their appropriate slots and headed out. A pretty significant problem became immediately noticeable.


Because the lining is only attached at the very top edge of the bag, the weight of items in the pockets allows them to shift around, mostly front to back. When than happens the top of the pack gets pulled down. It gives the impression that the backpack is collapsing in on itself. Not a good look!


Upon returning home I went to work correcting the problem. I secured the lining to the back panel of the exterior bag with four rivets. Not the easiest thing to do with the bag all assembled, but where there's a will there's a way. No more shifting lining, (and it looks good too!).


Next time....the completed backpack. Here's a little tease.


Saturday, September 17, 2016

Backpack progress and.... Saying hello to Magnolia

My Singer 301 came back from the repair man cleaned up, but still very temperamental about sewing the ultrasuede. I think part of the problem was the jeans needle I was using. I believe that a ball point needle is required. But even with a new needle it was unpredictable at best. Sometimes it worked, other times it would skip an occasional stitch, and at times it didn't stitch at all. There was no figuring it out. Considering the expense of the fabrics involved, and to preserve my sanity, I moved on to Plan B.


Say hello to Magnolia. This machine has been sitting in my attic for a couple of years now. It belonged to my mom, who rarely used it. It was way too complicated for her, so she sent it in my direction. I honestly never felt the need to use it, so off to the attic it went.


Long story short, it took to the ultrasuede like a duck to water. Underneath all that white plastic it's amazingly powerful, and it truly rescued this entire project. Thanks, Mom!!


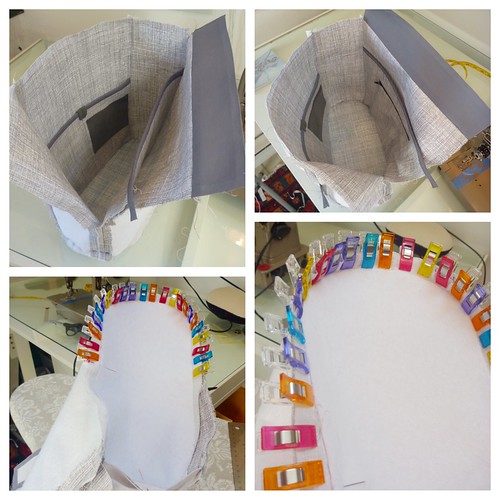
Speaking of rescues..... Wonder Clips!!! They made assembling the lining a snap. Thank you Kyle for sharing your bag making "secret weapon".


Working with the faux fur was surprisingly easy. Just the tip of the scissors are used. Slide them just under the backing fabric and snip maybe a 1/4" at a time. It's slow going, but the pile is preserved. After cutting, any loose fibers can be pulled away from the edges with your fingers. It's not anywhere near as messy as I feared it would be.


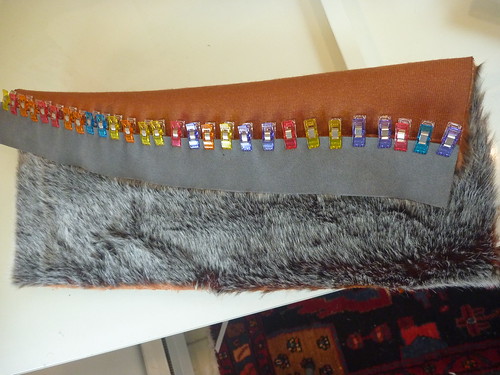
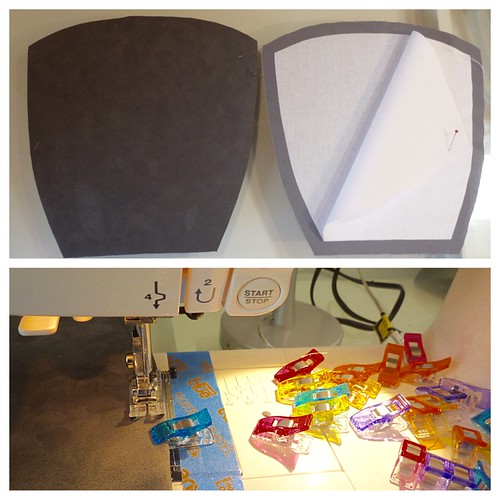
Wonder clips to the rescue again. Here a strip of ultrasuede is sewed to the fur. The pile of the fur is poked down into the seam allowance. Easy.


This is the suede flap, which is lined with a gray cotton quilting fabric interfaced with both a fusible and sew in interfacing. Two layers were required to obtain the body I wanted. Magnolia had no difficulty topstitching the assembled flap. (Even more Wonder Clips).


Slipping the lining into the fur section I can start to dream about the finished backpack. Still lots more to do though! Straps, a handle and grommets (which I've never done before).


The same goes for the boat. This is a pattern for the seats, set in place so I can dream about them. The mahogany boards for them should be delivered this week. Clearly the backpack will be done WAY before the boat!


I hope your projects, whatever they may be, are going well.


Monday, September 5, 2016

Rethinking my hardware choices, and launching into it.

I cut out some of the ultrasuede backpack pieces and did some test stitching on the scraps, only to find out that my trusty Singer 301 decided not make a single stitch. Arghhhh! It refused to pick up the bobbin thread, so it was essentially just sewing into thin air. I fiddled with the tension, cleaned out all the fuzz, gave it a good oiling, changed to a different needle, but nothing seemed to work. So...off it went to my sewing machine guru Mr. Klaus Heimann in Newcastle, Maine for some TLC.


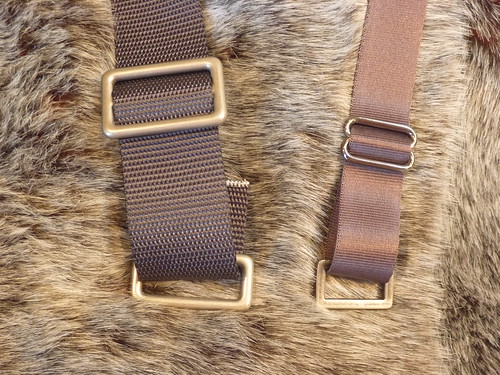
While I was at a standstill I began to question some of my choices for this project. The only gray webbing I was able to find is on the narrow side, and the finishes on the hardware don't match. With time on my hands I decided to order some new components on-line. So here are the results.


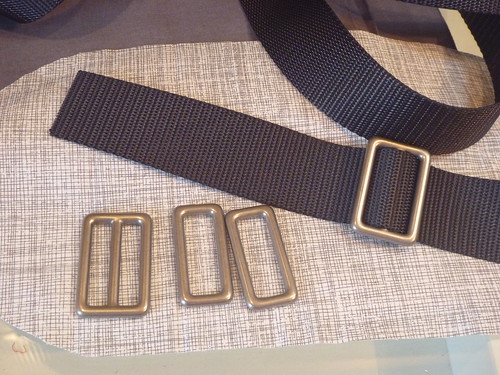
The new webbing is 1.5" wide, charcoal polyester from Strapworks.com. It's much more substantial that what I originally bought. It came in just a few days from Oregon.


The new hardware is solid brass with a matte nickel finish from Buckleguy.com. Infinitely better than what I had originally purchased, and it matches. This is substantial hardware, identical in weight to what's on a Fossil messenger bag that I own. Mr. Buckle guy is in Massachusetts, so this was in my mailbox the next day.


Side by side one can really see the difference. I'm much happier with these small changes. (Which in the end are really big improvements)


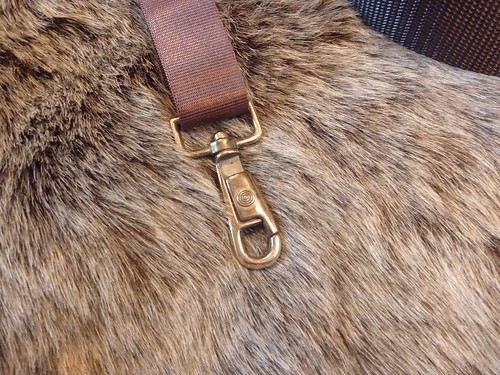
The old webbing won't go totally to waste. It fits perfectly on this swivel snap that I scavenged off an old Lands End canvas briefcase. It will become a clip for car keys somewhere inside the bag.


I'm not wild about the "innards" of the Lucy Backpack as designed, so I set out to make it more closely meet my needs. I'd like a large padded pocket along the inside back of the backpack to hold my iPad or Kindle. The Lucy has a zipper pocket on the outside of the back which would drive me crazy. I'd much prefer any zippered pocket to be on the inside.


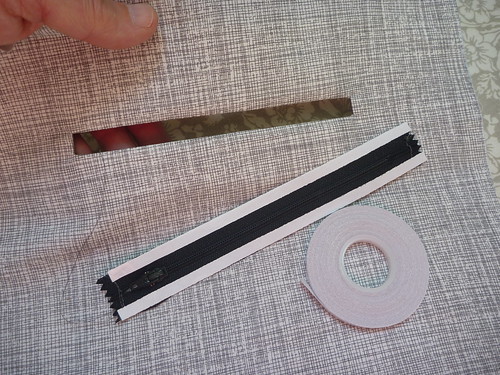
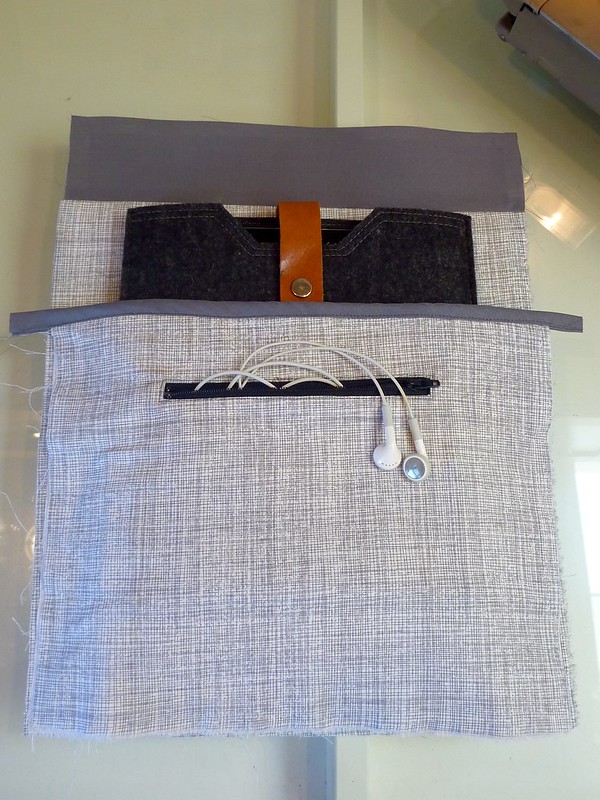
My plan is to make a little zipper pocket on the outside of a bigger pocket / sleeve. The zipper pocket was a breeze thanks to "backpack queen" Kyle over at Vacuuming the Lawn. She not only sent me the link to a great tutorial, she also sent me a roll of Wonder Tape and a box of Wonder Clips to make the job easier. Sewing people are the BEST, are they not. Thank you, Kyle!


So here's how it turned out. A pocket on a pocket. The lining is made with a quilting cotton from JoAnn's which is printed horribly off-grain, making everything look cockeyed. Grrrr. The top of the sleeve is finished off with some homemade bias trim, because...why not.


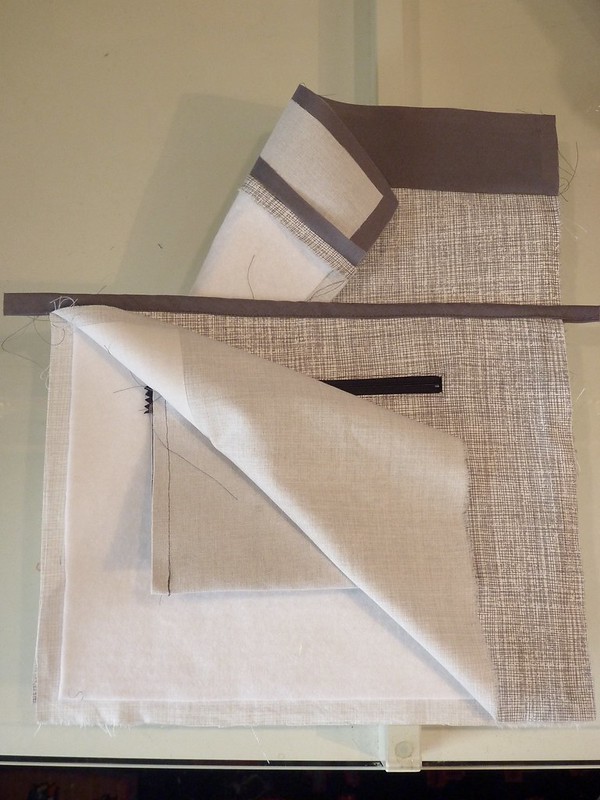
A variety of interfacings were used to give the lining some structure. I worry that the whole backpack could end up being a big floppy mess, so I'm working to avoid that.


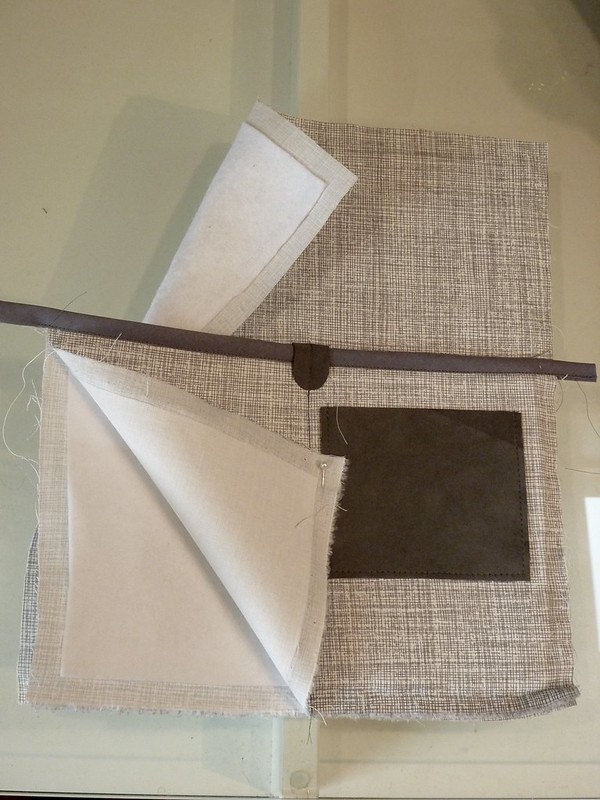
Here I've folded all the layers back. The area of the welt is reinforced with a strip of Shirt Crisp Fusible from Fashion Sewing Supply. The pocket bag is also completely interfaced Shirt Crisp. The inner layer of the sleeve and the entire outer layer of the lining are reinforced with Pelon Thermolam, a fleecy fusible. Shirt Crisp was used again on the top trim piece where the grommets will be located.


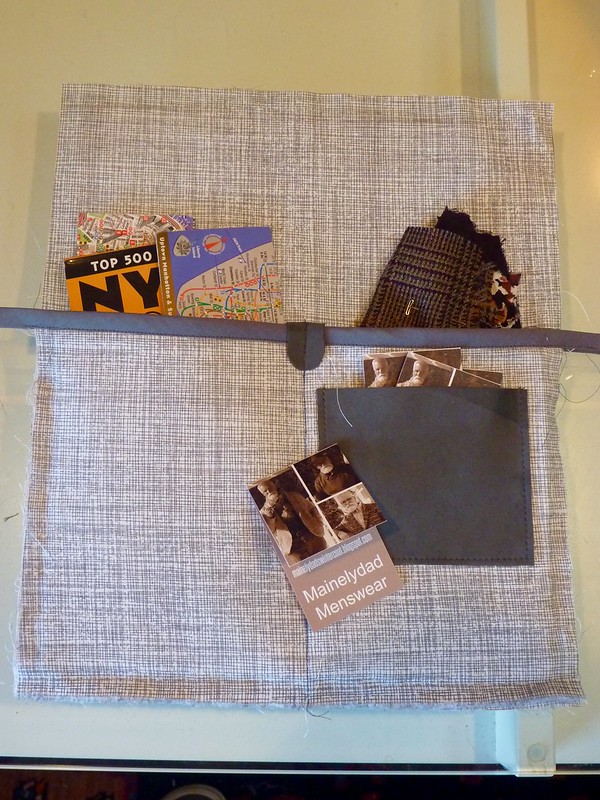
And here is the lininging for the front of the backpack. It has two padded pockets, one for maps of NYC (invaluable for this country bumpkin), and one for fabric swatches that I always carry with me. A little patch pocket of ultrasuede holds my cards.


Pulled apart to show the interfacing.


Next time I'll finish up the lining (Wonder Clips will be involved), and venture into the unknown territory of faux fur! Until then, happy sewing!