Showing posts with label Denver Fabrics. Show all posts

Tuesday, March 10, 2015

Getting Started -- The Watanabe Jacket

I'll admit it, I look at some fashion websites. It's a good source of inspiration for me, even if 99% of what's shown is a perpetual theme and variation on one thing -- Black.


I'm just NOT that person.


And don't get me going on sleeveless jackets for men!


I've been drawn to the work of Junya Watanabe for the past few seasons, especially his offerings for spring / summer. I didn't realize that he collaborated with Brooks Brothers a couple of years ago, which on some subliminal level may explain my attraction to his clothes. There's a definite "prep" vibe, but in a very light handed, whimsical way. I do like traditional style, and it's "age appropriate" for me; but I don't want to look like an old fuddy duddy either.


I love all these little details. Pockets, piping, patchwork. So my goal is to create my own version.


I'm also interested in the look of Engineered Garments. In particular the "fishing vest" look worn over a jacket.


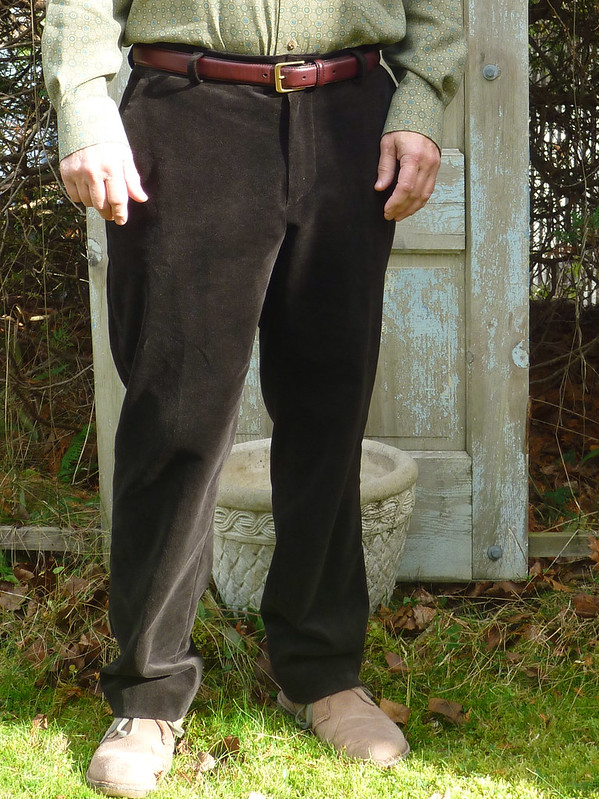
I love this short over long look. I'm not sure I can pull it off, but I'm gonna try!


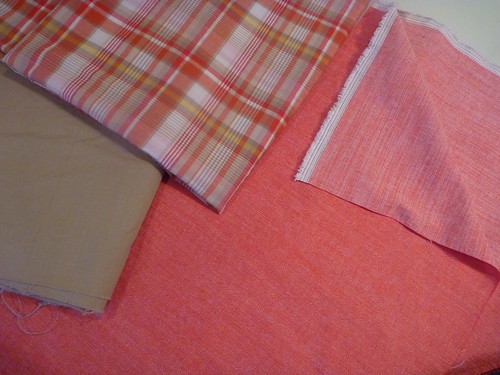
Here are the fabrics I've chosen. A heavy red "Oxford cloth" suiting that's been in my stash for a couple of years now. I bought this sight unseen from Denver Fabrics for something like $3 / yard. It's got an interesting weave, so the front and back are entirely different. I'll be using both the light and dark sides for the body of the jacket. Even though I've washed and dried this fabric twice, it's still quite stiff. It makes me wonder what it was really intended for. Upholstery maybe? Hopefully it won't be the downfall of the whole project. The other fabrics are a madras plaid and a khaki cotton with a subtle grid texture.


This photo shows the textures a little better.


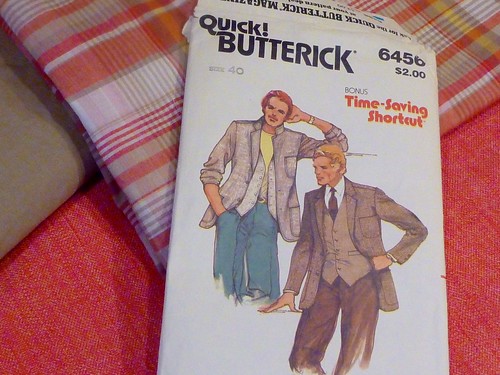
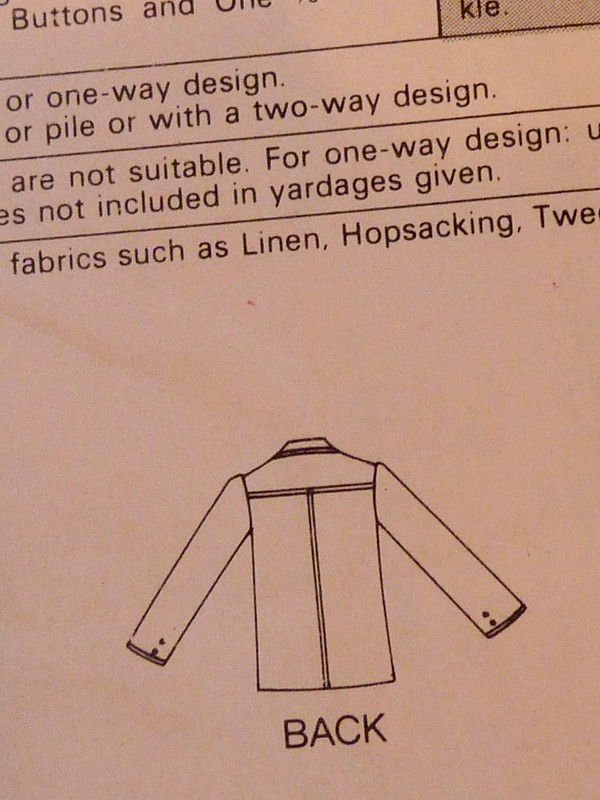
I'm going to be using this Butterick pattern for an unlined blazer. As you may recall this pattern didn't make the cut for the "Phoney Missoni" jackets. Still, I'm intrigued by the yoke and the unfitted boxy style. The goal is an unstructured jacket that I can throw on over a polo shirt or a t-shirt. The spring barn jacket alternative? Perhaps.


I won't go into all the gory details, but I fought with the muslin for what seemed like days. Maybe picking this pattern wasn't such a good idea after all. The "intriguing yoke" rapidly lost all its appeal! In the end I felt that I was really grasping at straws to get the damn thing to look halfway presentable. There's definitely a point of diminishing returns with fitting, and I'd reached it. To preserve my sanity I decided to move on, cut it out and hope for the best.


In short, here's the rundown of what happened....


The ease was removed the the sleeve cap.

The apex of the sleeve cap was moved forward.

The armscye was enlarged (it was uncomfortably high at the underarm).

Excess fabric was removed from the upper back.

The side and back seams were taken in slightly.


Will any of this work? Here's hoping.


Saturday, November 1, 2014

Falling for Foulard

I haven't posted anything for well over a month, but it doesn't mean there hasn't been any sewing going on in my world. These two projects, a foulard shirt and a pair of velvet Jeds have been finished for well over two weeks now. The weather just hasn't cooperated for an outdoor photo shoot. Finally, we had a partly sunny day, so I quickly set up the camera and shot these pics in my deer ravaged yard.


First up, the shirt.


This is a French viscose foulard from Elliot Berman, my favorite NYC fabric stop. I believe it was almost 60" wide, so I was easily able to get a shirt out of just two yards with plenty to spare. It's a soft olive green with little teal bits, both colors I love and that work well with my expanding "me made" wardrobe. But the real attraction is the positively delicious drape of this fabric. I wish you could feel how hefty, luxurious and fluid it is.


That fluidity, however, made for a challenging shirtmaking project. Not that it was difficult to sew.... The challenge was in the matching required for the fronts. There's an underlying grid to the pattern that really requires careful matching both horizontally and vertically. My "cutting table" is a glass topped Ikea desk, and the fabric was slip sliding all over the place. I really couldn't tell what was happening under the pattern pieces.


My solution was to illuminate the fabric from behind with a small desk lamp. This way I could accurately pin on the pattern and maintain the grid in both directions. Time consuming, yes, but ultimately worth the effort in the end.


The pay off!


This shirt has a spread collar interfaced with Shirt Crisp fusible interfacing from Fashion Sewing Supply.


A shirt is a shirt, is a shirt.... So I decided to make a little matching bow tie with the leftover scraps. I own some real bow ties, so I used them as a guide for the overall size. One of my favorites has pointed ends, so I tried to replicate that look. Essentially, I just made it up as I worked along. No rocket science required!


It just attaches with a snap at the back. Simple.


I've also banged out a pair of velvet Jeds. Sadly, the fabric here isn't really anything to write home about. It's been in my stash for a long time. It was a bargain fabric purchased online from Denver Fabrics. I might have paid $6 a yard for it, and, to tell the truth, it looks it. There's no way to sugar coat it, it's cheap fabric. Certainly nothing like the velvet I picked up at Britex last year. But, then again, that fabric was originally something like $75 a yard!

If there's one positive thing I can say about cheap stretch velvet, it's easy to work with. No velvet pin boards required for this stuff. I was able to press this stuff with reckless abandon!

So these may not be the velvet pants of my dreams, but they're serviceable and easy to care for. So I plan to just wear the hell out of them this fall and winter.


I think the pocketing fabric might be nicer than the pants fabric! This is the fourth pair of Jeds that I've made. I never tire of the way they finish up.


Using the tutorial on the Thread Theory website, I redrafted the back and made welt pockets instead of patch pockets. It's surprisingly easy to do, and makes for a slightly dressier look.


My next project will be a little more complex and involve uncharted territory for me..... Namely, knits!

Wishing you all happy sewing!


Tuesday, November 13, 2012

Give me Liberty..... Um, well, faux Liberty

Today, readers, we'll be traveling to merry old England and visiting the flagship store of Liberty of London. If I'm ever lucky enough to visit London, this is sure to be on the itinerary. Truly, this is a Mecca for the fabric obsessed. If you follow this blog, chances are that you fall into this category too.


Let's go inside, shall we?


Oh, my! This is what I would call a shopping experience. We're a long way from Kansas, and a long long way from Target. Apparently this installation was created for London Fashion Week. Spectacular. However, all this Tudor splendor comes at price.


I have been wanting a "little flowers" shirt for almost a year now. This is a very basic point collar men's shirt, with questionable matching at the front placket. Nice. It sells for £125 ( around $200 ). Pretty, yes......within my budget? Not on your life! I can't even justify the $80+ that the fabric alone would cost to make this shirt.

But all is not lost.


I was lucky to find this shirting on sale at Denver Fabrics. It's an Italian cotton, 36" wide, very finely woven with crisp printing. I ordered 3.5 yards at a $4.45 per yard. Score!

If I had not taken this picture I would never have noticed the subtle diagonal nature of this print. So much for just randomly cutting it out. I attempted to match the fronts and placket to preserve the diagonal effect. I've since read that the diagonal quality of the print is a hallmark of Liberty. Who knew? Certainly not me.


Here's a close up. These are all colors that work well for me.


Is it Liberty, or an imposter?

This is perhaps the best shirt I've ever made. I'm getting used to working with lighter weight fabrics. I've also given up my resistance to fusible interfacings. This shirt was interfaced with Pro-woven "shirt crisp" from FashionSewingSupply.com. I can't recommend it highly enough! It really gives the feel of a store bought shirt.


The matching isn't perfect, but good enough to preserve the flow of the pattern.


Final tally, not that it's that important...

Fabric $15.60, Buttons $5.25 = an "almost Liberty shirt" for $20.85

Clothes that I really love to wear .... Priceless!

I'm thinking I'll wear this for Thanksgiving this year. Speaking of which, I wish you all a Happy Thanksgiving and joyful sewing!


Monday, February 6, 2012

Great stuff in the mailbox

You know it's going to be a great day when you find 11 yards of fabric crammed into your mailbox!  


Denver Fabrics was offering free shipping, so I figured it was a good time to pick up more shirting fabric.  I probably saved about $13.  Admittedly, DF doesn't have the greatest photos on their website, so I was holding my breath as I ripped open the package.


Yay!  No huge disappointments.  


So here's my haul.  From left to right.  First is a very fine cotton shirting in celery and white.  It has a wonderfully silky hand.  I'll use this first and re-make the Victorian shirt with a few more alterations.  

 
Next is a block printed cotton voile.  I had no idea what voile is, but I liked the print and the colors.  This turns out to be my least favorite of the batch.  The weave is quite coarse, like a cheap muslin.  I hope it softens up with a good pre-washing.  Still, I love the colors and think it will make a fun summer shirt.  


Next is an olive and red tartan.  This is a substantial fine twill weave.  Nothing flimsy about it and well worth $4.95 / yard.  


Lastly, a light teal and white oxford cloth.  This is a color that I look particularly good in.  I plan on making a basic button down from the pattern that I used last year for the MPB shirt sew-along.  


Oh, but there's more than just fabric in the mailbox!  This amazing shirt pattern is dated 1964 .  Thank you Sassy Cotton for finding this gem.  I'm planning on using the voile for this one.  I especially love the back view with the pleat and button detailing.  There is also a button tab on the short sleeve.  I just love this kind of detail, and it's what keeps me wanting to make my own clothes.  


OK.  Now dial the "way-back machine" forward to 1975.  This pattern is also from Sassy Cotton.  If you love vintage patterns I hope you will check out their Etsy shop.   My other recent source for great patterns is Wheeler Salvage.  Mary has a great selection of very stylish stuff.  I could (and DO) look at vintage patterns for hours!  

I really think this whole safari look is ready for a resurgence.  Do you?  Should there be a Summer Safari Sew-Along?  


Here is the celery stripe with my brocade vest.   My plan is to launch into a second version of the Victorian shirt.  This time I hope to simplify the construction of the front placket by making it just a larger version of the sleeve placket.  I guess time will tell if that works out.  If I have enough fabric I hope to place the bib on the bias.  


Lastly, I'm thinking the tartan would make a most excellent tuxedo shirt.   I'm not sure how the pleats work, but it could be very interesting.  

That's it for now.  It's nice to have projects in the pipeline again.  

Saturday, March 26, 2011

Sewing in English!


I'm no longer a virgin.  I've actually forayed into the world of patterns and instructions that I can actually read.  I decided to participate in Peter's (of Male Pattern Boldness fame) shirt sew-along. His selected shirt, the Negroni by Colette, really wasn't my style, so I found a vintage 50's dress shirt pattern on Etsy.  Butterick 2124.  It features both a buttondown and tab collar, long or short sleeves and a guy smoking a pipe!  What more could a Daddy want?  I picked up some shirting at Denver Fabrics.  They have a huge selection at great prices, but absolutely the WORST pictures on their website.  If you're trying to match a color, or have something very specific in mind I wouldn't recommend it.  For this project, however, my fabric came quickly and was pretty much what I anticipated.  In fact, the quality of the fabric ended up being better than any shirt that I own, most of which come from either Goodwill or the clearance racks at Kohl's.  
I won't go into all the gory details of my shirtmaking experience, it's pretty well documented in the Flickr group that Peter set up for the project.  I ended up working my way through 2 fitting muslins.  Men must have been built differently back in the 50's.  My pattern was made for a barrel chested brute with the arms of a gorilla and a skinny neck.  I shortened the sleeves by over 1 inch, took almost 5 inches out of the circumference and did a sloped shoulder adjustment.  With the help of David Page Coffin's book Shirtmaking I was able to draft a French cuff.  Now I have a way to wear the amazing steampunk cufflinks that my daughter gave me for Christmas.  Perhaps the best part of the shirtmaking exercise, however,  is that I now have a "Go To" shirt pattern the next time some fabulous fabric comes along just screaming my name.