I'm afraid this blog has really fallen by the wayside. The boat project has really taken over just about everything for the past few months. Because I don't have a barn or garage, I've been splitting the rent on an industrial space with an ex-coworker for over 4 years now. So there's a real economic incentive to be wrapping things up. Plus, my co-tenant is sending some subtle hints that he may want to emigrate and live an ex-pat life in Mexico! I'm trying not to panic, but it's feeling like crunch time. To speed things up I've turned a tiny bedroom in "this old house" into a painting and varnishing workshop. So, evenings when I would usually be working on a sewing project, I'm working on the boat instead. Trust me, this does not make me a happy camper.
So where did I leave off?
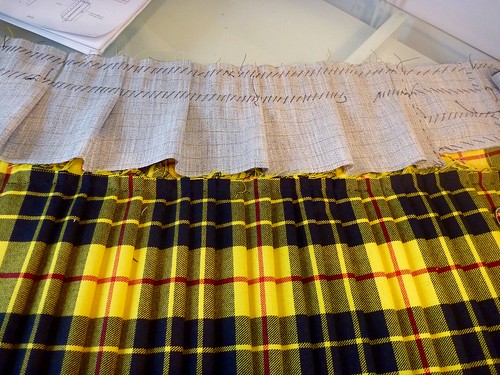
Oh, yeah.....A heavy weight hair canvas arrived from B. Black and Sons. Strips were sewn to the top portion of the kilt using a heavy carpet / buttonhole thread. A tailor's or diagonal stitch is used, the trick being to catch only a single layer of the tartan underneath so that none of the stitches show through on the right side of the kilt. It's surprising how one can develop a "feel" for it, especially this far into the whole process. I found using a very short needle worked the best for me.
Pleats are formed in the canvas covering the pleated section of the kilt. This preserves the slight flair at the back. Nothing is really measured, it just intuitively happens as one is stitching along.
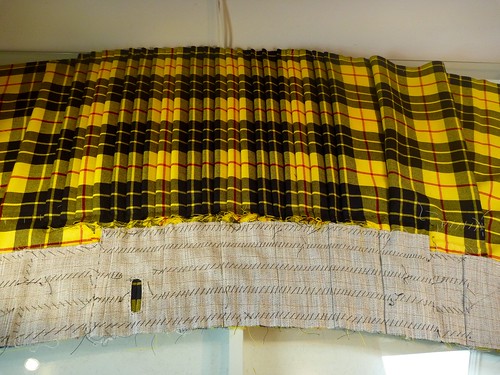
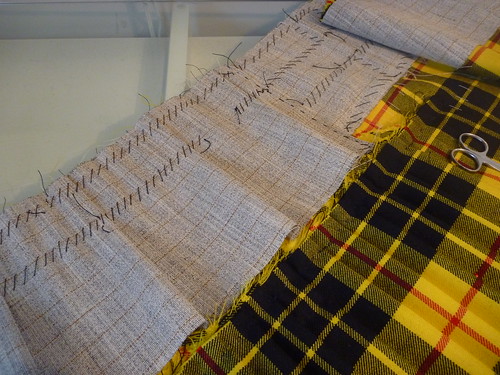
So here is the completed canvas all sewn into place. What looks very tedious was actually very soothing and relaxing to do. It went remarkably fast. It also helps that I enjoy handsewing.
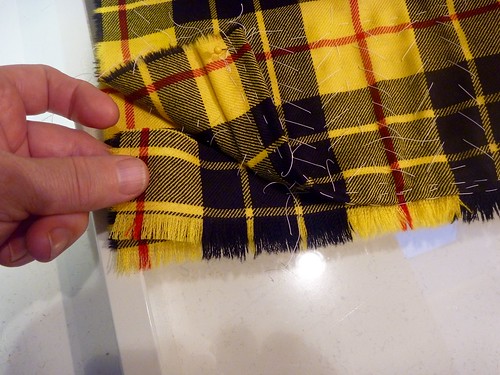
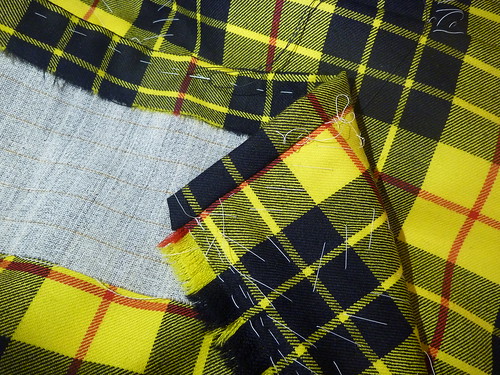
The fringe at the edge of the upper apron is actually double thickness. I undid just a bit for this picture to show how a narrow fringed strip (maybe 1.5 inches wide) is sandwiched into the side seam. Offsetting the layers slightly gives a more full appearance.
The only machine stitching on the kilt is the attachment of the narrow waistband (and even this can be handsewn if one wishes). The waistband will only match on the front apron of the kilt, and a walking foot would be a big help. I'm definitely going to look into getting one for my Magnolia. Even with basting, my matching isn't as perfect as it should be. Have I mentioned how obsessive this kiltmaking biz is???
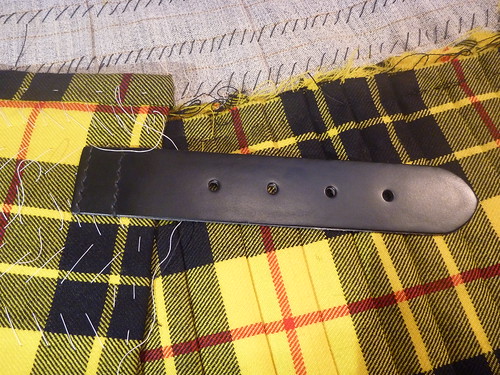
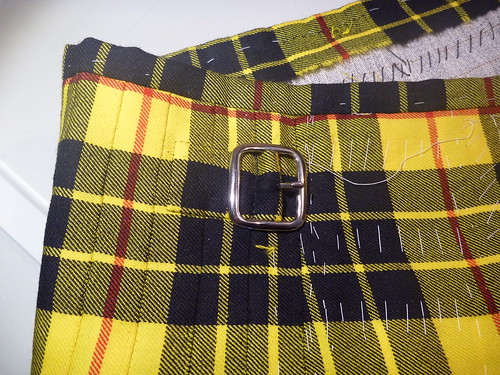
The buckles and leather straps are easily found online. These leather straps came all pre-punched, so sewing them on was a breeze. Making the tartan tabs for the buckles is a bit trickier, the goal being to make them as inconspicuous as possible. In the end the buckle tab gets covered by the leather strap, so go figure! Just more obsessive kiltmaking behavior.
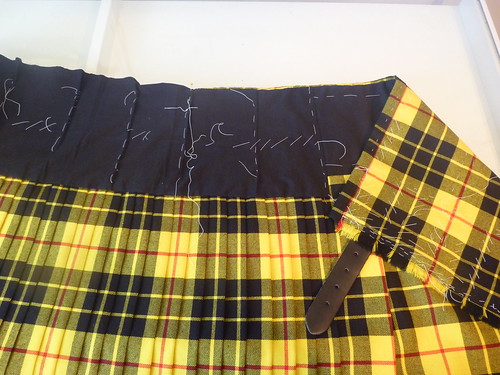
The home stretch! A cotton broadcloth lining is basted and then handsewn over the canvas. Once again small pleats are worked into the back to preserve the shaping of the kilt.
Time to give it a good pressing and remove what seems like miles of white cotton basting thread. I'll try to model the completed kilt soon. Be well....and be sewing more than me!