Showing posts with label shoulder pads. Show all posts

Thursday, July 3, 2014

Tailoring Progress

I'm making steady progress on the wedding suit.

It's been awhile since I've done any tailoring, so the amount of basting and handsewing has been a little overwhelming at times. I'm using the Roberto Cabrera book on tailoring which is usually helpful, but tonight he has me totally baffled about constructing the collar. It's almost more confusing than putting in a zipper fly! So I'm just going to walk away for the night and pick it up in the morning when I'm fresh. I do that a lot, hence I'm one of the slowest sewers out there.

The sleeves are essentially done, they just need buttonholes on the vents. I do like Cabrera's method of making and lining the sleeves. You do have to make a muslin first because the length will be set when all is said and done.


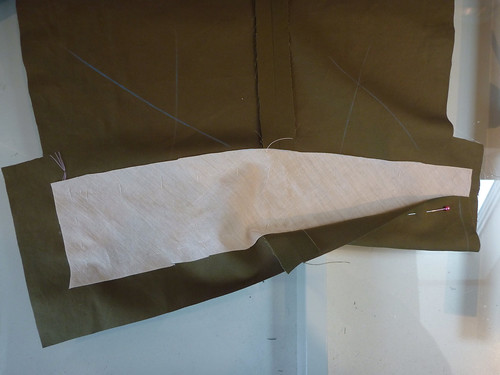
A wide piece of bias muslin is basted into the cuff along the hemline and fold lines of the vent.


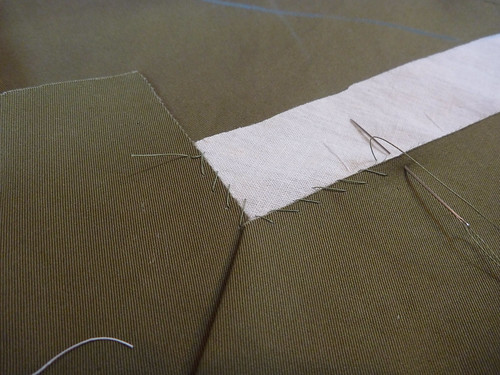
The hem is pressed up and attached to the muslin. This way there will be no stitches visible on the outside of the cuff. The sleeve and lining are then sewn up as usual.


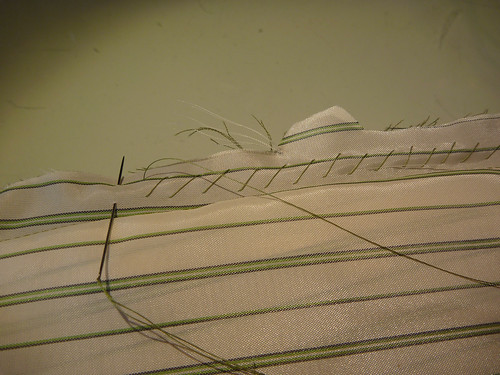
Both the sleeve and the lining will be wrong side out. They're stacked up and the corresponding seam allowances are quickly stitched together with a diagonal stitch. Nothing fancy here. Then the fun happens. Reach down through the lining and pull the sleeve up through it. Voila! A perfectly lined sleeve (inside out) ready to have the lining finished at the vent.


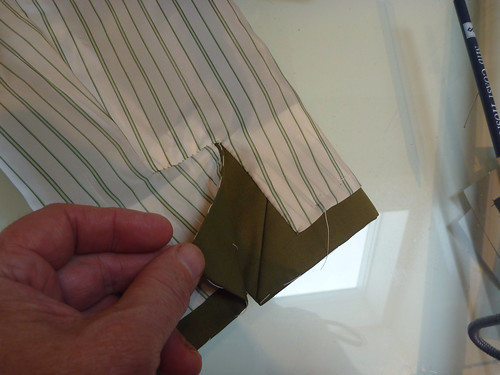
Here's the finished vent. You just have to fiddle with it until it works. Once it makes sense and comes together, I press it into position, baste to hold things together and then slipstitch with silk thread.


The sleeves are done for now and set aside.

Next I've worked on the lining and added an inside left chest pocket.


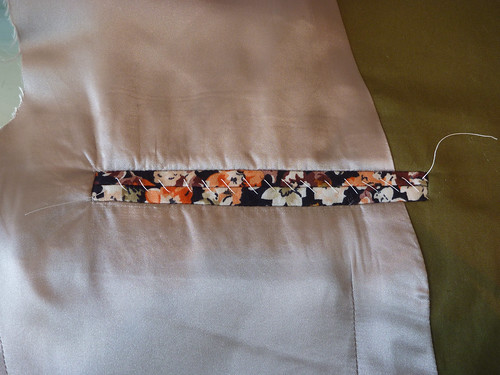
I used some of my left over shirting fabric for the welts. A fanciful touch. This is the same pocket construction as the outside pockets, just a bit smaller. I'm not bothering to make a right inside pocket because I would never use it, not to mention the time required to make it.


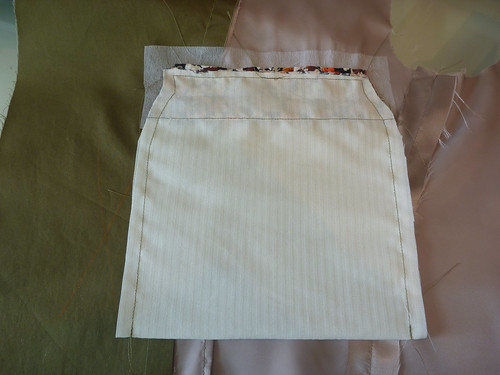
It looks like this from the inside.


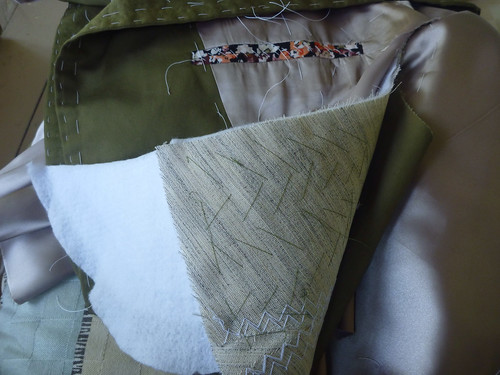
I've put in the shoulder pads. The front of the pad is padstitched into the canvas. It's kind of a wrestling match, and I'm always glad when this step is over.

 
It's not pretty, but it works.
 

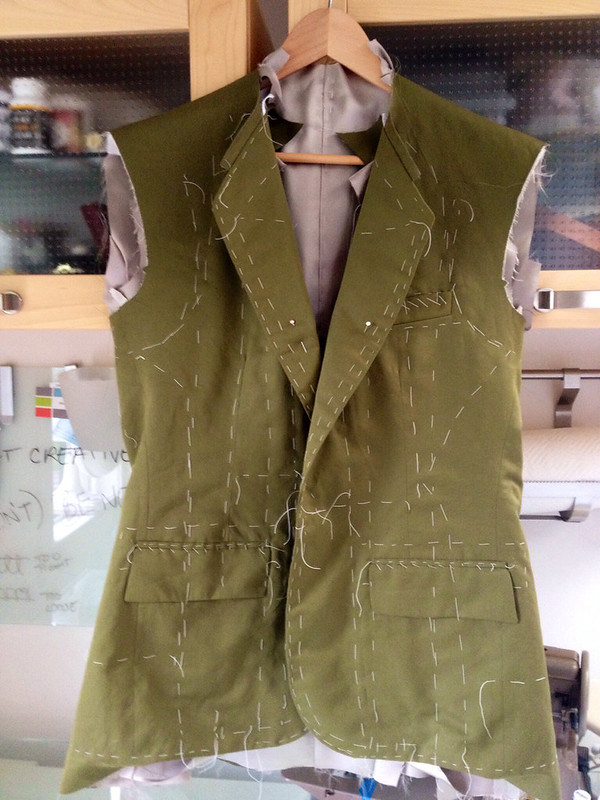
And here's where I leave off. Is there enough basting???? :)


Thursday, March 7, 2013

Wrestling Match

Things moved ahead so smoothly with the lining that I completely forgot about inserting the shoulder pads. Oh man, what an ordeal. Not that this is a particularly difficult process, it's just that there suddenly seems to be a lot of jumbled fabric sitting in one's lap. It starts to turn into a wrestling match.


First, all the layers of the armscye seam allowances are basted together so that it acts as a unit. There are a lot of layers here. Two layers of the fashion fabric, the canvas and the pocketing reinforcement strip. It's also, as you can see, a huge frayed mess.


Now the real wrestling begins. The shoulder pad is placed in position at the edge of the armscye seam allowance. Thankfully, the pad is notched where it should match the shoulder seam. Next, the canvas, which up until now has been basted to the jacket front, has to be peeled back while holding the pad in place. I try to preserve as much of the basting as possible so that the shape of the jacket front is maintained. It becomes a lot of work and attention paid to a very confined and awkward area. Don't get discouraged.


Next, as impossible as it seems, the canvas is pad stitched to the shoulder pad going through all the layers. At this point the shoulder pad is actually curving in the opposite direction that it will eventually go, so the jacket should be frequently turned rightside out to check that all is going well. Suddenly, a little jacket has turned into what seems like an octopus. The first time through this process was, in all honesty, a nightmare. Man vs. fabric. The second time was a piece of cake. It's amazing how quickly we can learn some of the more challenging techniques of tailoring.


Lastly, a sleeve head is sewn in. It helps fill out the top of the sleeve so that it will "fall" without wrinkles. Thankfully, this is easy to do and goes quickly. The edge of the sleeve head is placed even with the armscye and shoulder pad edges. It starts at the front notch and goes up and over the shoulder to the back. I back stitch it into the seam with a thread that will match the jacket. The stitches should not be visible from the outside, which would be pretty difficult to do considering all the fabric layers at this point.


So here is the final shoulder construction in all its layered glory. From the top down --shoulder pad, canvas, fashion fabric and sleeve head. I won't lie, I'm sick to death of working on these shoulders. But... I've turned the jacket rightside out and can tell you that all the effort has been worth it. They look great! Time for a break before attaching the lining.