Showing posts with label Clover Bias Maker. Show all posts

Wednesday, January 20, 2016

The Athleisure Jacket

I've really got the Athleisure bug, so I immediately launched into a jacket to go with my new sweatpants. I'm using the black and gray "birchbark" looking knit. I'm hoping the combination will be Armani-esque. One can always dream!


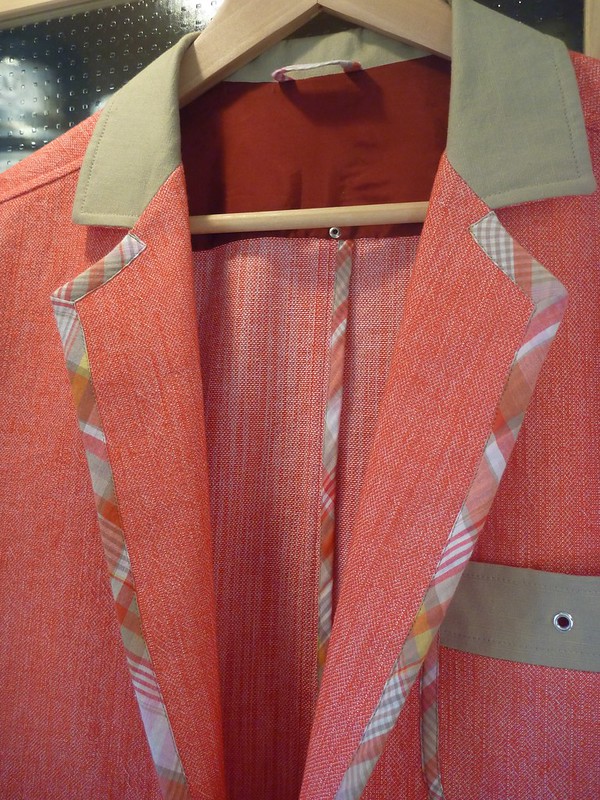
This is the pattern I used for my "Phony Missoni" jackets of last year. This time around I'm going to try the shawl collar version. (The illustration kills me!). Because this fabric is super wide, 72 inches, I only ordered 2 yards. Talk about cutting it close. I was just barely able to eek it out.


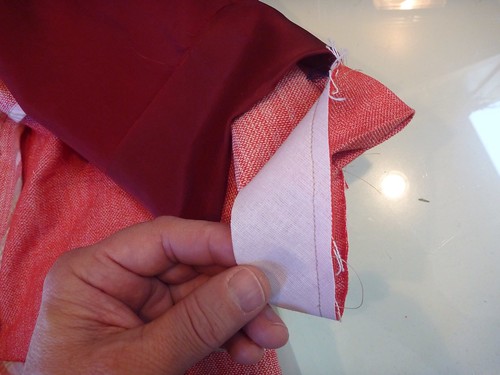
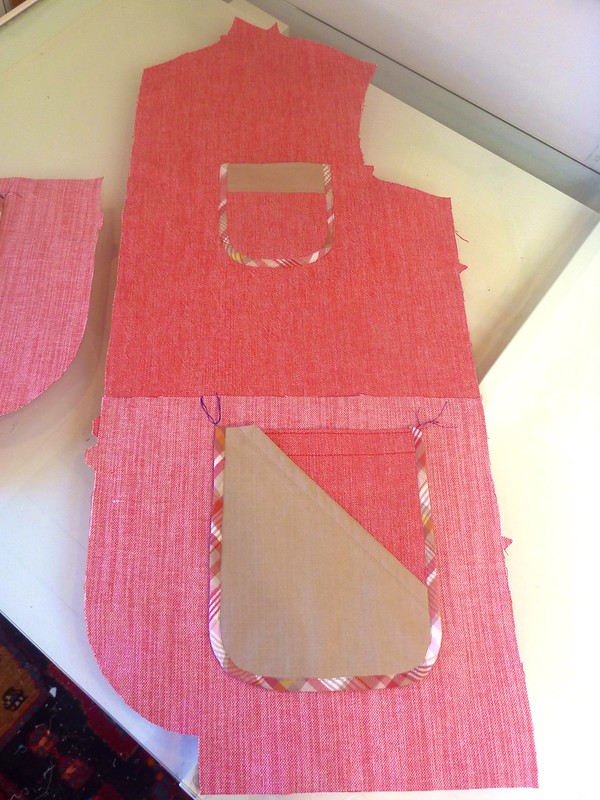
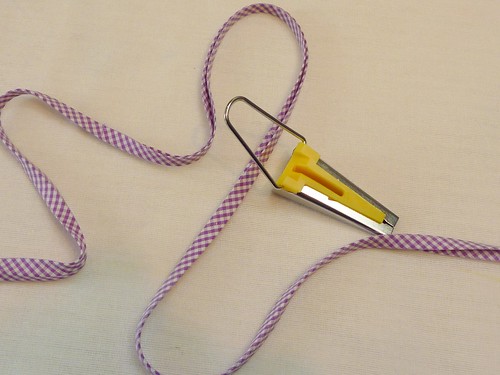
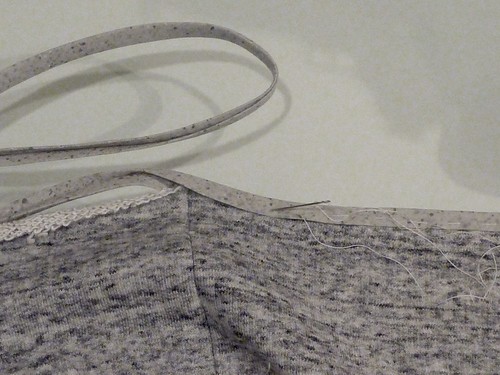
There is some serious Snug Hug usage going on with this jacket. Here a strip is sewn into the shoulder seams to prevent stretching. It works like a charm.


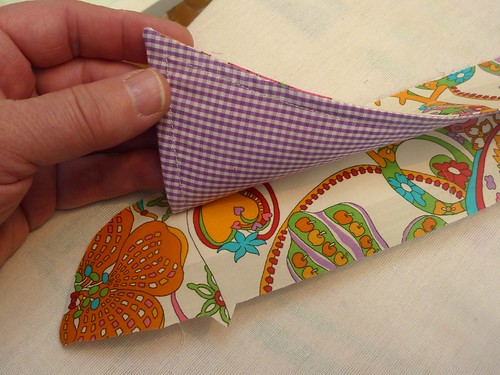
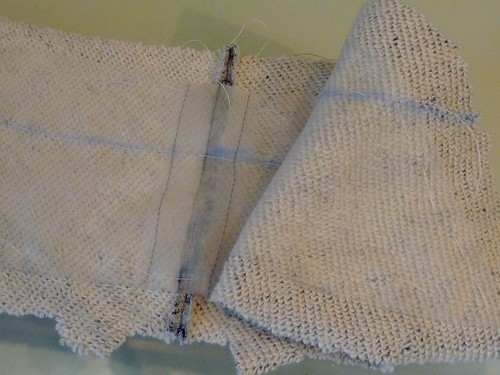
The seam allowance edges are covered with cotton bias binding. When the seams are pressed open the Snug Hug is completely hidden. I used this process on the shoulder seams and the side seams.


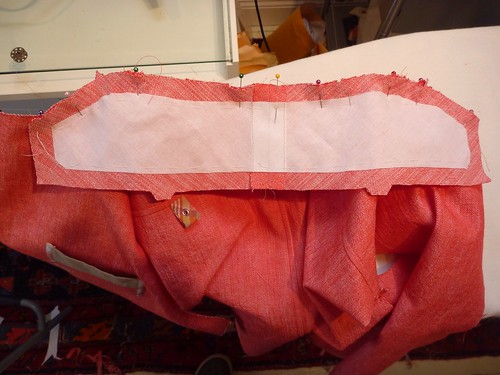
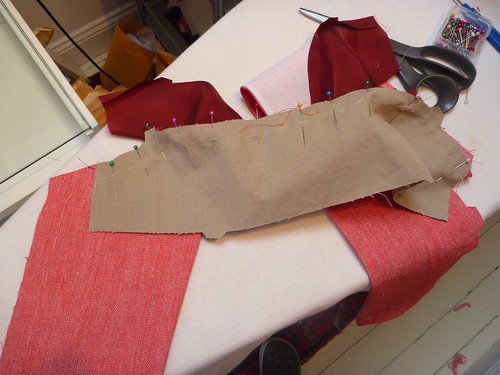
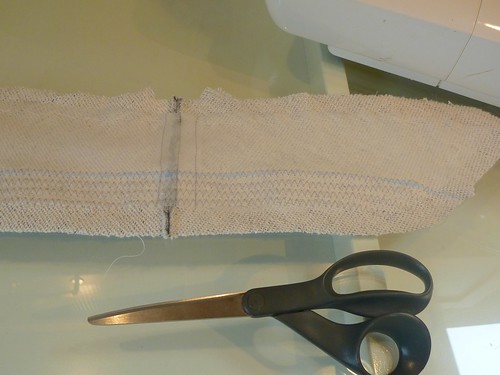
In places where the binding will be especially visible, namely the hem and front facings, I baste it in place before edgestitching. The thickness of the fabric combined with the loopy back made this necessary. Otherwise, I ended up edgestitching into air. Maybe you've been there too?


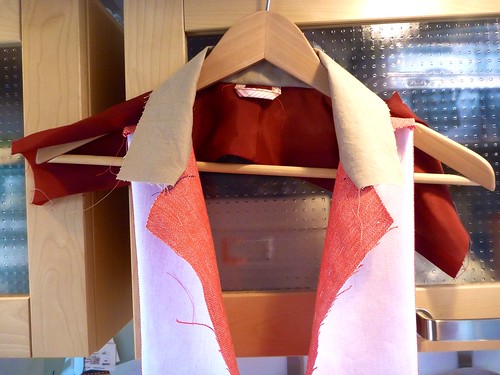
This is a little hard to see, but I interfaced the undercollar with silk organza. A little voice was saying, "what would Laura Mae do?


Rows of zig zagging along the foldline help create a little more structure.


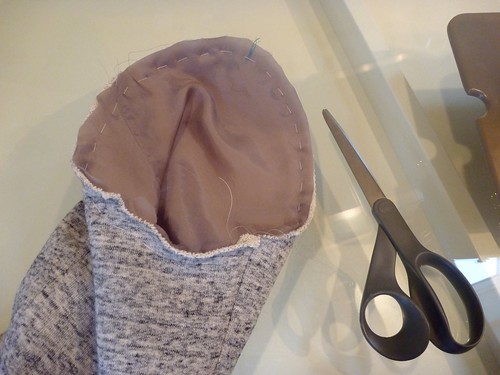
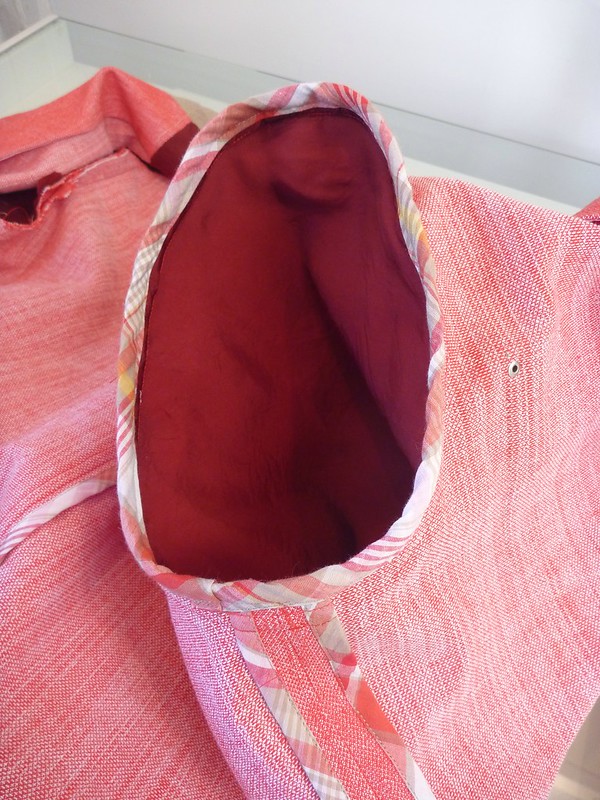
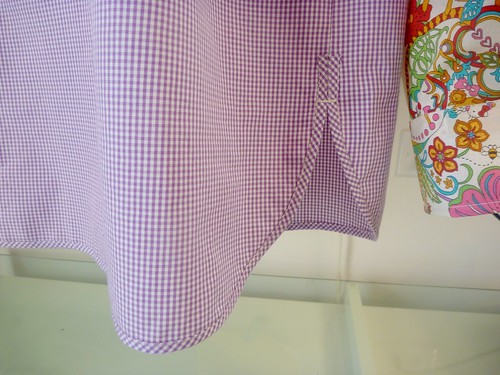
The sleeves are lined with rayon bemberg to make the jacket slip on easily. Otherwise, it's completely unlined.


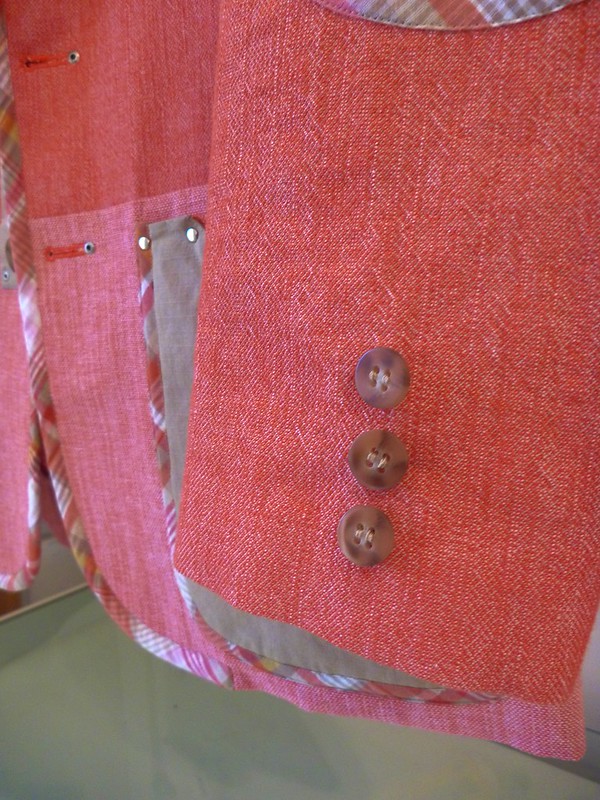
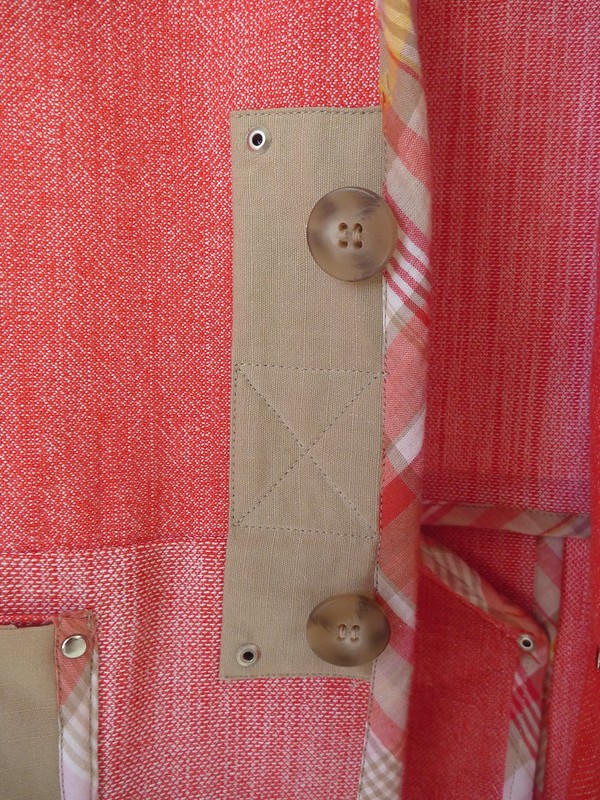
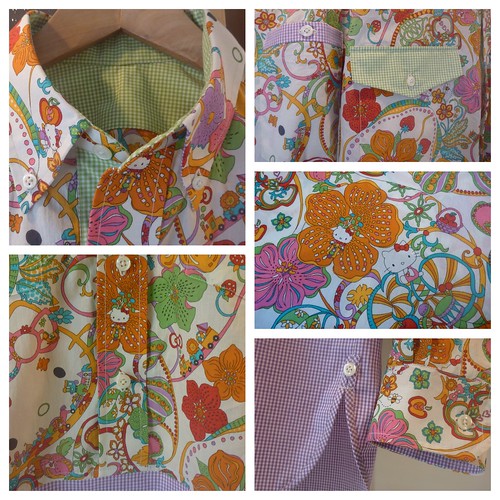
The world's worst buttonhole. This simply won't do!


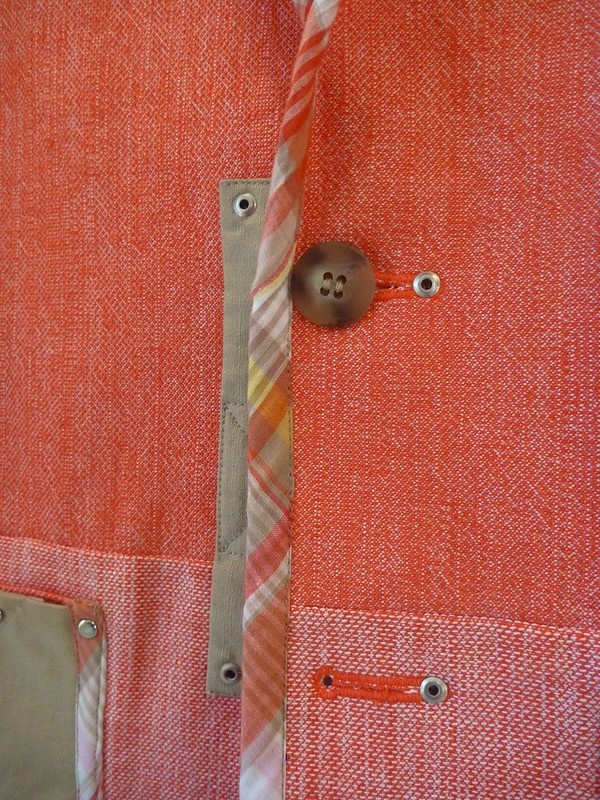
Break out the silk organza and Laura Mae's bound buttonhole tutorial! The BEST!


Lastly, the collar and front facings are understitched to help help keep them from rolling out. Below the button the seam allowances are stitched to the facing. Above the button it's reversed, and the lapel / collar seam allowances are stitched to the jacket front and under collar. Sounds confusing, but it becomes obvious when you're doing it.


Next time, the Athleisure reveal. (Arctic Blast reveal may be more like it!).


Thursday, March 19, 2015

Watanabe Jacket -- Progress #3, Finishing details

Here are the final details of my Junya Watenabe knock-off project.


The sleeves were very easy to set, since all the ease (1 1/2" of it) was removed. As always, I baste the hell out of everything. The uppermost row of basting is holding the lining and fashion fabric together. After pinning the sleeve in place, I baste again along the seamline. This pretty much eliminates the chance that I'm going to get a little catch in the fabric as I sew the seam. Oy! There's nothing I hate more than having to redo a sleeve. I'd much rather invest the time in basting, and get it done right the first time around.


Bias binding applied to the raw edges.


A bias strip of sew-in interfacing is applied to the cuff. This makes for a much more substantial cuff.


A vented sleeve is simulated by the addition of a few buttons.


The lapel is trimmed with a wider bias binding. This was made with the 25 mm Clover bias maker (the blue one). The trim was basted in place and then edge stitched.


Patches feature heavily in Watanabe's designs, so I added this one.


I only have a 1 1/16" keyhole cam for my buttonholer, which is a little big for a 3/4" button. I shortened the buttonhole by popping in a rivet. Problem solved.


I think I'm getting a little carried away with this project!

Thursday, March 12, 2015

Watanabe Jacket -- Progress #1

This project has gotten off to a great start. The fabrics are easy to work with, and I have WAY more than I need. That makes it much easier to take risks / experiment, and there's been plenty of it. Basically, I'm just making this whole thing up as I go along.


Since pocket details abound on Watanabe's jackets, I'm starting there first. To keep things simple I'm just using patch pockets. Two lower pockets and an upper chest pocket.


The two lower pockets are a double layer pocket that I made up. The Oxford cloth pocket is based on the actual pattern, the diagonal khaki pocket is layered over it. Both pockets are lined with a burgundy bemberg rayon lining. ( I only had three choices at JoAnn's -- black, gray or burgundy). I used my Clover bias maker to make the madras trim which holds the whole contraption together.


Here it is sitting on the lower portion of the jacket front. I've reversed the Oxford cloth to the lighter side.


As I said, I'm just making this up as I go along. You can sort of see where things are headed.


These are madras elbow patches. I lined them with silk organza by sewing them with a 1/4" seam allowance and turning them. It made the rounded corners much easier to finess, and gave them a little added oomph. One thing to remember, the organza has to be cut on the bias if the patch is on the bias. Otherwise, the whole thing curls up like a potato chip. Glad I have all that extra fabric because my first set was a complete disaster.


And here they are on the finished sleeves. This pattern has a one piece sleeve, simple, which I've lined with bemberg. The sleeve and lining are exactly the same. They are basted together at the top to act as a single layer. Once the sleeve is set, I plan to finish off the raw edges with bias binding.


I completely disagree with the pattern directions where the collar is concerned. The directions call for the upper collar to be interfaced. I think that's just plain wrong. Since I'm improvising so much of this project, I'm just going to ignore the directions and do what I think is right. Here I've interfaced the under collar with bias cut Light Crisp sew-in interfacing from Fashion Sewing Supply. I'm using the same interfacing for the lapels / front facings. It's great stuff.


The upper collar is attached to the front facings and the yoke lining. This is a new construction technique for me, and a bit of a mind bender. I was hoping that I could figure out a way to use the "burrito method" for the yoke lining, but I had to abandon that dream. A little hand sewing never hurt anyone!


The upper collar assembly. (I remembered to add a locker loop this time!)


Which has to get "married" to the under collar assembly. Yeow! That will have to wait for another day.


Sunday, February 22, 2015

More "Kitty" construction

Warning: Shirtmaking geek alert!

Purrrring along here in "Hello Kitty" world. With the fronts completed I turn my attention to the back and yoke. I've decided to eliminate the center box pleat at the back, so things are pretty simple here.


My plan all along has been to use the gingham as a contrasting inner yoke. One problem though.... The tana lawn is so sheer that the gingham shows through. To solve that problem I basted in an interlining of white batiste. Problem solved. Not only is the transparency issue fixed, but the whole yoke is more substantial.


What's going on here? This is the much beloved "burrito method" of attaching the yoke to the shirt fronts. It works like a charm, and gives a professional finish to the inside of the shirt. It's really an indispensable technique in any shirtmaker's bag of tricks.


I added a pocket to the upper right sleeve just for fun. I tried it with a flap like the front pockets, but decided it was just too much. A simple band with a button seems better. If I had an iPod, this would be the perfect place to stash it.


The bottom panel is attached to the shirt fronts with a flat felled seam. Pressing the seam upwards allowed me to trim out the bulk of the plackets.


Inside, everything is finished off. No raw edges for this guy!


The lavender gingham is used as a contrasting inner cuff. I can't topstitch a curved cuff to save my life, so I just lop off a corner at an angle. Works for me!


When the sleeves are rolled up, the lavender color is brought up higher on the shirt. It helps balance off the green of the pocket flaps and contrasting placket.


What's this? This is the Pam Erny method of turning collar points. This has become my preferred method and I think it gives the sharpest point. (Shirtmakers start to get obsessive over such things!). A loop of thread is sewn into the seam while the collar is being assembled. After turning the collar the loop is gently pulled and the collar point pops out. Voila!


The collar and band are interfaced with Prowoven Light Crisp Fusible from Fashion Sewing Supply. Their interfacings are frequently on sale, and I highly recommend having an arsenal of different weights in your stash.

Even with a white interfacing the collar was too transparent. Using the gingham for the undercollar gave a more consistent look. I use Peter's (of Male Pattern Boldness fame) method of attaching the collar and stand. Tutorial here.


Have I mentioned that I stink at sewing curves? My TNT pattern has curved tails. I usually fold them over about 1/4" twice and stitch them. It's always a struggle, and my results are average at best. It's a good incentive to keep my shirts tucked in!


The dilemma presented by this shirt is how to deal with tails that are intentionally untucked. My solution is to finish off the lower edge with a bias binding, something I've never attempted before.


Clover bias gizmo to the rescue! This is the 12mm size, which produces a binding about 1/4" wide.


I trimmed off the 5/8" seam allowance at the bottom edge, basted the binding in place and then edge stitched it on. A little time consuming....Yes. But I think the final result was well worth it. Not only is it neater than my usual method, but it adds some weight to the hem.


Spring is right around the corner!!!