I'll admit it. I'm a big time lurker on Laura Mae's blog, Lilacs and Lace. I'm never, in a million years, going to be making a beaded gala ball gown, but I love watching her process. Surely, in a prior life, this woman was one of "Les petites mains" in a Paris couture house. My current "Phoney Missoni" is going to need some couture touches, so Laura Mae is the "go to" gal for this couture wannabe. Break out the silk organza!
Laura Mae has some excellent tutorials on her blog. I'm always blown away by sewists who are not only incredibly talented, but generous in what they share with the rest of us. For this project I followed her instructions for making bound buttonholes, and applying Snug Hug seam binding. Both tutorials are crystal clear and easy to follow. I highly recommend them.
First up, Bring on the Snug Hug!
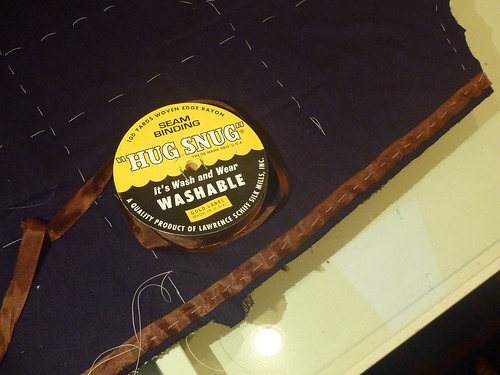
I actually ordered this roll of Mimi Brown Snug Hug from Amazon. The seller turned out to be A. Feibusch Corp., 27 Allen Street on the lower east side of Manhattan. They've been "zipping the world since 1941", so I've got a new place to explore the next time I get to the city. One roll of Snug Hug and I'm a believer!
What can I say about this stuff? It's amazingly light yet stable, adds almost no bulk, is easy to both sew and press, AND you get 100 yards so you can Snug Hug with reckless abandon.
So where did I use it? First, I basted a strip along the edge of the lapel to help it keep its shape. (See the top photo). It's so lightweight one would never know it's there. Certainly much more appropriate than the cotton twill tape that's usually used in menswear. I also inserted a strip along the shoulder seams to prevent them from stretching. I would normally have done this with a piece of leftover lining material. This was much faster, unroll a bit and it's done. Plus there's nothing to unravel, which is important in an unlined jacket.
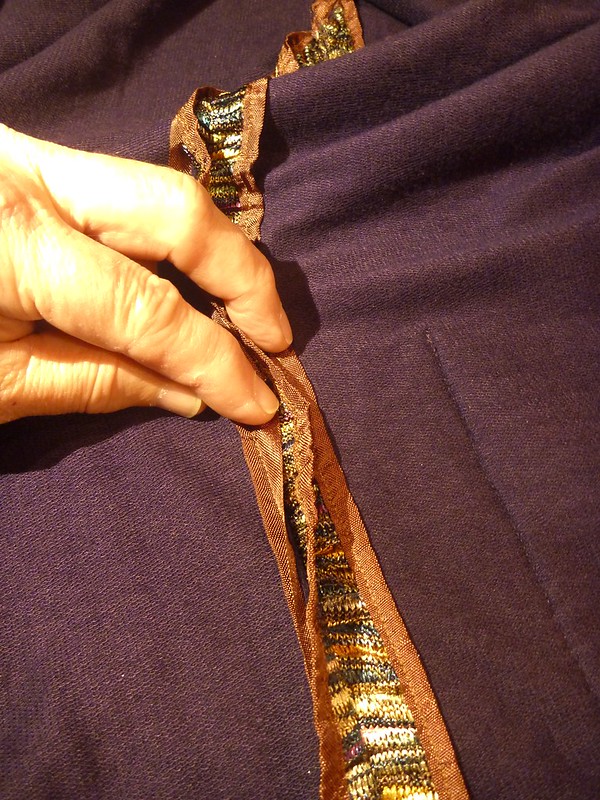
I sewed a strip into every vertical seam to prevent sagging. When both layers of knit fabric were sandwiched together there was a surprising amount of weight pulling / stretching the jacket down. By simply inserting a strip into the seam I was able to stabilize the knit vertically and maintain the shape of the jacket. Again, it added almost no bulk.
All the raw edges were finished. Once you get going it's hard to stop, especially when things look this great.

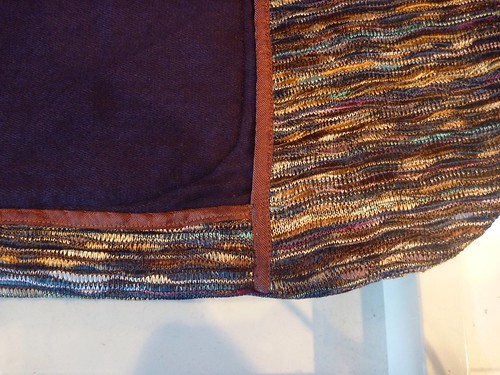
What's going on here? I started to reinforce the armscye a la Roberto Cabrera, but changed my mind. Suddenly things were becoming too structured, and I was losing the "sweaterness" that I was after. Out came this strip.
I ended up setting the sleeve and sewing around the armscye twice (three times at the underarm), trimming out the fashion fabric and then binding the lining fabrics together. This was a bit tricky since Snug Hug is only 1/2" wide, but I was able to make it work. First I pressed the Snug Hug in half, and then basted it in place before sewing it on the machine. A little more time consuming, but worth the effort I think.
With all the seams snugly hugged, I moved on to the bound buttonhole.
Laura Mae's tutorial is well illustrated and easy to follow, so I won't go into all the steps involved.
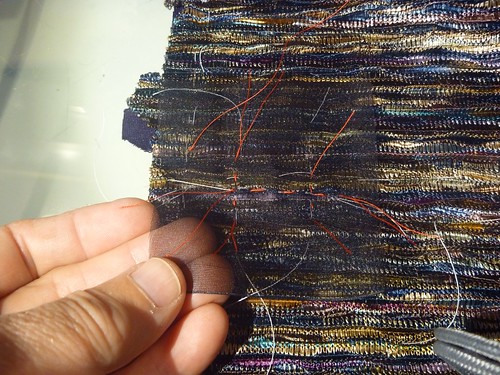
In a nutshell, I placed a square of silk organza on the outside of the jacket and plotted out the position of the buttonhole with basting thread (red). The organza supplies structure that the loosely knit fabric just can't. Without it I think the fabric would just unravel / disintegrate. I wasn't willing to risk a machine made buttonhole on this project. And a bound buttonhole is just WAY more classy!
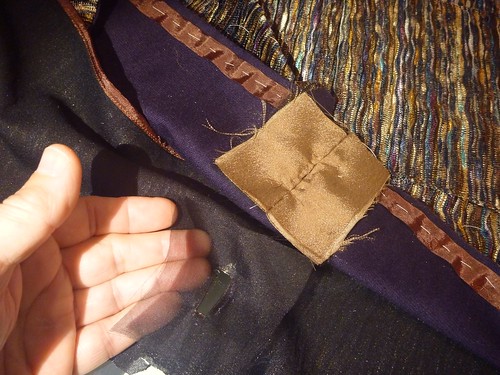
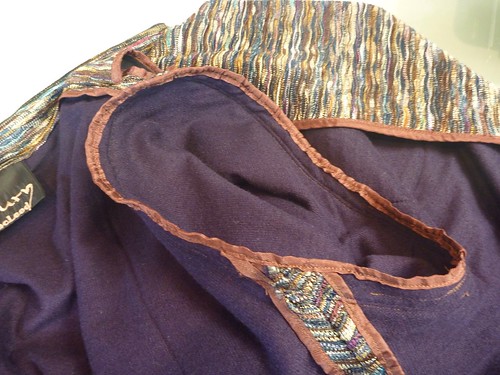
Once the rectangular opening of the buttonhole is sewn, slashed and clipped, it's turned to the inside of the jacket forming a little "window" as you see here. Note: this "window" is actually on the front facing and has been positioned to finish off the back of the buttonhole.
Scraps of lining fabric were used to form the "lips" of the buttonhole. They are handsewn into the window opening, which is surprisingly easy to do. Handsewing gives you complete control over what's happening.

Here is the finished buttonhole from the front (it's basted shut until the garment is completed).

And here it is from the rear, pinned back so you can see the organza reinforcement.
Thanks, Laura Mae, for holding my hand and guiding me through these techniques! I'll never fear a bound buttonhole again. A big takeaway for me has been the similarity of a welt pocket and a bound buttonhole. If you've done one, you've pretty much done the other.
The jacket is complete and I've actually worn it a couple of times to rave reviews. I hope to be posting a photo shoot soon.
In the meantime, Happy Thanksgiving to all!
Well, I've been lurking on your blog and wanted to share your praise for Laura Mae and her bound buttonhole tutorial. I had the pleasure of meeting her at the most recent Male PatternBoldness Day; sorry you weren't in attendance this year. I have the Japanese shirt pattern book (in French, pourquoi pas?)
ReplyDeleteHug Snug is certainly addicting! I used to preshrink it before attaching to designer pant hems for my clients but after measuring before and after there was very little difference. I think the Feibusch Corp will even match their Hug Snug if you send them a sample which is so nice if you don't have a color chart. Your buttonhole is just perfect and I look forward to seeing more progress and of course you wearing it for the final photo!
ReplyDeleteI just can't wait to see the finished article! Those buttonholes look superb. And as an aside I've been telling my bloggy sewing friends here in there UK to read your blog (bossy!) as it's so good!
ReplyDeleteJust found that my fave local fabric store has hug snug by the yard in a pile of colors. So I could actually do some matching, vs the "use the grey or the white" decision. I want to be Laura Mae when I grow up.
ReplyDeleteWow, this is going to be an amazing jacket.
ReplyDelete