This project has gotten off to a great start. The fabrics are easy to work with, and I have WAY more than I need. That makes it much easier to take risks / experiment, and there's been plenty of it. Basically, I'm just making this whole thing up as I go along.
Since pocket details abound on Watanabe's jackets, I'm starting there first. To keep things simple I'm just using patch pockets. Two lower pockets and an upper chest pocket.
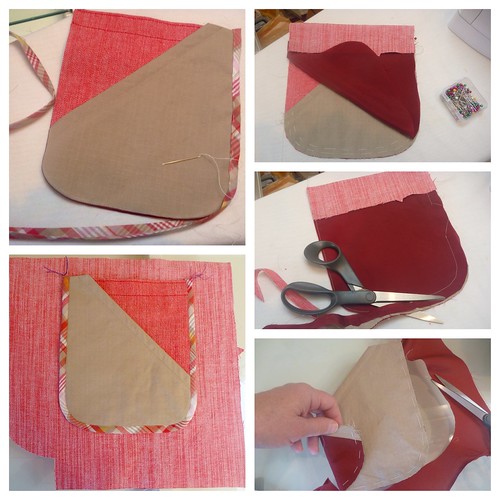
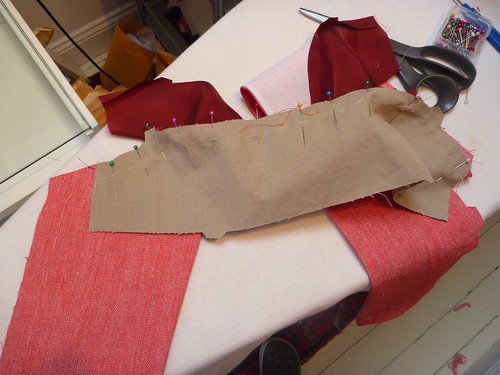
The two lower pockets are a double layer pocket that I made up. The Oxford cloth pocket is based on the actual pattern, the diagonal khaki pocket is layered over it. Both pockets are lined with a burgundy bemberg rayon lining. ( I only had three choices at JoAnn's -- black, gray or burgundy). I used my Clover bias maker to make the madras trim which holds the whole contraption together.
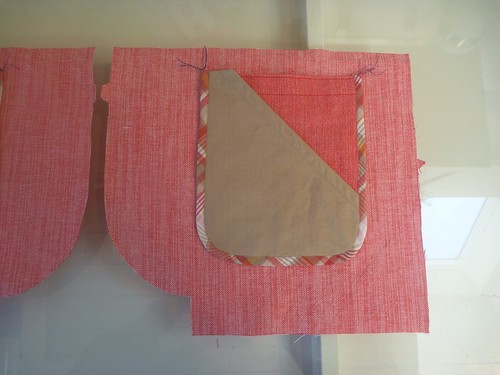
Here it is sitting on the lower portion of the jacket front. I've reversed the Oxford cloth to the lighter side.
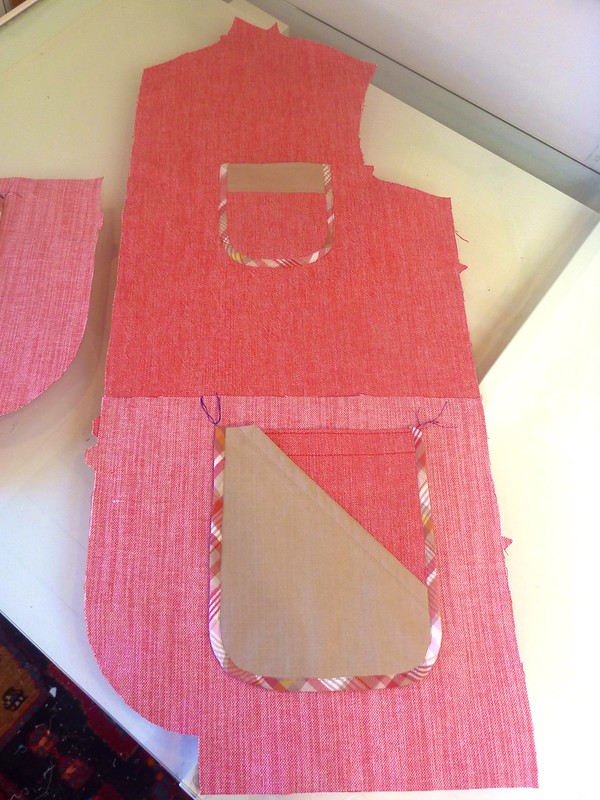
As I said, I'm just making this up as I go along. You can sort of see where things are headed.

These are madras elbow patches. I lined them with silk organza by sewing them with a 1/4" seam allowance and turning them. It made the rounded corners much easier to finess, and gave them a little added oomph. One thing to remember, the organza has to be cut on the bias if the patch is on the bias. Otherwise, the whole thing curls up like a potato chip. Glad I have all that extra fabric because my first set was a complete disaster.

And here they are on the finished sleeves. This pattern has a one piece sleeve, simple, which I've lined with bemberg. The sleeve and lining are exactly the same. They are basted together at the top to act as a single layer. Once the sleeve is set, I plan to finish off the raw edges with bias binding.
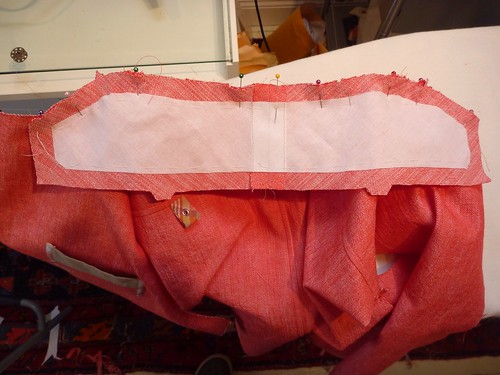
I completely disagree with the pattern directions where the collar is concerned. The directions call for the upper collar to be interfaced. I think that's just plain wrong. Since I'm improvising so much of this project, I'm just going to ignore the directions and do what I think is right. Here I've interfaced the under collar with bias cut Light Crisp sew-in interfacing from Fashion Sewing Supply. I'm using the same interfacing for the lapels / front facings. It's great stuff.
The upper collar is attached to the front facings and the yoke lining. This is a new construction technique for me, and a bit of a mind bender. I was hoping that I could figure out a way to use the "burrito method" for the yoke lining, but I had to abandon that dream. A little hand sewing never hurt anyone!
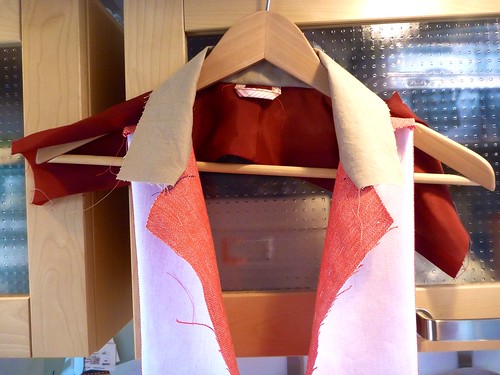
The upper collar assembly. (I remembered to add a locker loop this time!)

Which has to get "married" to the under collar assembly. Yeow! That will have to wait for another day.
It is off to a GREAT start! Love all the details like the bias cut binding and elbow patches, and the locker loop too!
ReplyDeletegreat project! I love the colors !
ReplyDeleteThis is going to look amazing and all the details are inspiring. Got to have the locker loop, never heard it called that before.
ReplyDeleteThe bias sets it off beautifully. This is going to be great.
ReplyDeleteDisagree and disregard. You're such a rebel.
ReplyDeleteNational Testing Service abbreviated as NTS. It is one of Pakistan leading testing agency which conducts tests for different jobs in Government & Private sector organizations. Besides this it also conducts various test for admission in various universities (NAT, GAT etc). Applying procedure for Jobs is quite Simple.
ReplyDeletehttps://ntsjobslatest.com