This post promises to be downright riveting!
I would never have attempted this if it weren't for my cyber sewing buddy Enrique over at Enriquesews. He's made some amazing duffle coats with rivets at various stress points that just blow me away. Plus, his joy of sewing is positively infectious. His blog confirms for me that through our sewing projects, whatever they might be, we make the world a much more interesting and joyful place.
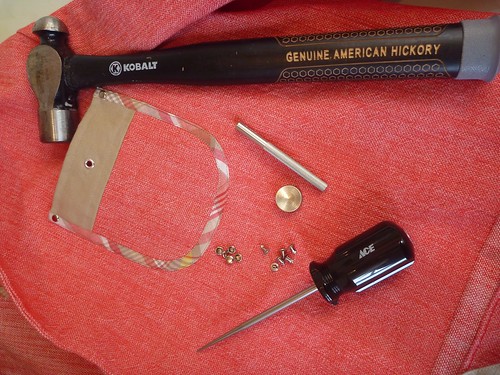
Anyway, after pestering him to make a tutorial on rivets, my man Enrique came through! Check it out here. I ordered some rivets, a setting tool and a rivet anvil online. It came to about $15 with the shipping. I picked up an awl at my local hardware store on the day they offer a senior citizen discount!! Hey, if the shoe fits...... :). I had a hammer, so I was in business.
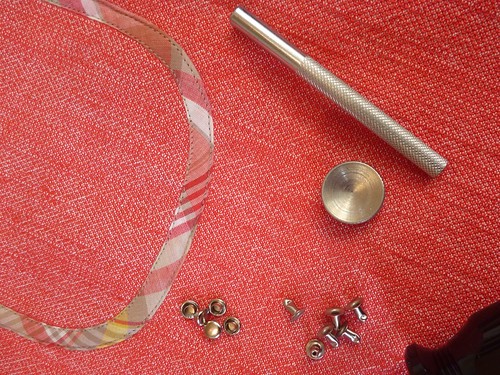
The setting tool and anvil are both concave, so the rivets remain rounded after they've been hammered. Neither is really necessary, but it's a nice touch.
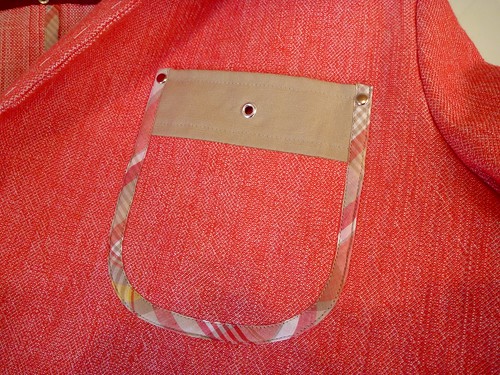

So here are my finished pockets with rivets and gromets. I followed Enrique's instructions and everything worked perfectly. I can't tell you how much FUN THIS WAS!!!!! It's addictive. Suddenly, I wanted to put rivets everywhere. It's a very slippery slope.

I felt in danger of ending up here! So I backed away from the rivets and continued with the jacket construction.
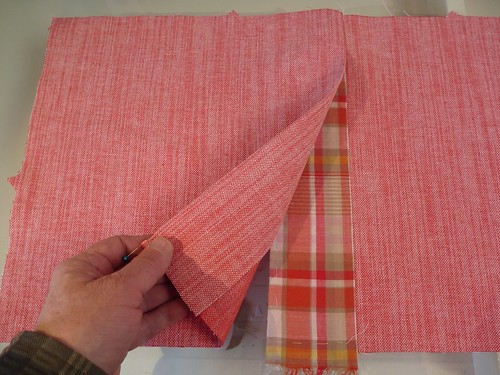
I spent the better part of a morning making a back center vent (the pattern doesn't have one). The center backs were extended 2". A piece of the madras was placed on the under flap. I did this on my safari jacket, and I've always liked the way it looks. There's a little flash of plaid when the vent opens.
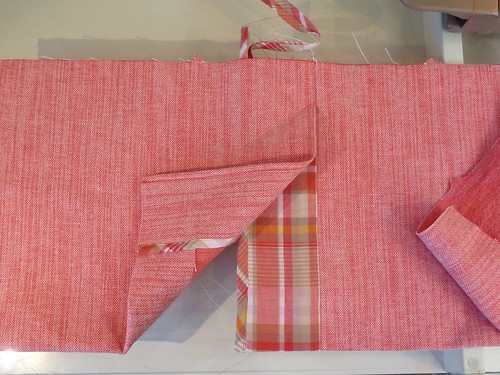
Because this jacket will be unlined, I really had to stop and think about how things would need to work. All the raw edges are covered with bias binding. It's not hard, just a bit of a mind bender on what steps need to be taken when.
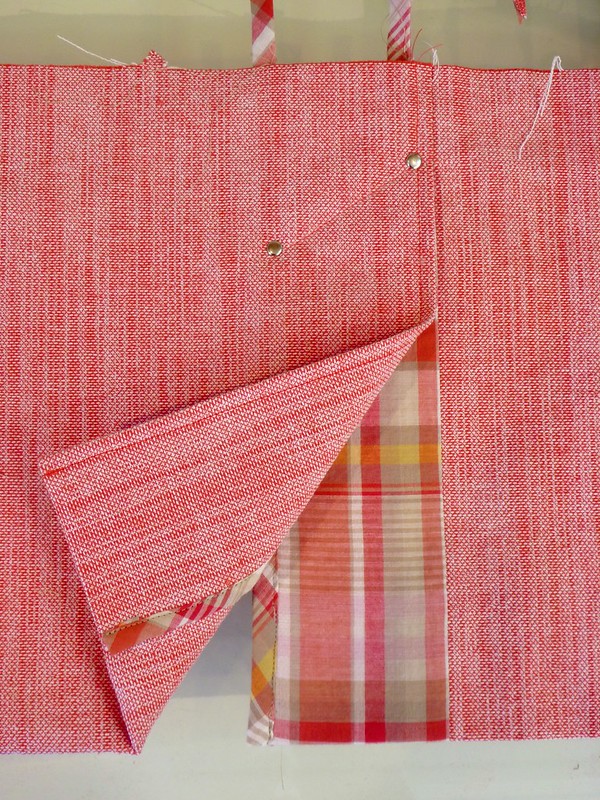
A line of diagonal stitching and a couple of rivets finished it off. With the vent completed I finished sewing up the body of the jacket.
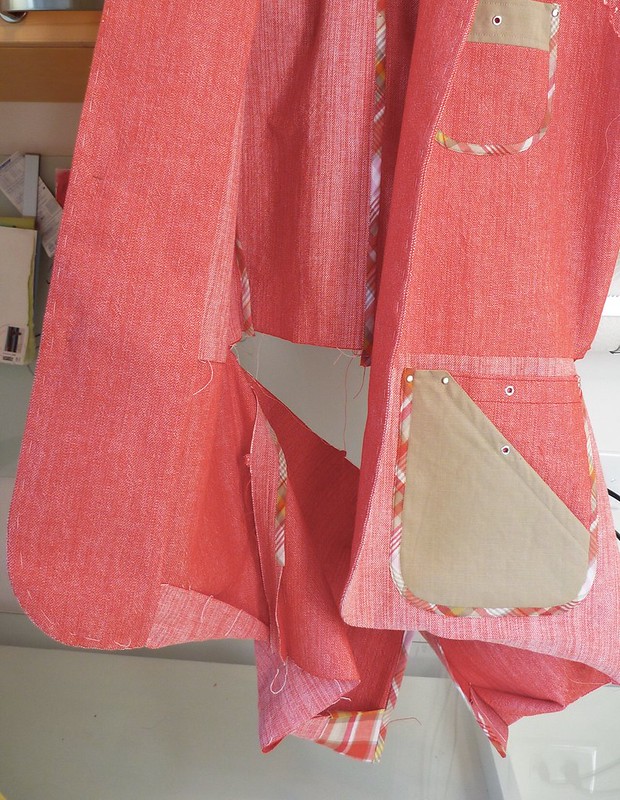
The horizontal seam at the lower portion of the jacket made for some very unusual contruction. It was a crazy mess, and a beast to get through the sewing machine. All the vertical seams had to be sewn and bound first, so that the horizontal seam could be one continuous seam around the jacket. Once that seam was sewn, the bulk was reduced by trimming one half of the seam. The other half of the seam was bound, pressed down and tacked in place with a couple of rivets. I just can't stay away from those rivets!
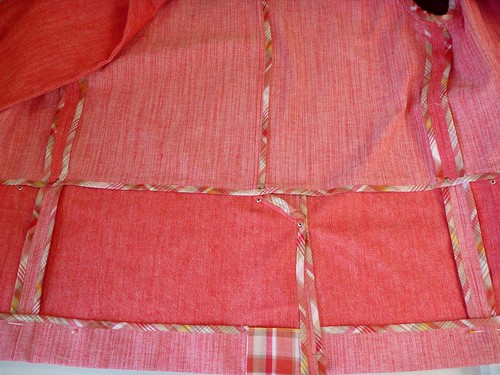
All that craziness paid off in the end, however. Result. -- An unlined jacket with no raw edges anywhere. Gotta love that!
Wow this is totally a work of art. Loving all the binding!
ReplyDeleteAnd the bedazzler picture made me laugh out loud!
I agree, Enrique's enthusiasm *is* infectious!!!
Rivets, omg I have just put 9 rivets on my jeans and I don't want to see an awl for a long time, neither does my poor thumb. Now in your jacket the layers looks a lot thinner than the 10oz denim I was using.
ReplyDeleteLove seeing all those seams bound and very creative use of the rivets.
Wow... art, art art. You're inspiring, every project. Enrique does make my day!
ReplyDeleteRivets are one of those things I always think looks so cool and never try. Yours look fantastic,and the plaid accents are perfect.
ReplyDeleteYour jacking is going to be stunning. I can hardly wait to see it!.
ReplyDeleteREALLY cool! Love the pockets'n'bindings—AND the rivets of course... Looking forward to the model shot:)
ReplyDeleteGreat jacket! I love all the bias tape and rivets!
ReplyDeleteThe bias tape is perfect. The rivets are a nice addition. Looking forward to the finished jacket.
ReplyDeleteMy goodness!!! I love the rivets in your jacket duane!!!! Im so happy i was able to help you and i hope i can help many more people!!! Thanks for the love amigo!
ReplyDelete