Here are the final details of my Junya Watenabe knock-off project.

The sleeves were very easy to set, since all the ease (1 1/2" of it) was removed. As always, I baste the hell out of everything. The uppermost row of basting is holding the lining and fashion fabric together. After pinning the sleeve in place, I baste again along the seamline. This pretty much eliminates the chance that I'm going to get a little catch in the fabric as I sew the seam. Oy! There's nothing I hate more than having to redo a sleeve. I'd much rather invest the time in basting, and get it done right the first time around.
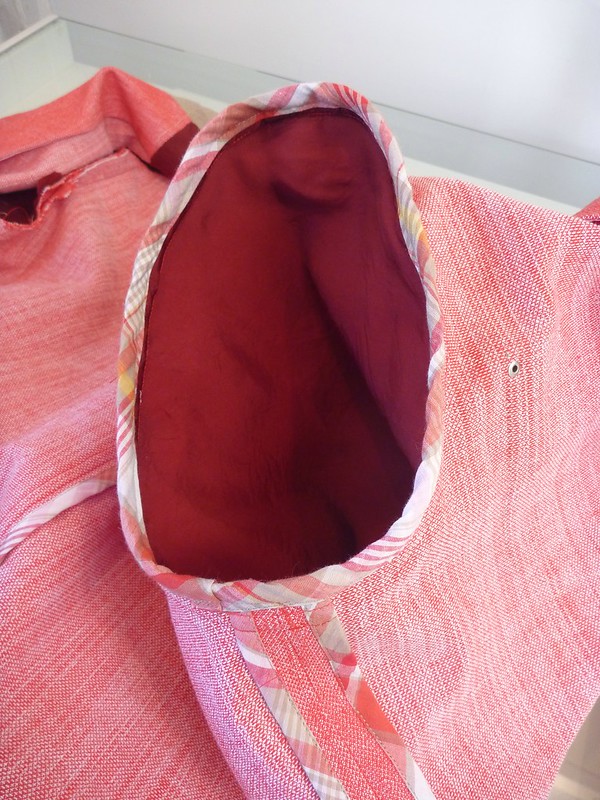
Bias binding applied to the raw edges.
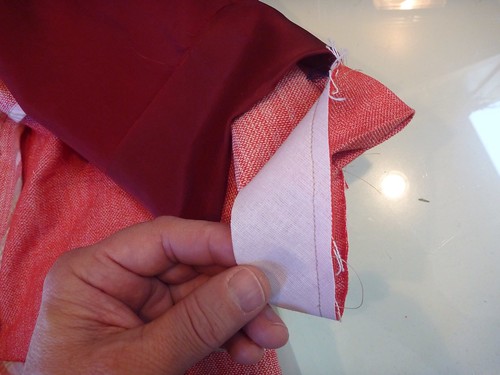
A bias strip of sew-in interfacing is applied to the cuff. This makes for a much more substantial cuff.
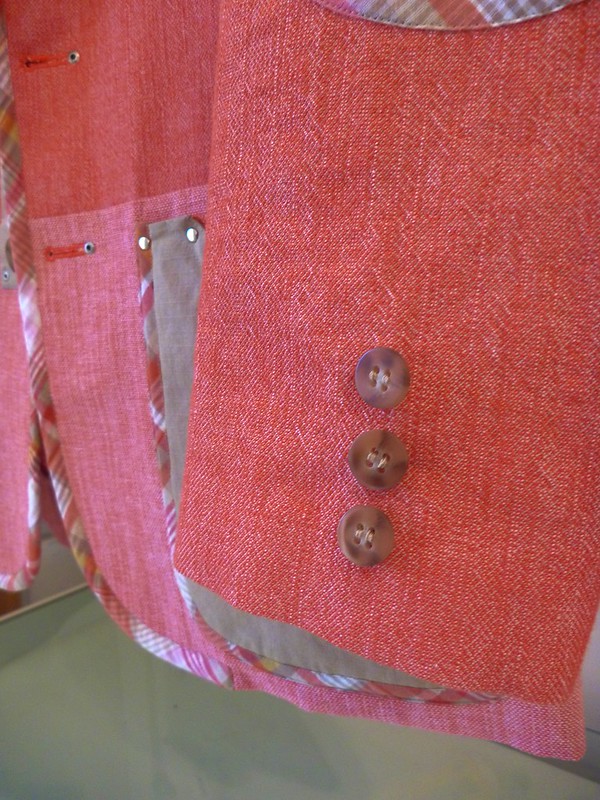
A vented sleeve is simulated by the addition of a few buttons.
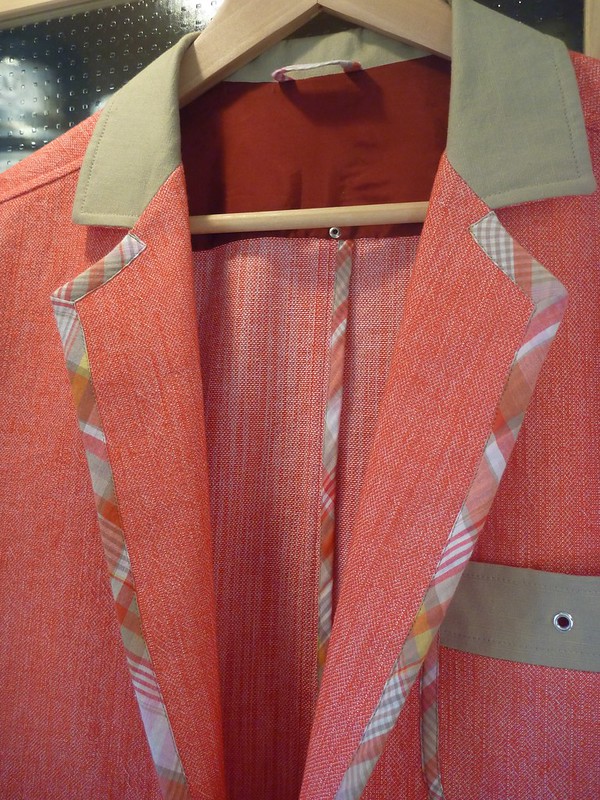
The lapel is trimmed with a wider bias binding. This was made with the 25 mm Clover bias maker (the blue one). The trim was basted in place and then edge stitched.
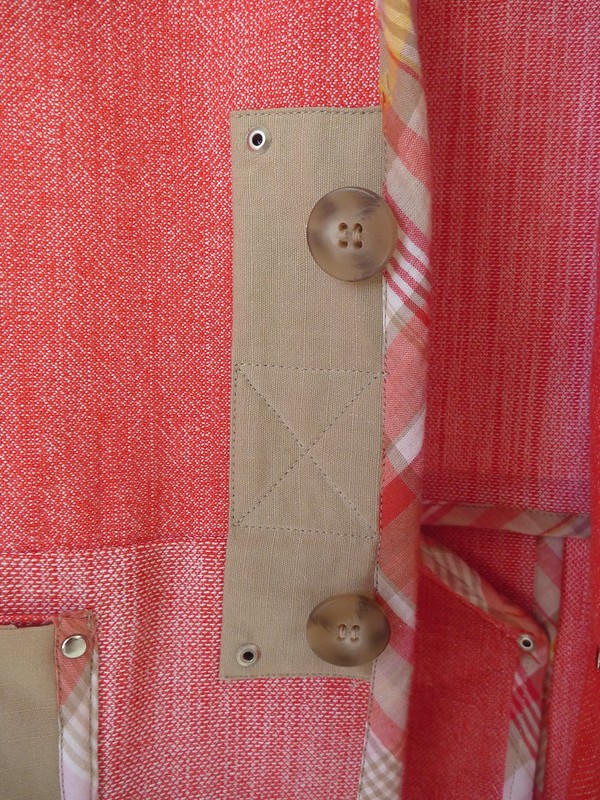
Patches feature heavily in Watanabe's designs, so I added this one.
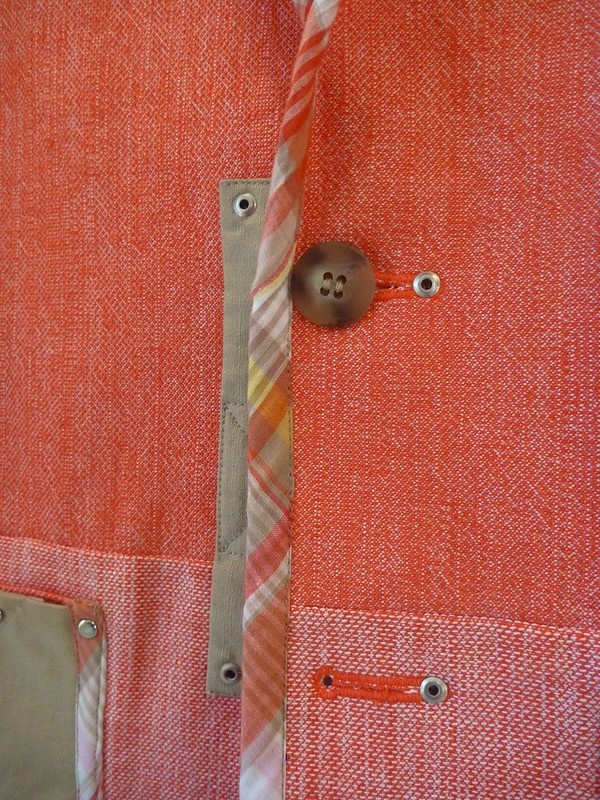
I only have a 1 1/16" keyhole cam for my buttonholer, which is a little big for a 3/4" button. I shortened the buttonhole by popping in a rivet. Problem solved.

I think I'm getting a little carried away with this project!
You've put so many interesting details in this jacket. It looks like spring to me.
ReplyDeleteYour jacket is going to be absolutely beautiful. I love all the details. The binding and the rivets...just everything. Love it!!!
ReplyDeleteI cn't wait to see the big reveal! And I adore the rivet on the buttonhole detail.
ReplyDeleteOh man I can't wait to see it on! So much attention to detail and such a great colour!
ReplyDeleteLove that you solved the problem of the too-large buttonhole with a rivet!
ReplyDeleteRivets: the solution to all of life's problems??
Beautiful work!
ReplyDeleteAs always, your work is very inspired. I love all the details you put in. You have already styled it with the shoes. Can't wait to see you on the runway!!
ReplyDeleteI use a vintage Singer 301. It doesn't do anything fancy, but it can power through just about anything.
ReplyDeleteW.O.W. That looks fantastic.
ReplyDeleteNever it looks amazing and look forward to seeing the fashion shoot.
ReplyDeleteOh we just LOVE it when you get carried away! :)
ReplyDeleteThis is looking amazing. I can't wait to see it finished!
ReplyDeleteSo glad I came across this. I was looking for inspiration to bind the lapels of a mans jacket. Did you add the binding to properly made up lapels or are the lapel edges raw under the binding? Sorry if that doesn't make sense!
ReplyDeleteI totally get what you mean. I added the binding after sewing the facings to the jacket fronts, turning and pressing them. It just seemed easier that way. I had to trim as much bulk as possible out of the seams, otherwise it would be way to bulky.
Delete