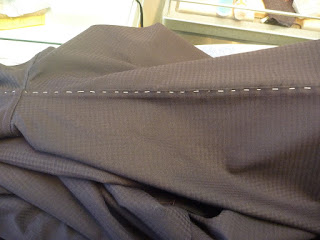
It's amazing how much precision sewing goes into even the cheapest RTW man's shirt. I'm sure there are all sorts of special machines and feet that create the various seams. Nonetheless, the craftsmanship is pretty amazing, especially when you're trying to re-create that level of exactness on a home sewing machine.
It's been awhile since I've made a shirt and I forgot how challenging, yet at the same time satisfying, the process can be. Truly, the devil IS in the details when it comes to making a shirt. My only suggestion is to just proceed very slowly. I just crawl along taking it one seam at a time.
As usual, I baste the hell out of everything.

Here I'm working on the plackets and bibs. This is the major design feature of this pattern and I want it to come out well. The seam allowance of the bib is pressed under and it's edgestitched to the shirt front. There is a lot of edgestitching on a shirt, and I find it extremely challenging to do well. I just go very slowly and take it a few inches at a time.
This is the presser foot of my Singer 301. To edgestitch, the fold of the fabric is aligned with the inside edge of the right side of the foot. This will make a line of stitching about 1/16" from the edge. It takes some practice. Basting the seam before edgestitching helps hold the fold in place. I also find having a very high intensity light focused on the presser foot helps me see better, which in turn helps keep me "on track".
I think my fabric is a cotton / polyester blend with a touch of lycra. It has a great drape, but it doesn't take a pressing very easily. I've decided to make the flat felled seams of the body and sleeves on the inside of the shirt. I basted the folded over seam allowance in place, and then stitched 1/4" from the seam from the outside of the shirt. Not exactly Kosher, but it looks better than a poorly done flat felled seam out where everyone can see it. Oh, BTW, the pattern calls for 1/2" seam allowances. I think that would be incredibly difficult to flat fell, so I increased it to 5/8". Why make hard things harder than they have to be?
Here is the cuff basted in place ready to be edgestitched. I consolidated the excess sleeve fabric into two tucks rather than the nine small tucks called for by the pattern. I've also made the cuff a single French cuff. I picked this idea up from David Coffin's book on shirtmaking. It's a little bit dressier than a typical barrel cuff, yet not as heavy and clunky as a double backed French cuff.
A final shot showing some of the details. I'm totally loving how this is turning out. I've been looking at vintage mother of pearl shirt studs on Ebay and Etsy. I have no idea how they work, but they could be a unique option for this shirt.


Lovely sewing as always. Can't wait to see the finished shirt in full glory.
ReplyDeleteThanks for all the useful tips.
Great shirt! I really admire all of your basting. I use pins right now but can seeing how having the seams basted exactly how you want them to be seen would be beneficial. No last minutes moving around under the presser foot. :) I just finished Simplicity Pattern 6693 (Men's western shirt) with pearl snaps and I too enjoyed watching my shirt come together slowly but surely. All the details that go into a nice men's shirt are amazing. The pearl snaps were a breeze to attach with the help of a snap attachment tool ... just watch out for the size of the pearl snap since men's snaps tend to be larger than the average attachment tool size (which seems to be geared towards smaller snaps that women would use).
ReplyDeleteGood Luck! I can't wait to see the shirt and all of your finishing decisions.