Construction continues on the Finlayson sweater. Because I'm working with a double layer of knits, I find myself having to improvise most of the seams to reduce the bulk. Even with the added steps I'm doing, this sweater goes together easily.
Once again, I'm using Snug Hug rayon seam binding to stabilize the seams. Here I've placed a strip in the shoulder seam to prevent it from stretching. The bigger issue at the shoulder is really the bulk. There are four layers to contend with, two each of the wool jersey and the wool / mohair knit.
I experimented with some scraps and came up with this quasi flat felled seam. I trimmed three layers away and then pressed a jersey layer (which has been Snug Hugged) over them. Then the whole mess is top stitched.

It ends up looking like this on the outside. Personally, I kinda like it!
So here is the final result. On the left the shoulder seam as seen from the outside, on the right is how it finished off on the inside. There are no raw edges to come unraveled anywhere.

The same process was done on the side seams.
Unfortunately, I don't have any pictures of the whole collar assembly. Trust me, it really goes together easily. For this sweater I placed a layer of the wool jersey between the upper and under collars. Two layers of the loosely woven knit were just not substantial enough for my taste. I understitched the collar to help it keep its shape, being sure to stop about 4" from each end. A lesson I learned from Finlayson #1. Alternatively, it could be topstitched.

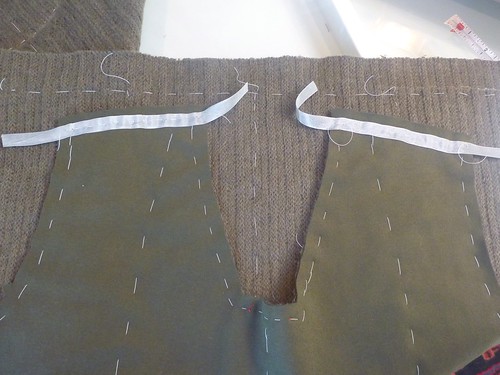
Inserting the collar can be kind of a mindbender (at least it is for me!!). My approach is to fold the collar into the correct shape first, and then flip it down onto the sweater front as seen in the diagram above. It's then just a matter of basting it all into place. This pattern is beautifully drafted, and the collar falls into place effortlessly. Still, I would recommend basting the hell out of it.
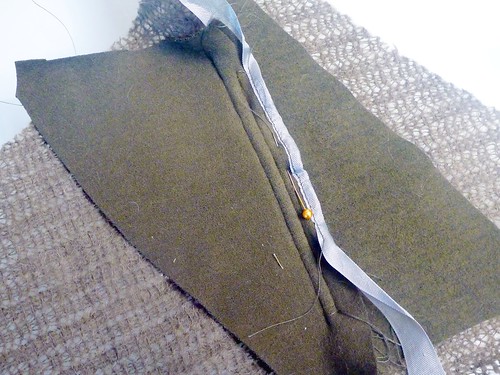
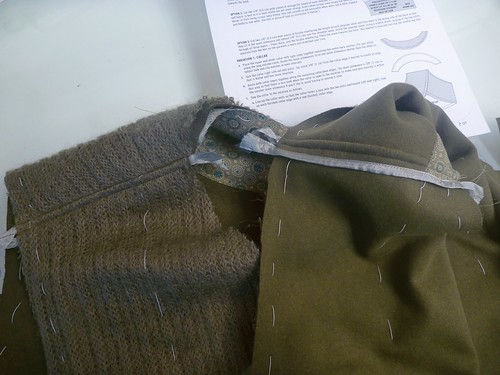
Again, my big issue was the bulk of the seams, especially the one across the bottom the placket. That seam contained 3 layers of wool jersey, and 5 layers of wool / mohair knit! Needless to say, I did a great deal of very careful and judicious trimming. This is NO place to slip up.

To bind off such a bulky seam I stitched two lengths of Snug Hug together very close to one edge. I then turned and pressed the ribbon, making a double width binding. I handstitched this over the trimmed seam allowances. Handstitching gave me complete control over this process, plus .... I really enjoy it.

And here is the result. Certainly worth the time and effort to have a clean finish on the inside, and worthy of the luxurious fabrics I'm working with.


The back neck edge and arm holes are also finished off with Snug Hug.

Lastly, a loop and horn toggle closure finishes it off.
This sweater's ready for the great outdoors! Time for another snowy photo shoot.
This looks so perfect and interesting how you have handled the bulky seams. We don't have Hug Snug here in Australia, might see if I can find some on ebay.
ReplyDeleteOh can't wait to see it! The inside finishes are beautiful!
ReplyDeleteMust get cold up your way. I cannot imagine needng to line a wool jumper with more wool!
ReplyDeleteThe insides are lovely, looking forward to seeing all of it.
Another fantastic garment!
ReplyDelete