So I've officially taken the plunge.
This will be my guide. I think it's safe to say that this book is considered the bible of kiltmaking. It's a little on the daunting side. The book opens with a series of color plates showing "good kilt" next to "bad kilt". Good kilt length / bad kilt, too short . Good stitching, invisible / bad kilt, stitches too large. Good kilt, stripes straight / bad kilt, stripes wandering. It's hard not to feel defeated before even starting! This lady sets the bar high.
In addition to this book I've also joined an online forum called "X Marks the Scot". Barbara Tewksbury, author of the book, actively participates in the forum. I've already posted several questions and she has chimed in on all of them, sometimes at great length. I've appreciated both her expertise and willingness to explain things in a supportive way. That doesn't always happen in online forums, where some members love nothing more than to pontificate on and on, and never answer the question.
But, I'm getting ahead of myself.
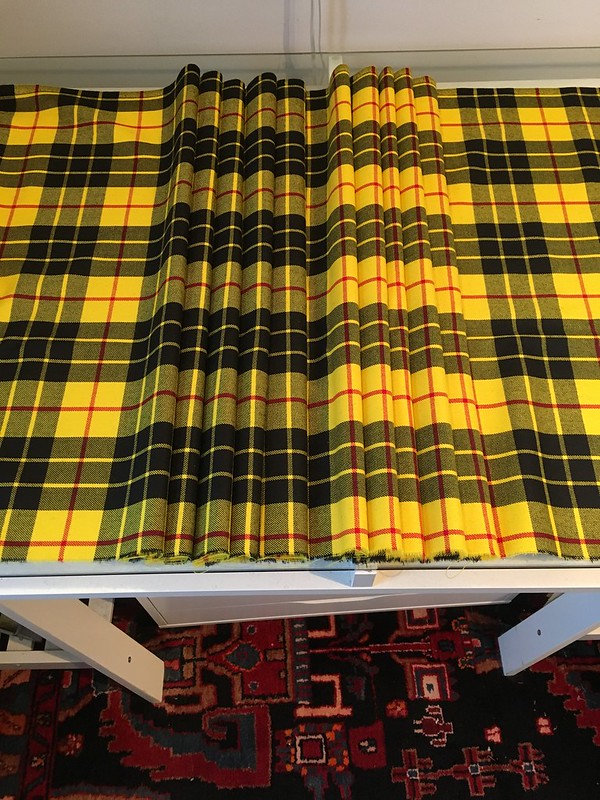
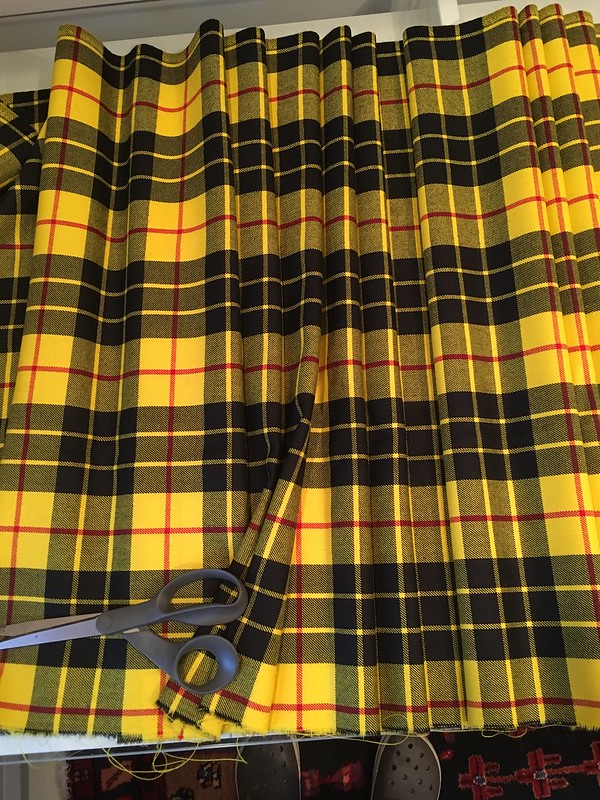
I spent days playing around with possible pleating styles. Yes, days! Without going too deep into the weeds, there are two types of pleating. Pleating "to the stripe" (also called military pleating), and pleating "to the sett" (in which the tartan is reproduced in the pleats). In military pleating the same stripe is centered in the pleats worked across the back of the kilt. My tartan is one of the more simple weaves, made up of only 3 colors. There are really only two possibilities for pleating to the stripe IMO. The yellow stripe centered between the black squares, and the red stripe through the yellow. I sort of approximated them in the photo above.
In the end I rejected both of them. Pleating to the yellow stripe created a very somber, to my eye "muddy", look. It took on almost a greenish cast.
However, it would have produced bright flashes of color when the pleats moved. Lots of drama, but a little too risky for a first (and most likely the only) kilt I will ever make for myself.
Pleating to the red stripe created a very golden yellow kilt. Pretty, but would I love it forever? These are the kinds of quandaries that can keep a man up at night, especially considering the cost of the materials and the amount of labor involved.
In the end I decided that pleating to the sett was the way to go. The pleats in the back will reproduce the tartan, giving the kilt the same appearance all the way around. In other words, I'm taking the safe route.
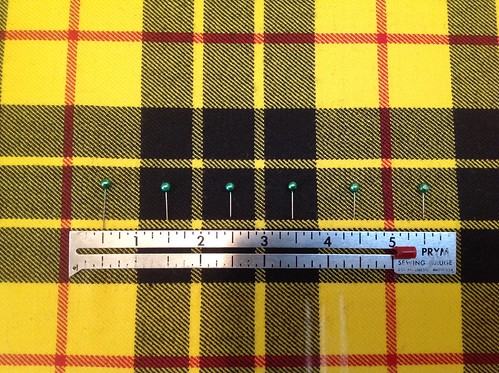
Here I've broken the weave down into the sections that will become the pleats. Each pleat will be 1" wide with a stripe or color border centered in each pleat.
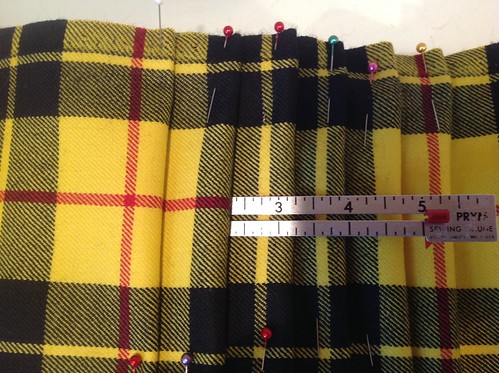
Here I've pinned the pleats into place. The sett of my tartan is actually quite small. Each total repeat of the plaid is only 5". Why does this matter? It makes the depth of each pleat quite shallow. That would be fine if I had a limited amount of fabric to work with, but I have "the whole nine yards!" I definitely don't want a skimpy kilt, so I've decided that each pleat will encorporate two whole repeats of the tartan. Yet another decision that kept me awake at night!
Days of deliberation and not one stitch made! Next time I hope to have made some real progress.


I can see why you would want to take your time with this. I'm amazed how different the colour is when you change the way you place the pleats. I like the decision you made -it's nice to see the whole tartan.
ReplyDeleteThere is so much more to a kilt than what was shown on the Great British Sewing Bee. It is amazing how the colour changes with the pleats. Your decision looks perfect and I can't wait to see more.
ReplyDeleteLoving this - just loving this!
ReplyDeleteI agree with you, pleating to the sett is the way to go. I look forward to watching you on your kilt journey. I have always wanted to make my own kilt, but after investigating, thought it was too intimidating. Maybe you will give me the courage!
ReplyDeletePlanning is such an important part of the process so you are right in taking the time you need to get it right (and I know you will). Thank you for sharing this process...I am learning something new!
ReplyDeleteGreat choice, pleating to the double sett. If you haven't already looked, there are some good you tube videos on kilt making. That is what i used to make my husband's first kilt. I used some plain black wool-like fabric that I paid $3 for about 6 yards (plain fabric doesn't need as much length) from the clearance fabric bin at Hancock Fabrics. Plain fabric, especially somewhat shifty fabric, is really hard to keep the pleats straight. The kilt was not perfect, but it was pretty good, good enough to wear, and I was very happy with the result. The hardest part for me, oddly enough, was the lining. I don't know what I did wrong, but I had to cut releases into to make it lay properly. That is probably where a book might have helped. I did not think that the sewing of the kilt was difficult; the challenge was being precise. Each pleat being exactly the same length and width and depth and sewn to precisely the same point. Pressing, pressing, pressing. Having a real wool tartan should help with the precision. My husband has lost close to 100 pounds, so the kilt no longer fits, and they cannot be altered. The pleated area would wrap all the way around him now. This time, I am going to spend the money for a real wool, and hopefully a tartan, which should make being precise with the pleating and sewing process a bit easier. Your iron or press will be your best friend. And patience! Don't move the pressed area until it is cool and dry. The scariest and yet most satisfying momemt was sitting down with scissors in hand and trimming out the pleats. There is no turning back, yet when done, the lay and swing of the kilt is like night and day. The kilt was one of the most satisfying projects I have ever made, and I am looking forward to making another. I think the decisions you have made so far are great, and with your excellent sewing skills, you will have a great result that you will be proud to wear. And there is not much of anything better than a man in a kilt! I look forward to seeing you in yours. Good luck!
ReplyDeleteMy husband's kilt is pleated to the single sett. The setts are somewhat bigger than on your. I made a full pleated skirt for my daughter, also doing this (not using our tartan - this was a practice) . I struggled because of the female waist/hip ratio. Making wider pleats at the top to narrow the waist risks the lines being off. To many narrow pleats makes the skirt very heavy. I haven't solved it yet. I'm using our family tartan that I had to get specially woven as it just wasn't available anywhere (still isn't). Does the book or the site cover making for women?
ReplyDeleteOne kilt will last for ever, other than weight change, so it's certainly worth taking your time. Good luck.
Pleating for women's kilts does require patience and basting. My daughter's dance kilt has a good taper from hip to waist.
DeleteKilt in progress
http://l3designs.blogspot.ca/2016/03/kilt-making.html
Finished kilt
http://l3designs.blogspot.ca/2017/01/2017.html
Thank you, Leah. Unfortunately I wasn't able to link to your kilt. I'll try again on my PC
DeleteGot there!
DeleteMy husband's kilt is pleated to the single sett. The setts are somewhat bigger than on your. I made a full pleated skirt for my daughter, also doing this (not using our tartan - this was a practice) . I struggled because of the female waist/hip ratio. Making wider pleats at the top to narrow the waist risks the lines being off. To many narrow pleats makes the skirt very heavy. I haven't solved it yet. I'm using our family tartan that I had to get specially woven as it just wasn't available anywhere (still isn't). Does the book or the site cover making for women?
ReplyDeleteOne kilt will last for ever, other than weight change, so it's certainly worth taking your time. Good luck.
I'm pretty sure the author would say there's no difference between a man's and a woman's kilt. The process is all the same. All the shaping is in the pleats. The key is to pick tartan elements that won't be lost as the pleats taper into the waist. I'm lucky that my tartan is simple. Some are very complex and require a real strategy. Barb's book 📚 is worth every penny IMO.
DeleteThank you. I'll look out for it. A
DeleteI never make any sewing decisions without sleeping on it first! Looking forward to the results of your kilt making.
ReplyDeleteWOW MainelyDad, this is one EPIC PROJECT! Keep going!
ReplyDeleteSo cool! I had no idea of the intricacies involved in kilt pleating. Thanks for sharing.
ReplyDeleteThat is going to be a fine fine thing, sir.
ReplyDeleteI went down this road for the (formerly) Blond Son. That is the book. And when you sleep, you will dream about this.
I confess some cheating: the kilt was going to boy scouts camp, and it would need to be expendable, so wool was out. I ended up buying a blended fiber kilt online (to get sufficient yardage) and taking it apart to get the plaid pattern desired. Actually I made the Son take it apart and repleat it, because at some point in your life, you need to do your own seam ripping and sett matching. He figured out how to line the waistband with flannel. I made him a fine sporran to go with it.
Looks great with hiking boots.
I wish you all the best! I made a kilt for my partner many many years ago. I had no book, and my English was weak so using internet as a source of information wasn't happening. I did my research at the local theatre, very kind and helpful tailors there. The end result was okay. Still can't believe I willingly did it.
ReplyDeleteLooking good so far! I heartily applaud your efforts and look forward to the next installment. :)
ReplyDeleteLooking great.
ReplyDeleteYes kilt making is an art. Don't rush into anything.
I did similar when laying out my daughter's kilt to decide on the centre stripe of the front apron.