
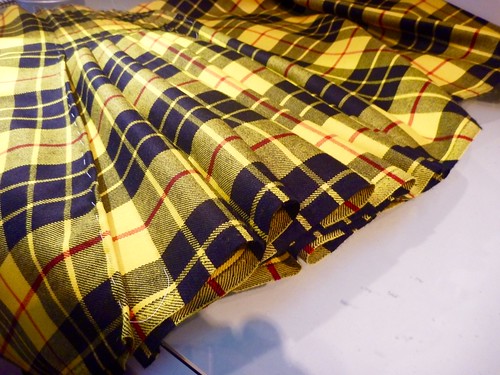
I think the scariest part about making a kilt is that it's just based on 3 measurements that someone else has taken. You have to give up every shred of control and place your faith in someone that you hope is taking the job seriously. That's hard for a control freak like me. I had my son, who has NO sewing experience whatsoever, measure me. Then, unbeknownst to him, I had my very OCD friend David do it. If you've got that kind of friend in your life I highly recommend it, purely for the peace of mind! In the end their measurements were almost identical. David gave me an extra 1/2" of length, and I'm taking it. I'd rather have a little extra length than end up with a plaid miniskirt.
So that's it....no pattern, no muslin, no dry run. Three measurements.

The book I'm using is unapologetically traditional in its methods. Everything is marked with chalk. That might be fine for an experienced kilt maker, but I found myself handling my fabric so much that my marks were quickly wiped away. As a result I misplaced my first pleat! Not a great start. So I resorted to more reliable techniques. I remarked all the pleat spacing with Wonder Clips and triple checked myself. (Any mistake is almost unfixable). Then I popped in a tailor tack at each clip. No more lost chalk marks. I also thread traced the edges of the overlapping fronts (the "aprons" in kilt speak).
You can see a few of the clips in the above picture. This is 5 yards of fabric that's perpetually sliding back and forth on the table.
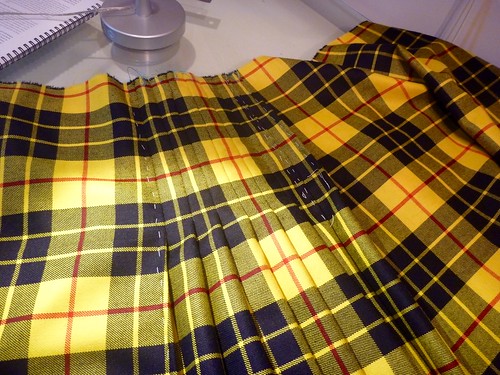
My kilt will have 22 pleats across the back. The set of three black blocks is centered on the front of the kilt, so it should also be centered on the back. That took a bit of trial and error but I eventually got there. Each pleat is 1" at the hip (the "fell" in kilt speak) and tapers to 7/8" at the waist. The amount of taper is determined by the difference between the hip and waist measurement. Mine is minimal since I have a flat buttock and the waist is measured 2" above a person's natural waist.
I'm sorry I don't have more detailed photos of the pleating process. There's a certain rhythm to the sequence. In short, the next pleat has to be formed and held in place before stitching the pleat one's currently working on. This is all to be accomplished by pinching the pleats with the left hand and stretching the fabric over one's thigh. With the fabric stretched the pleat is hand sewn with small invisible edge stitches. Somehow everything is supposed to end up perfectly straight and aligned. IN MY DREAMS!
I quickly realized that I would have to make a hundred kilts before I could master this technique. Anyone who's followed this blog knows that I'm a baste-o-holic, so I posed a question about basting on "X Marks the Scot". Stand back! This set off a small firestorm between the traditionalists and the more modern kiltmakers. After the dust settled I pretty much ignored all their advice and proceeded to baste all my pleats. In the end it's all about what works, right?
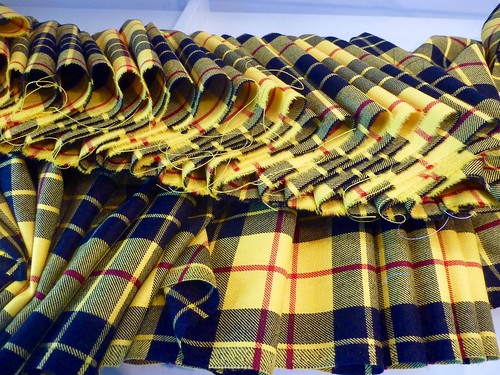
Even with all my basting, sewing the pleats accurately was no small feat. The horizontal red stripe was particularly difficult to keep aligned. There's definitely a knack to it. Maybe on my hundredth pleat I might have it down. Sometimes you just have to say it's "good enough for a first kilt".

So here is the completed back, pleated to the sett, with all the pleats basted into place. A good place to take a break and read up on the next step.
Wow! What a journey. I'm enjoying all of the details.
ReplyDeleteWish I could say something exciting, profound or just plain giddy about the awesomeness of your work! This looks sooooo hard but you are totally rocking it. Thanks so much for sharing.
ReplyDeleteAwe-inspiring! It does all seam to be working for you. Keep up your great (as usual!)work and thanks for sharing. This is going to be amazing.....enjoy every stitch...we are.
ReplyDeleteWith that much fabric, basting is the only way I can see it happening if you have no kilt experience! The back is very impressive and love reading your thoughts and processes.
ReplyDeleteAll I can say is WOW. I am so impressed.
ReplyDeleteDoing very well indeed!
ReplyDeleteAmazing stuff. DO you have a walking foot? I can imagine it would help with the horizontal stripe matching but honestly I'll just take your word for it as it looks pretty darned good!
ReplyDeleteIt's all handsewn. No machine involved.
DeleteGoing well! I'm enjoying your journey.
ReplyDeleteI certainly basted all down the pleats when I made my daughter a full pleated skirt. I didn't realise this was controversial.
Is this the McLeod tartan?
Yes. The "Loud MacLeod"!
DeleteWow, you are very brave! Thanks for sharing your progress it is facinating.
ReplyDeleteI find it interesting that chalk is considered more 'traditional' than tailor's tacks.
ReplyDeleteFunny, I laughed when I read the xmarks thread about basting. There are passionate kilters around. I too followed the instructions the book provided. I had to. It was the first garment I ever created. Now, after the 4th kilt, I improvise a bit :) Enjoy the journey.
ReplyDeleteThat is so beautiful. As much as I admire process, in the end I don't care which method you used to get there, I'm just thrilled you did.
ReplyDeleteI am kind of glad I just punted on my son's: I am a pinner. I'd staple the dang thing to get it right. So - safety pins (nice quilter ones) - and I'm glad I did. Otherwise, I think the slight errors would be insanely visible to more than just me.
It makes sense there is a controversy; it's a thing in specialists. And I'm glad they care that much. Bless em all.
Great work! I'm, as always, impressed by your work, and your preparation.
ReplyDelete