Monday, September 5, 2016

Rethinking my hardware choices, and launching into it.

I cut out some of the ultrasuede backpack pieces and did some test stitching on the scraps, only to find out that my trusty Singer 301 decided not make a single stitch. Arghhhh! It refused to pick up the bobbin thread, so it was essentially just sewing into thin air. I fiddled with the tension, cleaned out all the fuzz, gave it a good oiling, changed to a different needle, but nothing seemed to work. So...off it went to my sewing machine guru Mr. Klaus Heimann in Newcastle, Maine for some TLC.


While I was at a standstill I began to question some of my choices for this project. The only gray webbing I was able to find is on the narrow side, and the finishes on the hardware don't match. With time on my hands I decided to order some new components on-line. So here are the results.


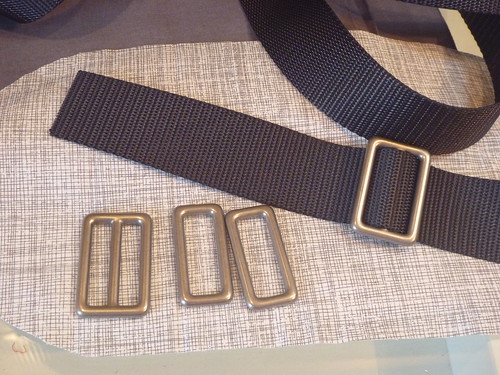
The new webbing is 1.5" wide, charcoal polyester from Strapworks.com. It's much more substantial that what I originally bought. It came in just a few days from Oregon.


The new hardware is solid brass with a matte nickel finish from Buckleguy.com. Infinitely better than what I had originally purchased, and it matches. This is substantial hardware, identical in weight to what's on a Fossil messenger bag that I own. Mr. Buckle guy is in Massachusetts, so this was in my mailbox the next day.


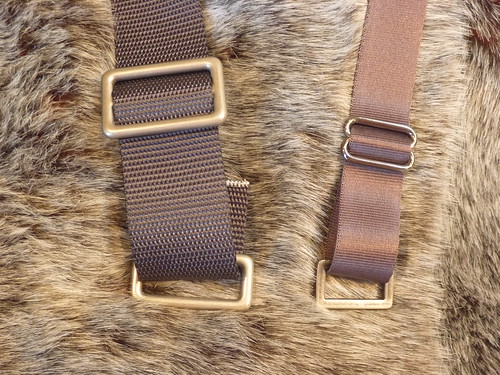
Side by side one can really see the difference. I'm much happier with these small changes. (Which in the end are really big improvements)


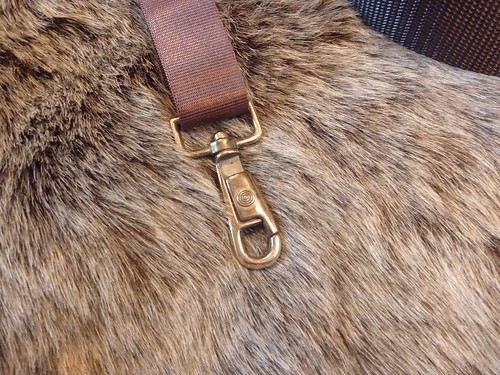
The old webbing won't go totally to waste. It fits perfectly on this swivel snap that I scavenged off an old Lands End canvas briefcase. It will become a clip for car keys somewhere inside the bag.


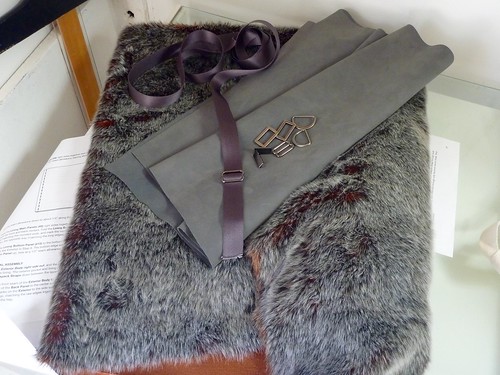
I'm not wild about the "innards" of the Lucy Backpack as designed, so I set out to make it more closely meet my needs. I'd like a large padded pocket along the inside back of the backpack to hold my iPad or Kindle. The Lucy has a zipper pocket on the outside of the back which would drive me crazy. I'd much prefer any zippered pocket to be on the inside.


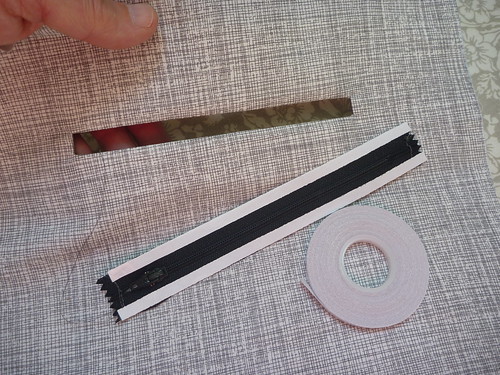
My plan is to make a little zipper pocket on the outside of a bigger pocket / sleeve. The zipper pocket was a breeze thanks to "backpack queen" Kyle over at Vacuuming the Lawn. She not only sent me the link to a great tutorial, she also sent me a roll of Wonder Tape and a box of Wonder Clips to make the job easier. Sewing people are the BEST, are they not. Thank you, Kyle!


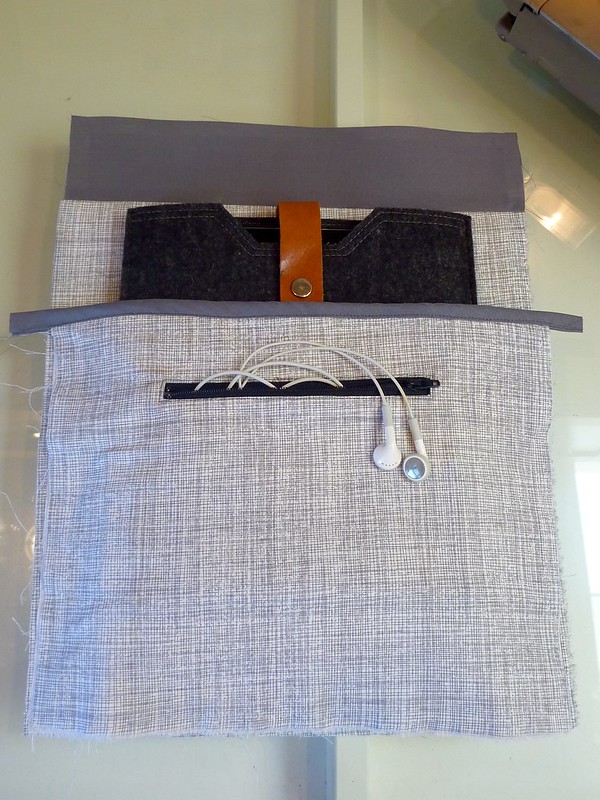
So here's how it turned out. A pocket on a pocket. The lining is made with a quilting cotton from JoAnn's which is printed horribly off-grain, making everything look cockeyed. Grrrr. The top of the sleeve is finished off with some homemade bias trim, because...why not.


A variety of interfacings were used to give the lining some structure. I worry that the whole backpack could end up being a big floppy mess, so I'm working to avoid that.


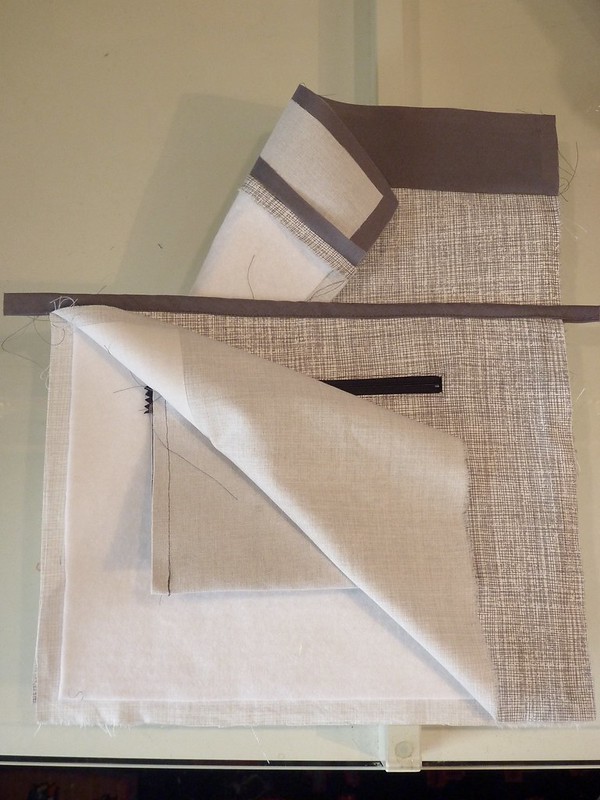
Here I've folded all the layers back. The area of the welt is reinforced with a strip of Shirt Crisp Fusible from Fashion Sewing Supply. The pocket bag is also completely interfaced Shirt Crisp. The inner layer of the sleeve and the entire outer layer of the lining are reinforced with Pelon Thermolam, a fleecy fusible. Shirt Crisp was used again on the top trim piece where the grommets will be located.


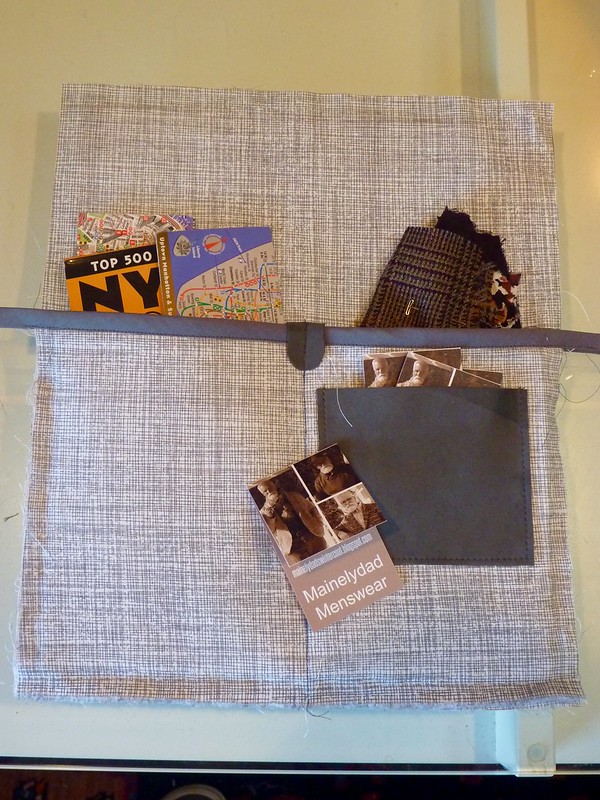
And here is the lininging for the front of the backpack. It has two padded pockets, one for maps of NYC (invaluable for this country bumpkin), and one for fabric swatches that I always carry with me. A little patch pocket of ultrasuede holds my cards.


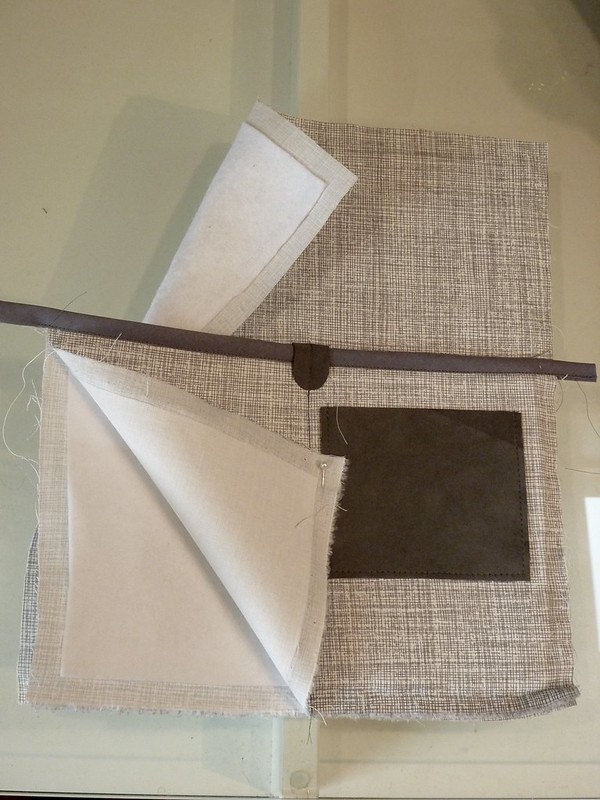
Pulled apart to show the interfacing.


Next time I'll finish up the lining (Wonder Clips will be involved), and venture into the unknown territory of faux fur! Until then, happy sewing!


Saturday, August 27, 2016

Backpack Crush!


Oh, MIchael, you may not dig the hairy forearm look, but I'm totally crushing on your hairy / fur backpack for Fall 2016.


Talk about "Love at First Sight" !!!


Even though this backpack is plastered all over MK's website, I can't find it for sale anywhere. NOT that I would ever be able to afford it. The closest thing I can find is a black shearling version at Saks for $798. Yes, people have that much $$$ to blow on a backpack.


My mission is to create my own version which, admittedly, is whole lot more fun. Plus, this will be my first foray into bag making.


I started collecting the materials for this project at Peter's MPB Winter Frolic back in March. (I'm hoping for a repeat in 2017!). I purchased a half yard of faux fur at NY Elegant on W 40th St. They have a huge selection of furry delights up in the mezzanine. Their inventory truly runs from the sublime to the downright ridiculous. Don't, however, expect to find any "bargains" here. Sometimes a splurge is in order. And somehow, having so many furs to choose from can justify the price of admission. I fell hard for this silver tipped number with a rust undercolor that's revealed when the fabric folds. I wish you could feel how deliciously soft it is. Yummy!


I've gradually been collecting the other bits and pieces I'll need. I'm going to substitute gray ultrasuede for the leather portions of the MK bag. The webbing is actually a better match than it appears in these photos. Trust me, it's not lavender! I still need to get a grommet kit and 3/8" grommets. I'm also reconsidering some of my hardware choices. There are lots of options out there! Swivel clips, D rings and slides, Oh MY!


I've also hit JoAnn's for some interfacing and stiffening products I'm not familiar with. Pellon Shapeflex (which is a fusible stiffener for the back and bottom), and Pellon Thermolam (a fleecy fusible that I'll pad the lining with). If anyone has experience with these please chime in!


I looked around on the Internet and Etsy and settled on this pattern. The Lucy backpack from Swoon Sewing Patterns. It has the overall shape of the MK, a drawstring top with grommets and a good sized flap. It has some features I don't like, but those are easy to omit. I'll configure the inside to suit my needs. Basically, a padded pocket to hold my iPad, one small zippered compartment and other open pockets for pens, checkbook, fabric swatches etc.


I picked up a remnant of upholstery tapestry for $2 at Goodwill and banged out a rough "muslin". The directions were well illustrated and very easy to follow. Kudos to Swoon!


I poked holes in the top band to simulate grommets and threaded some SnugHug through to get the gist of the drawstring. It really helps me to work through all this in advance, especially since I've deviated from the pattern in places.


This is just some twill tape to simulate the straps.


Overall, I think I'm off to a good start. The bag may be just a touch on the small side, so I may lengthen it by an inch or two. The next step is to research how to work with faux fur. I hear I'll need a good vacuum cleaner!


My sewing and blogging has really taken a backseat to the boat this summer. I'm really wanting to have the whole project wrapped up before the snow flies, but there are days when I have my doubts. Recently I've been making the spars (mast, boom, gaff and jib club). Basically, planing and sanding square stock into round parts. I'm pleased with the results, but can't honestly say that any of it has been fun.


Bring on the backpack!


Tuesday, July 5, 2016

New Summer Shirts


What's better than a new shirt for summer??? Two new shirts!


I made just a couple little adjustments to my vintage pattern. I always need a sloped shoulder adjustment (top pic), and I also added a slight curve to the upper back (lower pic). I also cut the undercollar and the collar interfacing on the bias. I think that helps a camp collar fit a little better. Oh, and I added some extra fabric at the lower sides to allow for some small side slits.

Both shirts have sew-in interfacing. A fusible would have flattened out all the crinkle on the graffiti print, so I used some very lightweight cotton gauze from my stash. I think it was intended to be used for sheer curtains. It's that light, and it worked perfectly. The plaid shirt is interfaced with Fashion Sewing Supply's "light crisp" sew-in. A dream to work with, and it didn't weigh down my fabric. No guy wants a heavy summer shirt.

All the construction was extremely straightforward. Basic shirt stuff.


The plaid shirt is a whisper weight cotton madras plaid from Peron Fabrics. It's been patiently waiting in my stash for the right pattern to come along.


I'
 

The truly observant will notice that I've used this fabric before... namely as bias binding, elbow patches and other assorted do-dads on last year's Watanabe inspired jacket and fishing vest. It's a lotta look! I'll save it for a day when I'm feeling especially "fashion adventurous". A morning at the laundromat maybe!


I fell in love with this crazy crinkled graffiti print at Elliot Berman. I don't tend to wear much blue, other than jeans, so this is a big departure for me.... Both color and style wise. It's hard enough getting older, even worse to be old and turn into a stodgy fuddy duddy. No chance of that with this shirt!


Plus, summer is made for wearing crazy shirts!


So get out there and have your very own......


Tuesday, June 7, 2016

The Blazer Goes on Ice.


I've decided to make it official and declare the blazer project officially on ice for the time being. Try as I might, I just can't gather any enthusiasm for it. It's funny how something can suck all the sewing mojo right out of me. The thought of a third muslin has had me stalled for an entire month.


I received some great advice on my various fitting issues, and for that I'm so grateful. With your suggestions I know I can make the blazer better, but my heart just isn't in it right now. Somehow the timing is off. Maybe it's the season...it's summer and I want fun things to make and wear. A black wool blazer....not so much. So I've packed it all away with a few mothballs, and I feel a huge weight has been lifted.


Another lift came in the form of a lovely note from my sewing pal Enrique. Yes! He's still alive!


He enclosed swatches of shirt fabrics that he has in the pipeline, along with some of his street photography. Such a talented guy!


So, taking a page from his playbook, I've decided to make myself some fun summer shirts. This is guaranteed to be the cure to my sewing doldrums.


Fabrics....a lightweight cotton madras-y plaid (which I've used in two other projects), and a crazy graffiti / camouflage crinkled fabric that I found at Elliott Berman.


I picked up this vintage pattern on Etsy awhile back. I'd been on the search for a new casual shirt pattern and this beauty appeared.


I love all the little details on this shirt... The back collar button, center back box pleat, a little tuck on the sleeve that creates a cuff effect, and most of all the hybrid camp / buttondown collar. I'm guessing it dates from the 60's. My thanks to whoever saved it these past 50 years.


And, look ladies! There's a matching shirt for you!


Go on, unleash your inner Nancy Reagan! Hmmmm...on second thought.....


I can't wait to get started on these shirts. I wish you all happy summer sewing projects!


Thursday, May 12, 2016

Muslin #2, Mrs. Mole's fix and MORE!


The fitting battle continues.... First, thanks Mrs. Mole for your suggestion. I took your advice for my Dowager's hump, and the result is perfect. Plus it was extremely easy. Here's what it looks like...


I sliced across the back at yoke level, and swung the top half up to create a curve at the upper back. Simple. Also visible here is my forward shoulder adjustment, which I hope will move the seam closer to the apex of my shoulder. An equal amount was subtracted from the front shoulder seam to balance out the equation, so to speak.


I then went looking for clues as to why the jacket won't hug my neck. Check this out.....


So this is the neckline of the Bill Blass suit that I made a couple years ago. Note the nicely curved lined where the front joins the back. Also see that the back shoulder is wider than the front, which is correct.


Now look at my current pattern....


How is this jagged line supposed to curve around anyone's neck? No wonder it won't fit!


I've taped in a scrap of paper and drawn the missing curve. And while I'm tweaking things, I added a 1/4" to the lapel width (just a little too 60's narrow), and reduced the curve at the bottom edges of the jacket fronts, which seemed to "cut away" too much for my taste. (I think this was due to the high positioning of the buttons on the original).


So here's Version 2.0.


Much better fit around the neck, and across the upper chest. (You have to excuse my left arm, which is permanently bent due to an old injury, hence all the wrinkles).


My fitting issues seem to have moved from the front to the back, where excess fabric is bunched up behind my arms. It's not the end of the world, but I think it could look better.


I spent the rest of an afternoon trying to work it out.


This is version 2.1. I took out 1/4" from the back armscye. I'm way out of my depth here, but this is looking better to me. I still have room to move, and more importantly, I haven't screwed up the front. Sometimes I feel that I fix one thing only to f$&@ up something else. Have you been there?


These are details of Version 2.2. I think I've removed 1/4" from both the back armscye and the under sleeve. It's easy to loose track of what I'm doing. I've changed my shirt with each adjustment so I can keep them straight. I'm not a fitting expert, so I'm just going with what I think will work. Also, I haven't physically trimmed anything. I'm just taking in what I think is excess fabric and basting a new stitching line.
 
Lastly here is version 2.3, where I think I pulled the jacket side up 1/4" at the underarm. I can honestly say I'm at the end of my rope with fitting at this point. I wish I had the persistence of Michael over at Line of Selvedge, a guy who can work through muslin after muslin after muslin. Sadly, I don't have that patience. I'm burning out here. Fast.
 
This is, after all, just a bedsheet. I'm going to let the dust settle and read your suggestions, which are always so helpful. In the meantime I'll work on the boat; one project where I'm actually making some progress!
 
 
I've built in little side storage lockers (room for a life vest and lunch), and I'm preparing to install teak floor boards. Finally a level surface to stand on!
 
I hope all your projects, sewing and otherwise, are going well. Cheers!