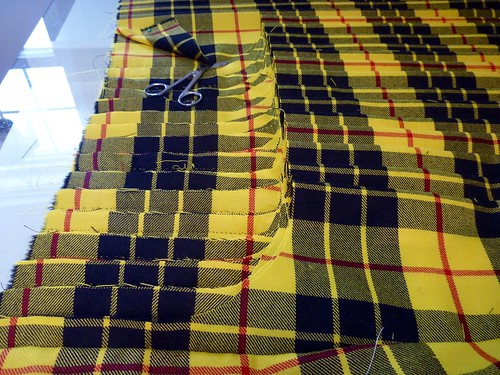
The next step is cutting out the excess fabric from behind the pleats. The book I'm using emphasizes that this is no place to screw up. One slip of the scissors is all it takes to make an unfixable mess. For me that means the most expensive wadder ever!
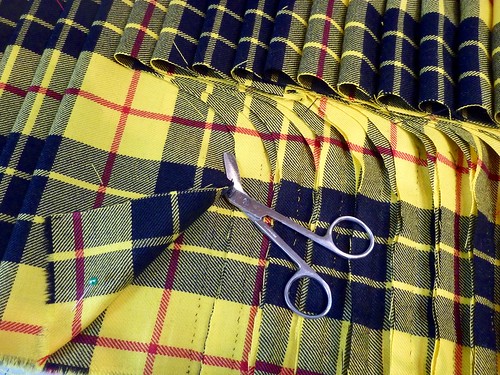
Based on the way the pleats are formed, just a single layer of fabric is removed at a time. I used my trusty bandage scissors.
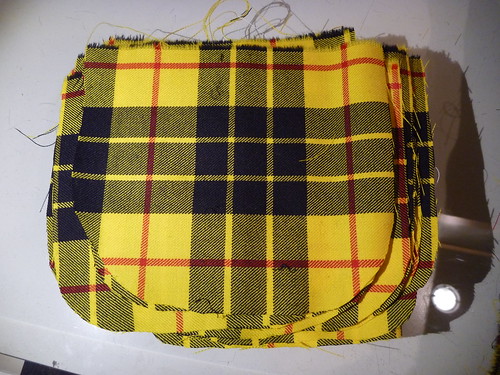
I ended up with a nice little stack of scraps. Some of these will be used as beltloops and buckle straps. The rest might end up as elbow patches some day. :).
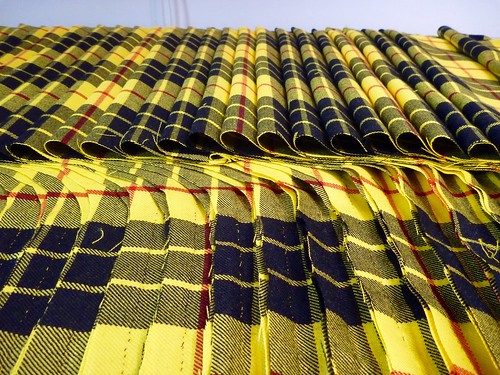
The tops of the pleats are secured in a process called steeking. Using a heavy carpet thread, a line of stitching is worked across the top of the pleats from the back of the kilt. This stabilizes the pleats and helps prevent the stitching from ripping out.
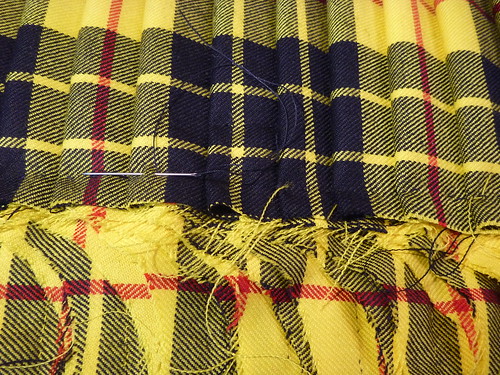
It's hard to see the steeking because my thread is black. The trick here is to sew through as many layers as possible without going through the front of the kilt. Even if a single thread is caught on the outer layer of fabric a dimple will form. I ended up with 2 dimples, had to go back, rip out a few stitches and restitch.
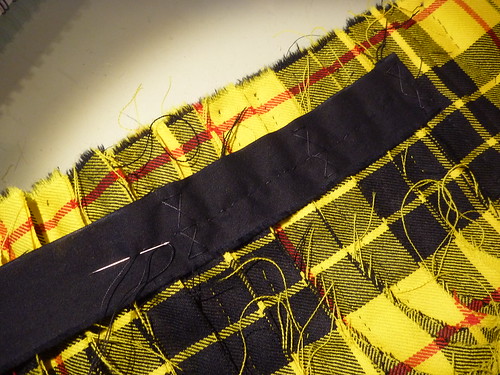
Next, a waist stay is sewn in over the pleats. This is a selvedge strip of cotton broadcloth. Like the steeking, all the stitches are worked from the wrong side of the kilt. "X's" are worked in at every third pleat. Because it's at the edge of the kilt, it's much easier to keep flipping the work over to check for dimples or stitches that show.
That's as far as I can go right now. The next step requires a heavy hair canvas which I can't find locally. B Black and Sons to the rescue! Once my order arrives I'll be back in business. In the meantime there's always a boat to build.


So impressed!!! And I love your fabric! My desire is to make a kilt for my grandson of our tartan, the Cummins. I would like to weave the fabric. We'll see how THAT goes!! Am so enjoying your blog. Thanks!
ReplyDeleteOh wow that would take some time to remove that layer of fabric and the care needed. It is so interesting to see what goes on with a kilt.
ReplyDeleteNow that is a labor of love--both the kilt AND the boat. Fun to see the details.
ReplyDeleteThe trimming doesn't worry me half as much as the visible fraying in progress. A necessary part I know, but eeeeeek.
ReplyDeleteIt's gonna be great.....it's gonna be great.
That is a scary step! I agree....
ReplyDeleteYou are making great progress.
Looking good
ReplyDeleteThis is amazing and I am finding the process quite fascinating. Beautiful work and fabric. I am learning a lot. My dad brought me back a kilt from Scotland when I was a child and I held on to it. My daughters wore it and my grandson did as well. Somehow it vanished in the movements of life.
ReplyDeleteAre you supposed to do something to address the fraying? It looks like that could become a problem.
ReplyDeleteIn short...nope! Have faith.
DeleteWow - unbelievable! This is coming along beautifully. I am learning something new by reading your posts about this kilt - thank you. Those scraps of fabrics also look like they could be patch pockets.
ReplyDeleteI wish I would've found this book when making a kilt for my uncle last year! Or maybe not---it was daunting enough just going from websites. 😂 This is going to be amazing!
ReplyDeleteA man should look as if he has bought his clothes with intelligence, put them on with care and then forgotten all about them. http://charlyscompany.ie/collections-2/
ReplyDeleteHow fascinating! In knitting, steeking is the process of cutting open a knit tube, to firm another shape. This is used extensively in multicolored stranded knitwear. If you’re curious, I show it over at my blog.
ReplyDeletehttp://howsrobb.blogspot.com/2015/11/chopping-apart-and-stitching-together.html